11.11. Writing a Plugin
This tutorial presents a step-by-step description of how to develop a SteelScript App Framework plugin. No tutorial can be as useful as an example. Therefore, in this tutorial, a steelscript-stock plugin is used to explain the process of how to construct SteelScript App Framework plugin. Note that the stock data is fetched from yahoo finance API as a third party resource. By changing the data source as well as modifying the reports, App Framework plugin can be used to display data from almost any where, such as a csv file, a rest API or a device with reporting capability, etc.
11.11.1. Creating the skeleton of a plugin
First we need to run the command steel appfwk mkplugin in a shell:
$ cd /tmp
$ steel appfwk mkplugin
Give a simple name for your plugin (a-z, 0-9, _): stock
Give your plugin a title []: Steelscript Stock
Briefly describe your plugin []: Steelscript Stock App Framework Plugin
Author's name []: author
Author's email []: email
Writing:  /private/tmp/steelscript-stock/LICENSE
Writing:  /private/tmp/steelscript-stock/MANIFEST.in
Writing:  /private/tmp/steelscript-stock/README.rst
Writing:  /private/tmp/steelscript-stock/setup.py
Writing:  /private/tmp/steelscript-stock/gitpy_versioning/__init__.py
Writing:  /private/tmp/steelscript-stock/steelscript/__init__.py
Writing:  /private/tmp/steelscript-stock/steelscript/stock/__init__.py
Writing:  /private/tmp/steelscript-stock/steelscript/stock/appfwk/__init__.py
Writing:  /private/tmp/steelscript-stock/steelscript/stock/appfwk/admin.py
Writing:  /private/tmp/steelscript-stock/steelscript/stock/appfwk/models.py
Writing:  /private/tmp/steelscript-stock/steelscript/stock/appfwk/plugin.py
Writing:  /private/tmp/steelscript-stock/steelscript/stock/appfwk/datasources/__init__.py
Writing:  /private/tmp/steelscript-stock/steelscript/stock/appfwk/datasources/stock_source.py
Writing:  /private/tmp/steelscript-stock/steelscript/stock/appfwk/devices/__init__.py
Writing:  /private/tmp/steelscript-stock/steelscript/stock/appfwk/devices/stock_device.py
Writing:  /private/tmp/steelscript-stock/steelscript/stock/appfwk/libs/__init__.py
Writing:  /private/tmp/steelscript-stock/steelscript/stock/appfwk/reports/__init__.py
Writing:  /private/tmp/steelscript-stock/steelscript/stock/appfwk/reports/stock_report.py
Writing:  /private/tmp/steelscript-stock/steelscript/stock/commands/__init__.py
Writing:  /private/tmp/steelscript-stock/steelscript/stock/commands/README.rst
Writing:  /private/tmp/steelscript-stock/steelscript/stock/commands/subcommand.py
Writing:  /private/tmp/steelscript-stock/steelscript/stock/core/__init__.py
Writing:  /private/tmp/steelscript-stock/steelscript/stock/core/README.rst
Checking if git is installed...done
Initializing project as git repo...done
Creating initial git commit...done
Tagging as release 0.0.1...done
11.11.2. Installing from source
Once you have created the source tree of you plugin, you need to install it as below.
$ cd steelscript-stock
$ pip install -e .
Details about installing steelscript plugin can be found Installing a plugin.
11.11.3. Developing data fetch API
You need to develop an API to fetch data to feed the App Framework engine. This step is recommended to be done early as we can understand better the data format, which would help define the structure of the App Framework reports later.
First we need to create a python module stock.py in steelscript/stock/core directory. The reason
the module stock.py resides in core directory instead of appfwk directory is that the API can
be used independently without App Framework. Below shows how a stock data API might look like.
from steelscript.common.timeutils import TimeParser
from steelscript.common.connection import Connection

# Mapping from price measure to the relative position
# in the response string
mapping = {'open': 1,
           'high': 2,
           'low': 3,
           'close': 4,
           'volume': 5}

tp = TimeParser()

def parse_date(date):
    return tp.parse(date + " 00:00")

class StockApiException(Exception):
    pass

def get_historical_prices(begin, end, symbol, measures,
                          resolution='day', date_obj=False):
    """Get historical prices for the given ticker symbol.
    Returns a list of dicts keyed by 'date' and measures

    :param string begin: begin date of the inquire interval
      in the format of YYYY-MM-DD
    :param string end: end date of the inquire interval
      in the format of YYYY-MM-DD
    :param string symbol: symbol of one stock to query
    :param list measures: a list of prices that needs to be queried,
      should be a subset of ["open", "high", "low", "close", "volume"]
    :param string resolution: 'day' or 'week'
    :param boolean date_obj: dates are converted to datetime objects
      from date strings if True. Otherwise, dates are stored as strings
    """
    conn = Connection('http://ichart.finance.yahoo.com')
    start_month = parse_date(begin).month - 1
    start_day = parse_date(begin).day
    start_year = parse_date(begin).year
    end_month = parse_date(end).month - 1
    end_day = parse_date(end).day
    end_year = parse_date(end).year

    ret = []
    params = {'s': symbol,
              'a': start_month,
              'b': start_day,
              'c': start_year,
              'd': end_month,
              'e': end_day,
              'f': end_year,
              'g': resolution[0],
              'ignore':'.csv'}

    resp = conn.request(method='POST', path='/table.csv', params=params)

    # extract data and skip first row with column titles
    data = list(resp.iter_lines())[1:]

    # iterate over the data backwards as the daily prices are sorted
    # backwards by the dates
    for day in reversed(data):
        # day is a string with date, prices, volume separated by commas,
        # '<date>,<open>,<high>,<low>,<close>,<volume>,<adj_close>'
        # as '2014-02-19,20.22,20.55,20.11,20.50,1599600,20.50'
        day = day.split(',')
        date = parse_date(day[0]) if date_obj else day[0]
        daily_prices = {'date': date}
        for m in measures:
            if m in mapping:
                daily_prices[m] = float(day[mapping[m]])
        ret.append(daily_prices)
    return ret
The above function get_historical_prices leverages the yahoo stock api to get the daily transaction volumes as well as daily prices (including high, low, open and close) for a stock within a date range. The return date format is a list of python dicts, with each dict represent the data of the stock for one day.
>>> from steelscript.stock.core.app import get_historical_prices
>>> from pprint import pprint
>>> pprint(get_historical_prices(begin='2015-04-01', end='2015-04-05', symbol='rvbd', measures=['open','close', 'high', 'low','volume']))
[{'close': 20.92,
  'date': '2015-04-01',
  'high': 20.92,
  'low': 20.9,
  'open': 20.91,
  'volume': 1754900.0},
 {'close': 20.92,
  'date': '2015-04-02',
  'high': 20.94,
  'low': 20.9,
  'open': 20.91,
  'volume': 1851400.0},
 {'close': 20.92,
  'date': '2015-04-03',
  'high': 20.92,
  'low': 20.92,
  'open': 20.92,
  'volume': 0.0}]
11.11.4. Creating App Framework reports
From the above API, we can see that in order to generate stock data, we need to pass in parameters, including stock symbol, start date, end date, the price names, resolution. The returned data can have information such as dates, daily (include open, close high, low) prices, and daily transaction volumes.
Now that the data format has been understood, one can set out to create the Application Framework components for reports. The first step will be defining a data source, which sets up the required criteria fields for users to input, and then extract data using the API based on the input criteria values. Then we need to write the report using the defined data source to render the data. For illustrative purpose, let us build a simple report that can show the close price of a stock given a range of dates.
11.11.4.1. Writing data source
The generated stock_source.py has included some skeleton code, including
the declaration of the StockColumn class, the StockTable class and the StockQuery class.
For normal reports, there is no need to modify the StockColumn class. We need to
modify the StockTable class in order to add criteria, which maps to the parameters passed
to the data fetch API. Details are shown below.
from steelscript.appfwk.apps.datasource.models import TableField
from steelscript.appfwk.apps.datasource.forms import (DateTimeField, ReportSplitDateWidget,
                                                      fields_add_time_selection, fields_add_resolution)
from steelscript.appfwk.apps.datasource.models import TableField, DatasourceTable, Column


class StockColumn(Column):
    class Meta:
        proxy = True

    COLUMN_OPTIONS = {}

class StockTable(DatasourceTable):

    class Meta:
        proxy = True

    # When a custom column is used, it must be linked
    _column_class = 'StockColumn'

    # Using StockQuery class to extract data
    _query_class = 'StockQuery'

    # TABLE_OPTIONS is a dictionary of options that are specific to
    # StockQuery objects in this file.  These will be overridden by
    # keyword arguments to the StockTable.create() call in a report
    # file
    TABLE_OPTIONS = { }

    # FIELD_OPTIONS is a dictionary of default values for field
    # options.  These by be overridden by keyword arguments to the
    # StockTable.create() call in a report file
    FIELD_OPTIONS = {'duration': '4w',
                     'durations': ('4w', '12w', '24w', '52w', '260w', '520w'),
                     'resolution': 'day',
                     'resolutions': ('day', 'week')
                     }

    def post_process_table(self, field_options):
        # Add a time selection field
        fields_add_time_selection(self, show_end=False,
                                  initial_duration=field_options['duration'],
                                  durations=field_options['durations'])

        # Add time resolution selection
        fields_add_resolution(self,
                              initial=field_options['resolution'],
                              resolutions=field_options['resolutions'])

        # Add end date field
        self.fields_add_end_date()
        self.fields_add_stock_symbol()

    def fields_add_stock_symbol(self, keyword='stock_symbol',
                                initial=None):
        field = TableField(keyword=keyword,
                           label='Stock Symbol',
                           initial=initial,
                           required=True)
        field.save()
        self.fields.add(field)

    def fields_add_end_date(self, initial_end_date='now-0'):
        # Add a date field
        # the front javascript code will determine the default date
        # according to initial_end_date, so if initial_end_date is
        # 'now-0', today will be the default end date
        field = TableField(keyword='end_date',
                           label='End Date',
                           field_cls=DateTimeField,
                           field_kwargs={'widget': ReportSplitDateWidget,
                                         'widget_attrs': {'initial_date':
                                                          initial_end_date}},
                           required=False)
        field.save()
        self.fields.add(field)
From the above, it can be seen that the function post_process_table in the StockTable class
defines the criteria fields. There are four fields added, including duration, end date, stock symbol
and resolution (the start date can be figured out using end date and duration). The values of
duration and resolution are limited to a few.
After the StockTable class in the same module, we need to define the run method in
StockQuery class, which is about using the values from the criteria fields in the
StockTable class to derive the data by leveraging the
data fetch API. See below for details:
import pandas

from steelscript.stock.core.stock import get_historical_prices
from steelscript.appfwk.apps.datasource.models import TableField, TableQueryBase
from steelscript.appfwk.apps.jobs import QueryComplete

class StockQuery(TableQueryBase):

    def run(self):
        criteria = self.job.criteria

        # These are date time strings in the format of YYYY-MM-DD
        self.t0 = str((criteria.end_date - criteria.duration).date())
        self.t1 = str((criteria.end_date).date())

        # resolution is either 'day' or 'week'
        self.resolution = 'day' if str(criteria.resolution).startswith('1 day') else 'week'

        # stock symbol string
        self.symbol = criteria.stock_symbol

        # Dict storing stock prices/volumes according to specific report
        prices = get_historical_prices(self.t0, self.t1, self.symbol, ['close'],
                                       self.resolution, date_obj=True)

        if prices:
            df = pandas.DataFrame(prices)
        else:
            df = None

        return QueryComplete(df)
Note
This method only returns a QueryComplete object with a pandas.DataFrame
object as an attribute after it is successful. If this function failed or no data is
obtained, an error message will be presented in App Framework widget.
11.11.4.2. Writing Reports
After finishing off writing data sources, finally it is time to collect results.
In <plugin>/appfwk/reports/stock_report.py, we first need to define a report and
create a section asscociated with it.
from steelscript.appfwk.apps.report.models import Report
report = Report.create("Stock Report")
report.add_section()
Next step is to instantiate the StockTable class and add columns to the table object.
import steelscript.stock.appfwk.datasources.stock_source as stock
table = stock.StockTable.create(name='stock-close-price',
                                duration='52w', resolution='day')
table.add_column('date', 'Date', datatype='date', iskey=True)
table.add_column('close', 'Close Price')
Note
When creating the stock table object, the passed-in duration and resolution values need to be
one of the few options listed in FIELD_OPTIONS in StockTable class. When adding columns to the
table, the first parameter, representing the name of the column, needs to be one of the keys in the dict
returned by the Data fetch API. For date column, the datatype parameter
needs to be ‘date’. Since we plan to plot the data against the dates, the date column needs to
be specified as the key column, as done by setting iskey=True.
Last step is to add a widget to the report and bind the table to the widget at the same time.
# Bind the table to a widget for display
import steelscript.appfwk.apps.report.modules.yui3 as yui3
report.add_widget(yui3.TimeSeriesWidget, table, 'Close Price', width=12)
Note
Since the report is a plot based on time, we use yui3.TimeSeriesWidget as the
widget class. Setting width=12 will span the widget across the whole browser, as the whole browser
has 12 ‘columns’.
11.11.5. Rendering reports
Before running the report, we need to ask the App Framework site to load it. If the report was
added to the <appfwk_project>/reports directory, one needs to click ‘Reload All Reports’
option from the dropdown menu of the admin button at the top right corner. If the report was added to
the plugin directory, one needs to first click ‘Edit Plugins’ option from the dropdown menu
of the admin button, then click the ‘Update All Report’ button at the bottom, then check the boxes
for ‘Collect Reports’, ‘and Overwrite Reports’ and ‘Reload Reports’ at the popup window, and finally
click the ‘Go!’ button, shown as the image below. More information about picking up plugin reports are
described here.

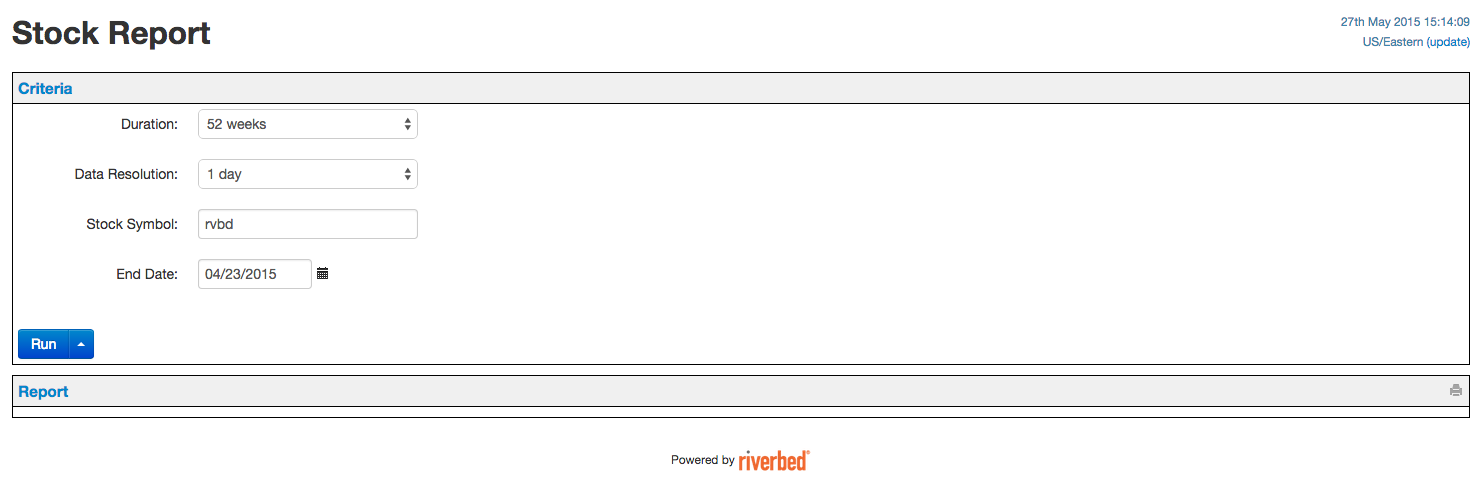
Now, Let us start running the App Framework site in the browser. After clicking ‘Stock Report’ in the dropdown menu of the ‘Reports’ tab in the top tool bar, the criteria fields are shown as below.
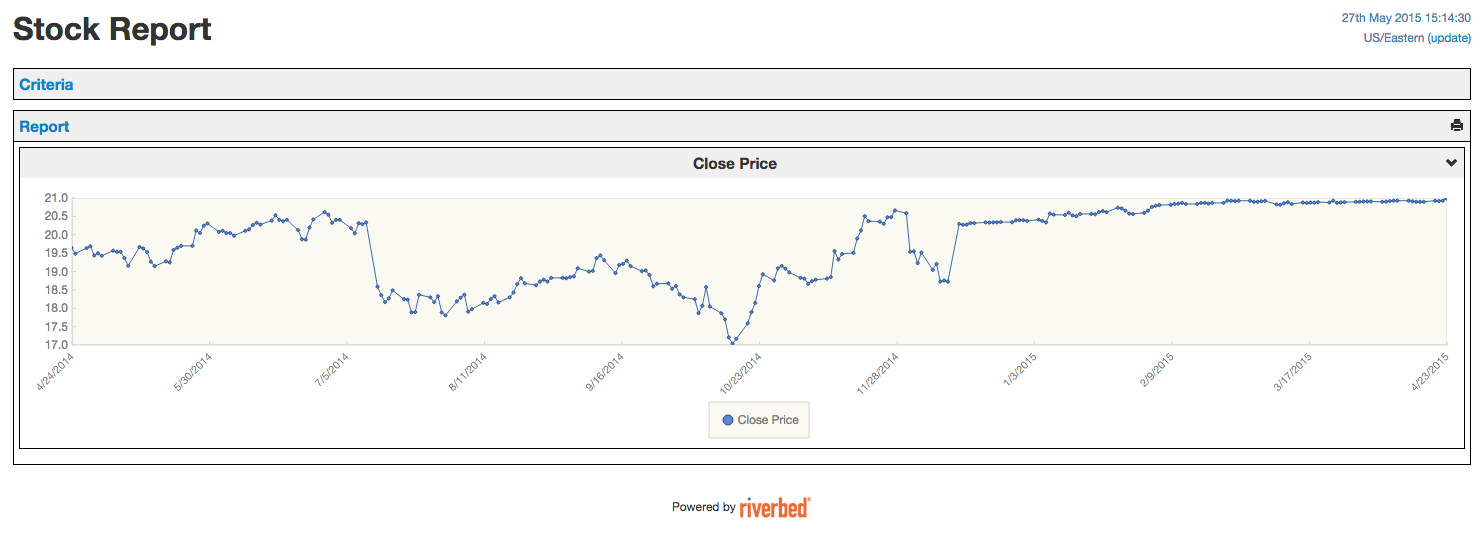
After click ‘Run’ button, the ‘close’ price per day for the stock ‘rvbd’ for the last year is shown as below.
11.11.6. Leveraging App Framework device
For this stock plugin, there is no physical stock device to configure. But often times, we need to interact with a device to fetch data and generate reports. Although it is possible just to put necessary device-related fields in the criteria and run the data fetch API, the operation suffers from two flaws: firstly, the criteria fields would be cluttered with hostname, port, username, password and module fields, all of which would not change between running reports against the same device; Secondly, it would be very costly to reconnect to the device every time the report is run. Configuring a device separately from running reports can reduce the amount information to deal with when filling criteria. It can also cache the device connection and thus reduce network latency for future reporting runs.
In order to be able to use ‘Device’ functionality in the App Framework plugin, the first step is to write
a corresponding device class which can be used as the main interface to interact with the appliance,
handling initialization, setup, and communication. One example is the
NetProfiler
class. The second step involves modifying appfwk/devices/<plugin>_device.py to
instantiate the defined appliance class. In the case of NetProfiler,
the code is shown as below.
from steelscript.netprofiler.core.netprofiler import NetProfiler

def new_device_instance(*args, **kwargs):
    # Used by DeviceManager to create a NetProfiler instance
    return NetProfiler(*args, **kwargs)
Lastly, when writing data source, a device field needs to be added to the criteria. Take NetProfiler for example, the code is shown as below.
from steelscript.appfwk.apps.devices.forms import fields_add_device_selection


class NetProfilerTable(DatasourceTable):

    def post_process_table(self, field_options):
        fields_add_device_selection(self, keyword='netprofiler_device',
                                    label='NetProfiler', module='netprofiler',
                                    enabled=True)
Now admin user can configure a device for the plugin, and normal users can select corresponding device before running associated reports against it. More info can be found here.