Using Search
NetIM includes powerful search capability that lets you find sites, devices, groups, interfaces, hosts, or configuration files quickly.
This section includes the following topics:
Searching NetIM
To begin a search, select Search in the menu bar. The following page displays.
On the Search page you can perform the following types of searches:
Simple Search
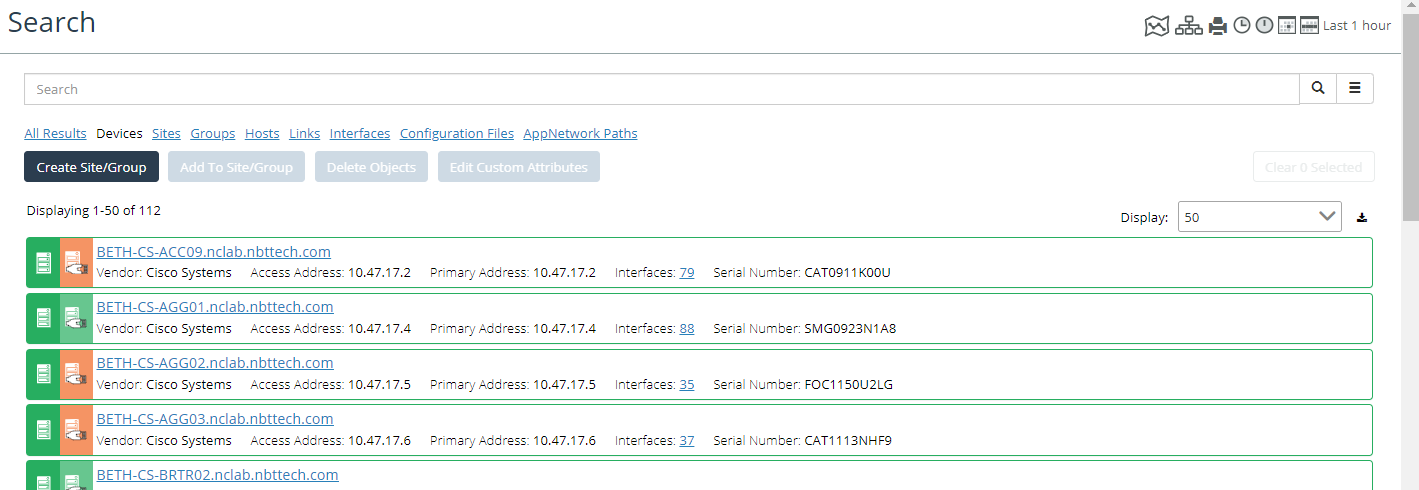
You can do a simple search by entering your search term in the space provided and pressing Return, or you can narrow down the search by your items of interest: Devices, Groups, Interfaces, Hosts, or Configuration Files.
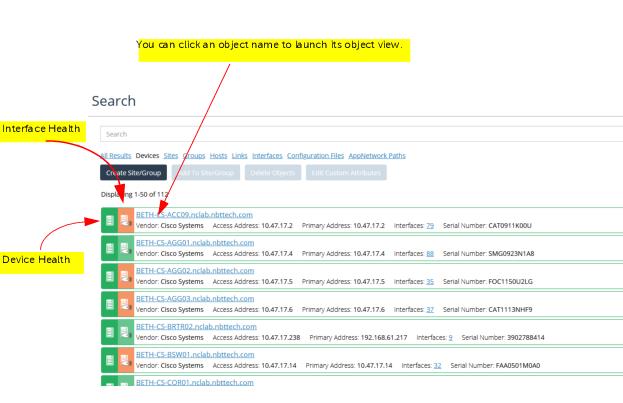
The following figure shows the results of a keyword search, “BETH”.
Note the following:
• You can change the area of focus by choosing a different type of results. For example, if we change our focus from “Devices” to “Interfaces”, we can jump to the interface results that match our search string.
• If you select items in the search results, you can add the items to a group. (The Add To Group button becomes active.)
Advanced Search with Query Expressions
NetIM’s search page allows you to use search expressions to search for exactly what you are looking for. NetIM’s Search Expression search also provides a query language and type-ahead to make creating complex searches easy, as shown in the following screen:
Search by Search Expression’s type-ahead support includes search attributes (including custom attribute definitions), attribute values (including custom attribute values) and relevant operators available for selection as you type, as follows.
To get started with Search-by-Search Expression, note the following:
• The objectType keyword can be used to limit your search to query for a specific object type. ObjectType values supported are device, interface, group, or site. Supported operators include:
• Comparison Operators are: ==, !=, ~, !~
• Logical Operators are: &&, ||
• The Search-by-Search Expression supports the following:
– Multiple search queries can be combined using the supported logical operators.
– Parentheses are supported to enable complex query grouping.
– Search attribute values containing spaces must be wrapped in double quotes.
Other Search Options
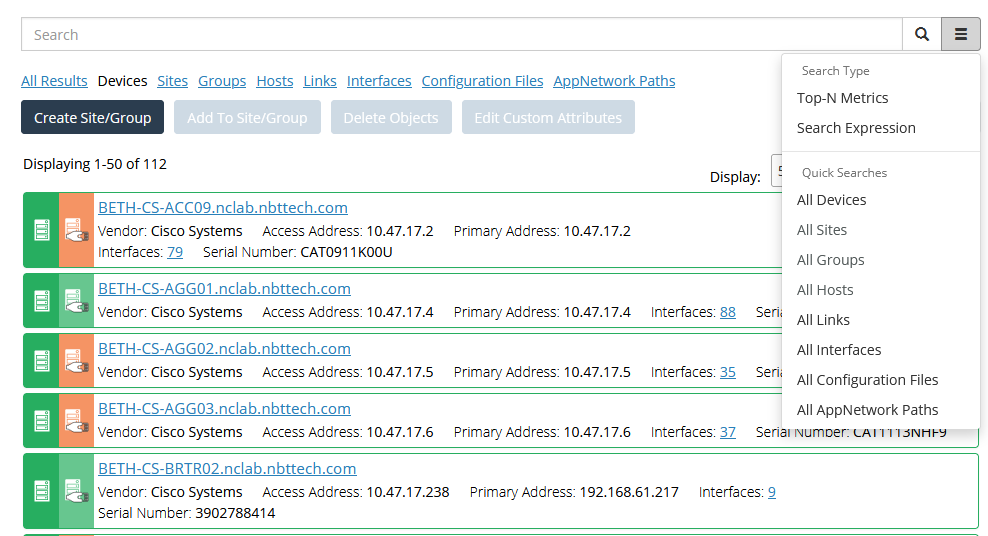
In addition to the simple keyword search, NetIM provides other options, such as a Top-N Metrics search. Launch additional options by selecting the menu button indicated in the figure below.
Option | Description |
Top-N Metrics | Opens a new dialog that lets you search for metrics results. See
“Searching for Top-N Metrics". |
Search Expression | Search Syntax Help • Build search queries consisting of one or more attribute/value comparisons, using the supported comparison operators listed below. • Supported search attributes, possible attribute values and relevant operators will be available for selection as you type. • Multiple search queries can be combined using the supported logical operators listed below. Parentheses are supported to enable complex query grouping. • Search attribute values containing spaces must be wrapped in double quotes. • Use the objectType search attribute to query for a specific object type. – objectType values: device, interface, group or site Supported Operators • Comparison Operators: ==, !=, ~, !~ • Logical Operators: &&, || Example Search Expressions • objectType == device && name ~ BETH • vendor == "Cisco Systems" || vendor ~ Juniper • objectType == device && (hostname ~ NASH || hostname ~ CS) && accessIP ~ 10.47.17 && vendor == "Cisco Systems" |
All Devices | Clears your search term and lists all device objects |
All Sites | Clears your search term and lists all site objects. |
All Groups | Clears your search term and lists all group objects. |
All Hosts | Clears your search term and lists all host objects. |
All Links | Clears your search term and lists all link objects. |
All Interfaces | Clears your search term and lists all interface objects. |
All Configuration Files | Clears your search term and lists all configuration files. |
All AppNetwork Paths | Clears your search term and lists all AppNetwork paths. |
Managing Search Expressions
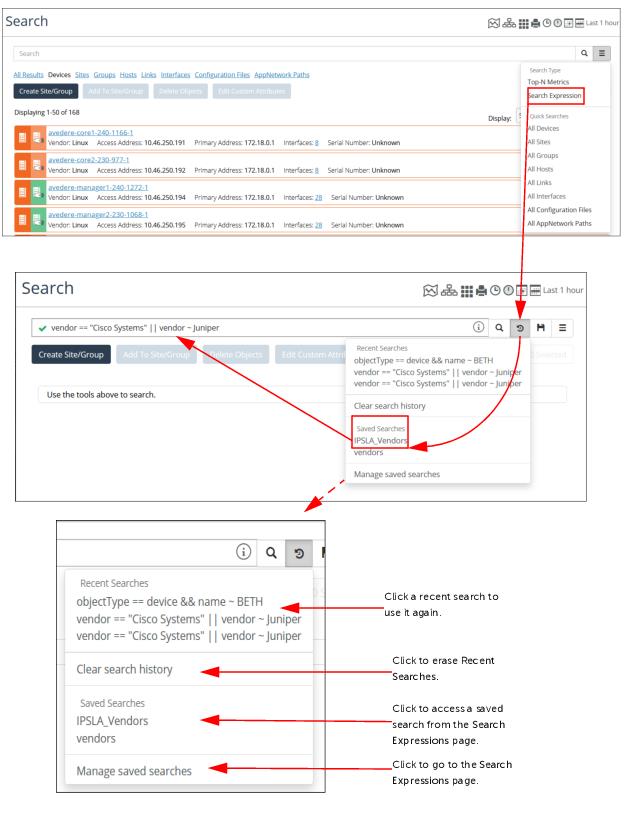
When using search expressions, the Search Page not only allows you to create a new expression, but also to select a search expression from a list of previous searches, access a saved search, or manage saved search expressions by going to the Search Expressions page, as shown in the following screens.
Managing search expressions is also supported when creating
Performance Summary reports on the
Report page. For more information, see
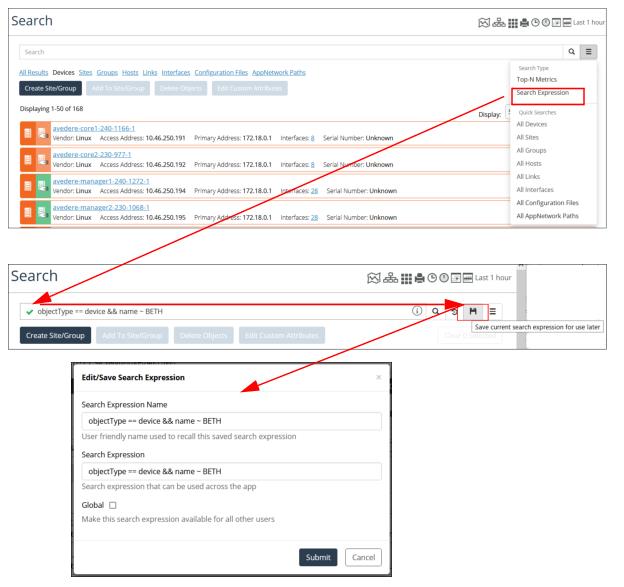
Working with Report Options.Additionally, you can save a new search expression to the Search Expressions page, as shown in the following screens:
For more information on saved search expressions, see
Using the Search Expressions Page.Searching for Top-N Metrics
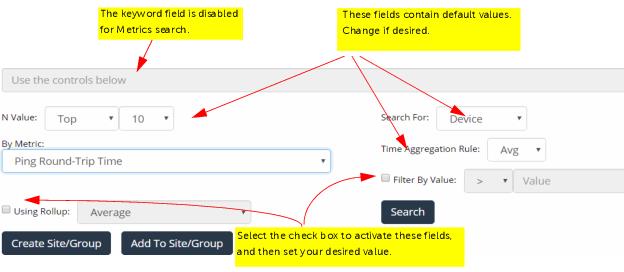
The following figure shows the fields for a Top-N Metrics search.
Note the following:
• The only field that requires input is the By Metric field. Choose an option from the drop-down menu.
• All other fields have default values that you can change, if desired.
• If you select items in the search results, you can add the items to a group.
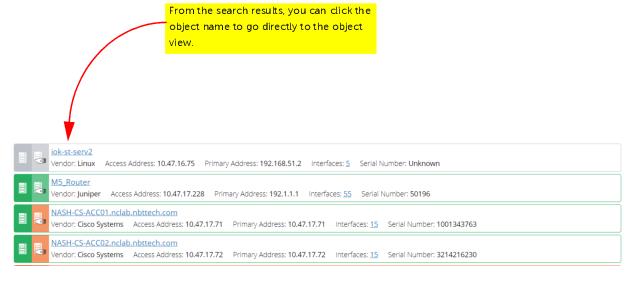
Using these parameters, our search returned the following results for the top 10 devices by average Ping Round-Trip Time.
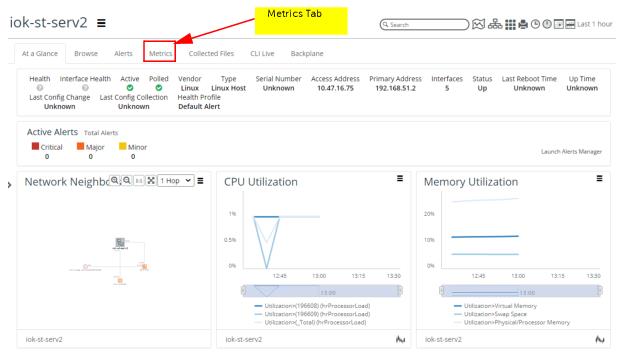
From our results, if we want to find more specific information, we can click the object name and go to its curated view, as shown in the following screen.
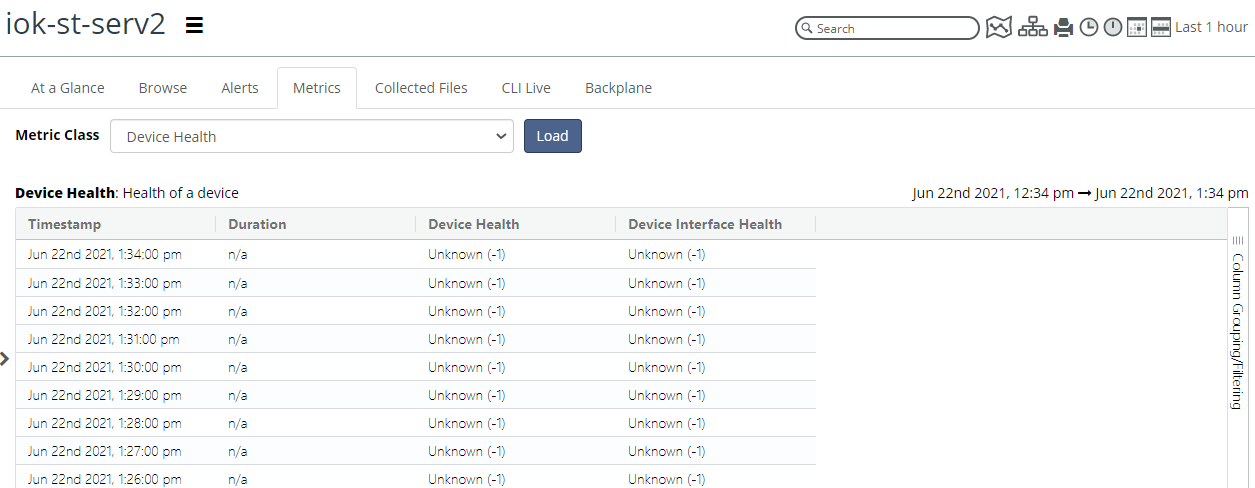
You can then click the Metrics tab, select a Metric Class, and click Load to get more information. The following screen shows Device Health metrics for the object of interest:
Search by Serial Number, Custom Attribute Values, and AppNetwork Paths
Search supports search by serial number and custom attribute values as well AppNetwork Paths. You can also perform mass operations on search results such as deletion and custom attribute assignment.
Search by Device Serial Number
A device’s serial number is now searchable and is returned in the search results as well as in a device’s information ribbon, as shown in the following screens:
Search by Custom Attribute Value
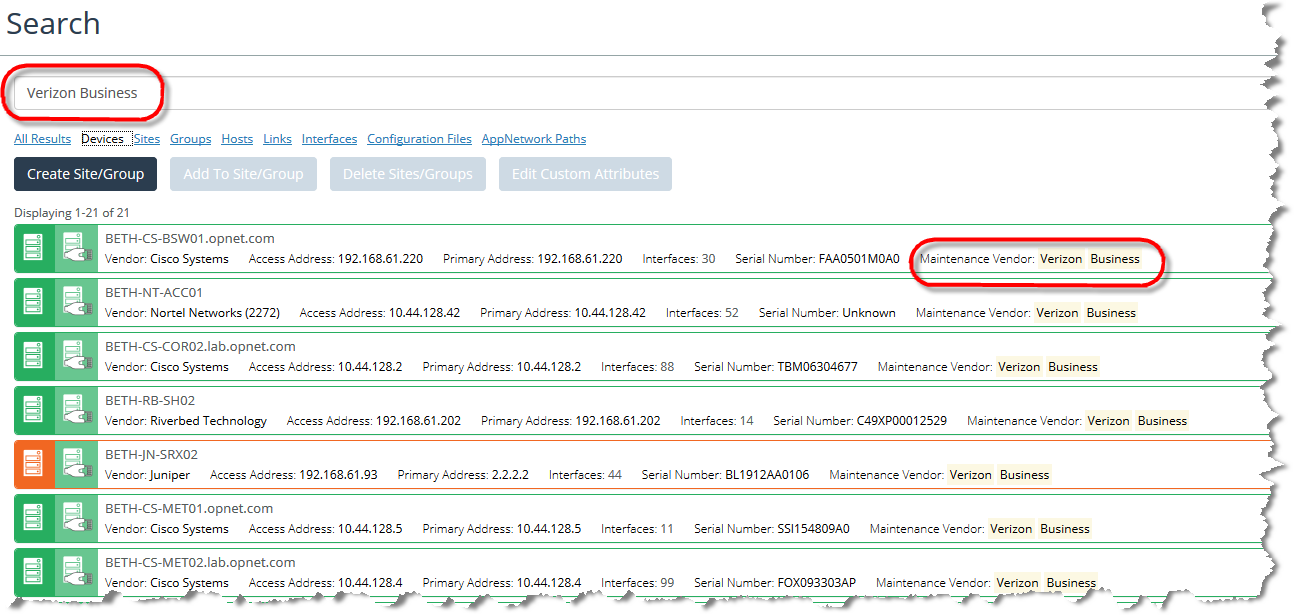
An object’s custom attribute values are searchable, as shown in the following screen:
Search by AppNetwork Path Name
Monitored Paths are now presented as a filterable object in search results, and you can search for a specific monitored path by name, source, destination, and description, as shown in the following screen
Search Operations
NetIM supports the following search operations
Search Operations – Delete Objects
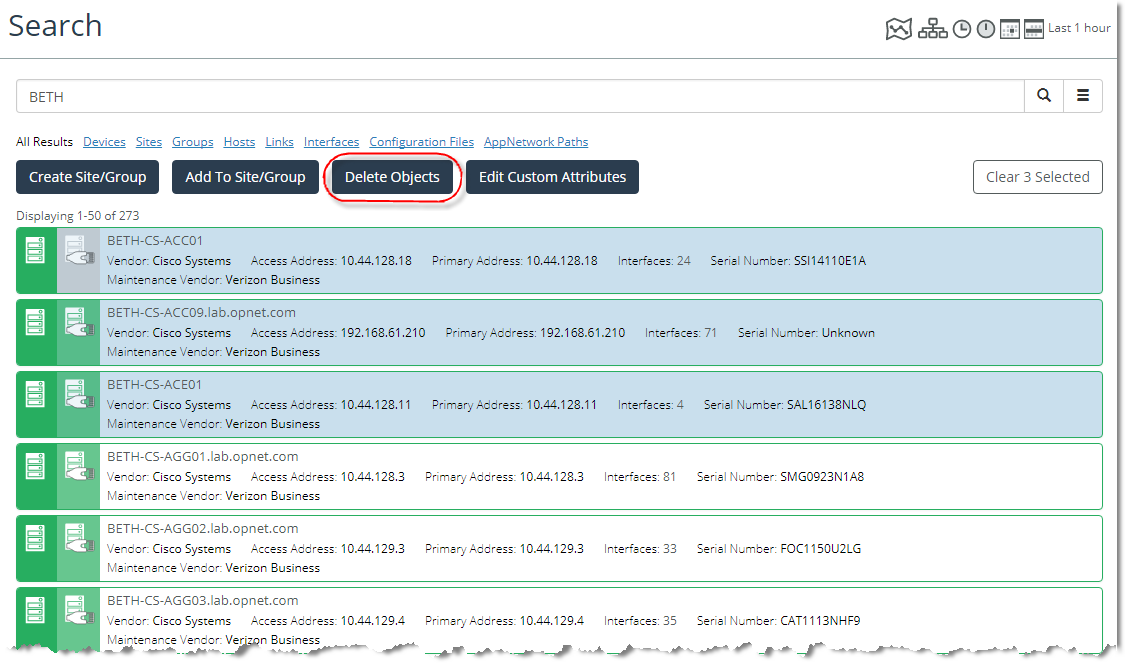
You can perform mass deletion operations on the selected results of your search by performing a search selecting the objects you want to delete and then clicking the Delete Objects button, as shown in the following screen:
Search Operations – Edit and Create Custom Attributes
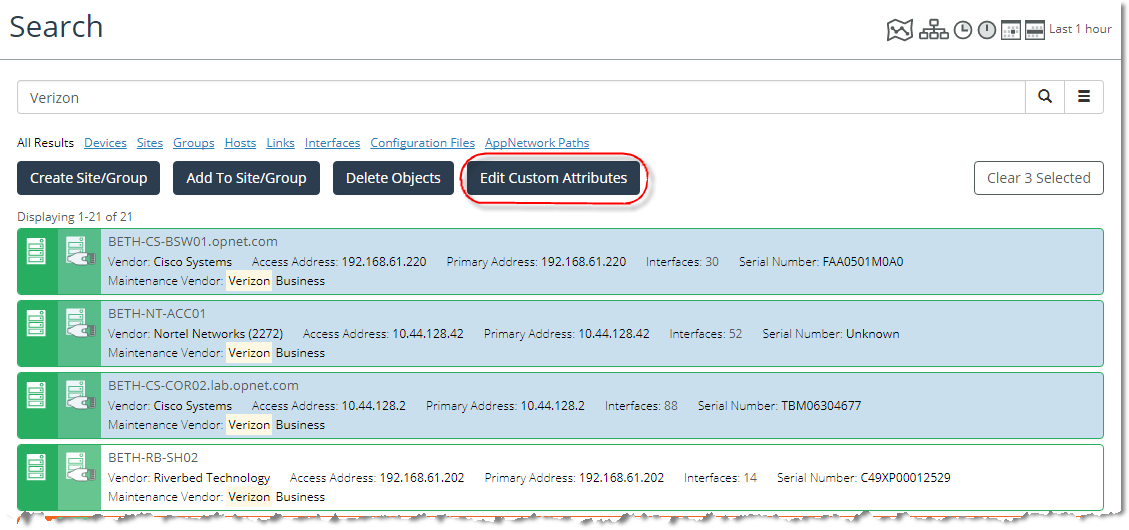
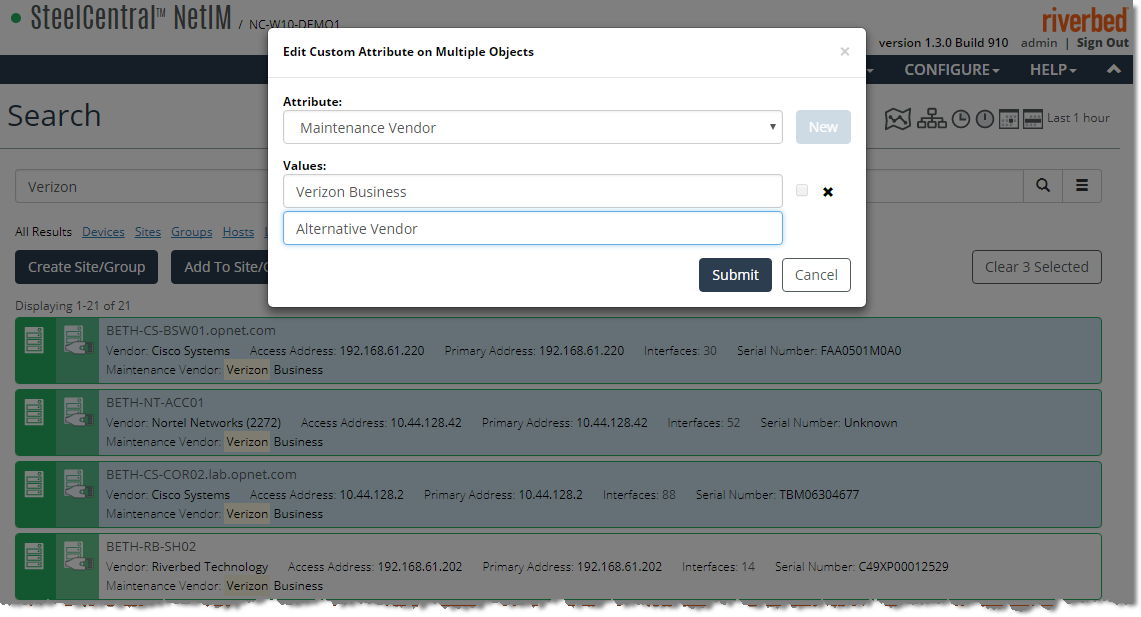
You can perform, quickly assign, and edit custom attributes on the selected results of your search. Perform your search, select the objects on which you want to edit custom attributes, and then click the Edit Custom Attributes button, as shown in the following screen:
You can also delete existing custom attributes, edit existing custom attributes, or create and assign new custom attributes, as shown in the following screen:
For more information on custom attributes, see
Custom Attributes.
Grouping Elements from Search
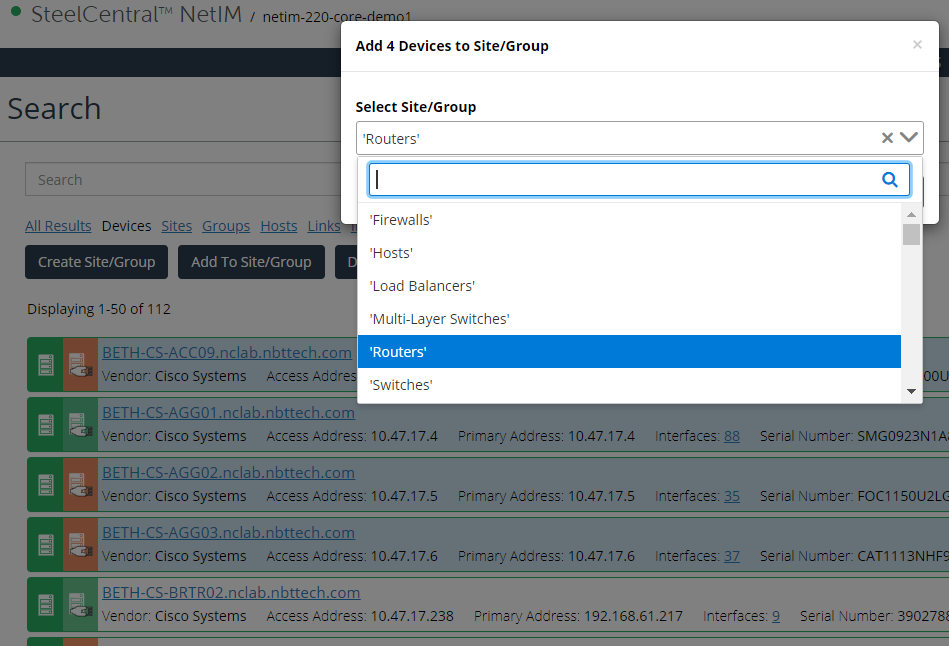
Once you have your search results, you can select items and add them to a site or group or create a new site or group from the selection. In the following example, we have selected several devices we want to add to a site or group. After selecting the items, we can click Add to Site/Group to launch the grouping dialog box.
The Add To Site/Group button only becomes active if you have selected sites, devices, or groups.
The following screen shows grouping elements from Search by adding them to the group Routers:
Be aware that search results can span several pages. You may page through to select multiple objects. When you return to the first page, all selections are remembered, but if you enter a new search term, your selections and results are cleared.
Adding Selected Objects to an Existing Site/Group
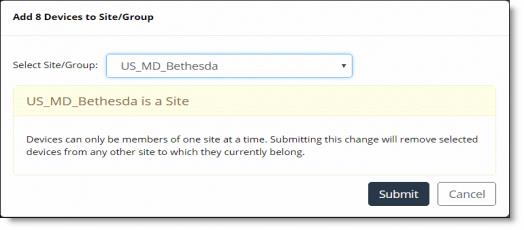
After you select the site/group to which you want to add the devices, the Submit button becomes active. Clicking Submit saves and commits the change. If you attempt to add the devices to a site, you will see the warning shown below. If you click Submit, any devices belonging to another site will be removed from the existing site and added to the new site you have chosen, as shown in the following screen:
Creating a New Site/Group from Selected Objects
If you want to create a new site/group from your search results, choose the Create New Group radio button. The following dialog box appears. Provide a name and an optional description, and choose whether you want to create a Group or a Site. When you click the Submit button, your new site or group is created, and your objects are added to it.
Exporting Search Data to CSV Files
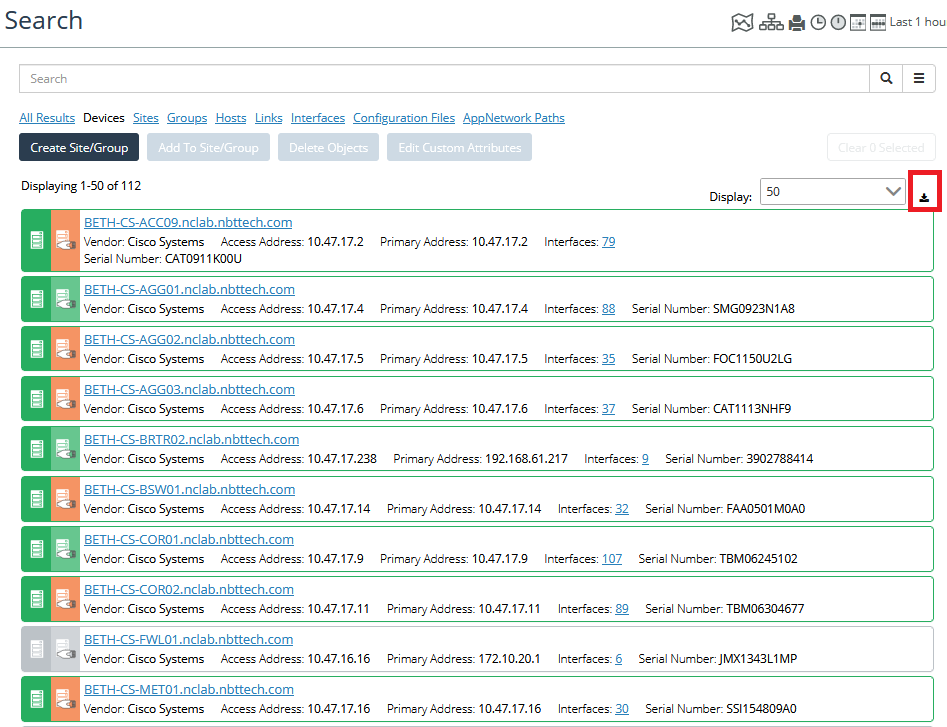
NetIM supports exporting tabular search data to CSV files from the Search page, which is accessed from the main navigation frame at the top of the UI, as shown in the following screen:
To export tabular search data, click on the export  icon in the Search
 page, as shown in the following screen.
Every search option result

can export data.
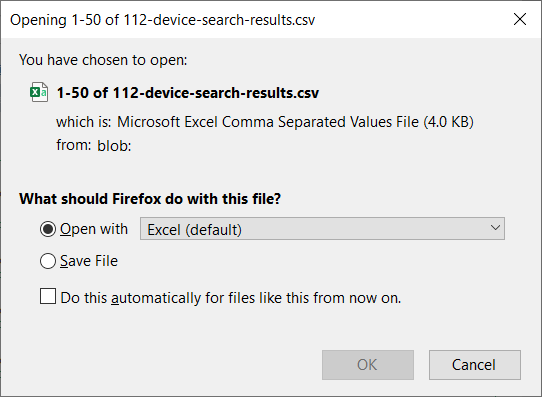
After clicking the export icon, the following screen appears:
Decide what the browser should do with the file, and then click the OK. button.
Using the Search Expressions Page
NetIM supports the ability to create persistent search expressions that can be set to personal use (default) or global by the user who created them. The search expressions can be created on the
Search Expressions page or saved to the
Search Expressions page from the
Search page and from the search section when creating a
Performance Summary report on the
Reports page. For more information on saving search expressions, see
Managing Search Expressions.
To work with the Search Expressions page, follow these steps:
1. Login to the UI.
2. Navigate to CONFIGURE->All Settings->Organize->Search Expressions. The following screen appears:
The Search Expressions page contains a list of all personal and global search expressions. You can also edit or delete the search expressions that you created.
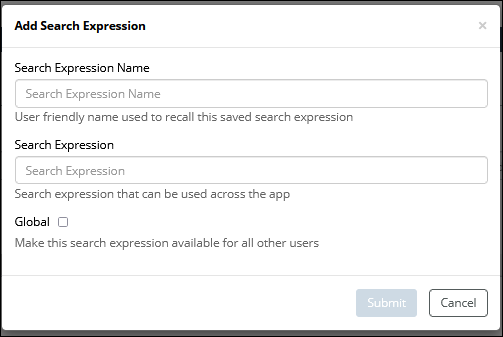
3. To create a new search expression, click on the +Add icon. The following screen appears:
Enter the following information:
– Search Expression Name - A unique name for the search expression.
– Search Expression - The search expression you wish to persist across the UI.
– Global Checkbox - Whether or not the search expression should be available to others.
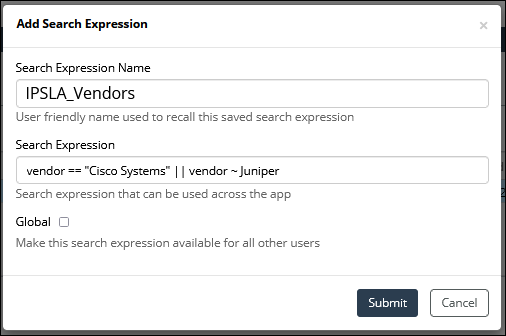
The following example shows a vendor-specific search expression that is not global:
4. When you are satisfied with your selections, click the Submit button. The search expression then appears as an entry in the Search Expressions table, and can be edited, deleted, made global or local, as shown in the following screen:








 icon in the Search page, as shown in the following screen.
 can export data.