Advanced Methods for Creating Device Entries
This section describes advanced methods for creating device entries, and consists of the following topics.
Manually Creating a Device Entry
The
“Adding Devices to Device Manager" automatically create and populate device entries with needed information. Under normal circumstances you should not need to manually create a device entry.
To manually create a device entry, follow these steps:
1. Login to the UI as a user with administrative privilege.
2. Navigate to CONFIGURE > Device Manager.
The following screen appears:
3. Click the +Add icon in the toolbar.
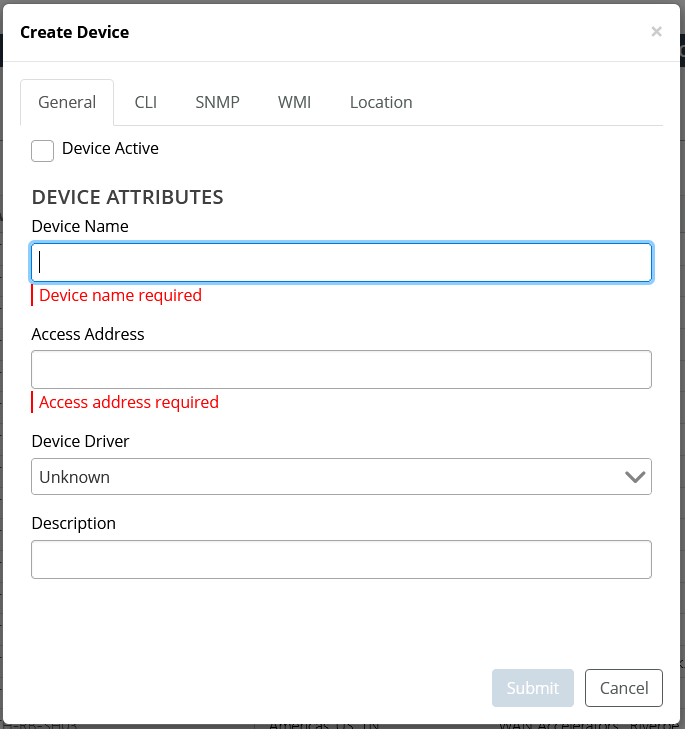
The Create Device dialog box appears:
4. Enter information for the device entry on the applicable tabs.
You no longer need to provide a sysName and sysObjectID when you want to perform basic up/down ICMP ping status polling of an IP address. You only need to provide a device name and access address, and ensure that SNMP collection is not enabled on the SNMP tab
After adding the device, ensure that the device entry is active, metrics polling is enabled, and SNMP collection is disabled. If you do not disable SNMP collection, device health will appear as unknown. Disabling SNMP collection for the device is your indication to NetIM that you do not need SNMP data to calculate health. The ICMP ping polling results are provided in the Device Status metric class. The ICMP ping poller performs three pings, one second apart. The round-trip time is calculated as the average of the three polls. The ping status is calculated as the best ping status over the three polls.
5. Click the Submit button to record your selections and close the dialog.
Importing and Exporting Device Entries
The
“Adding Devices to Device Manager" automatically create and populate device entries with needed information. Under normal circumstances you should not need to import device entries into the Device Manager from a text file.
A device info file must be in a specified format and must contain required fields. Contact technical support for assistance.
Perform the following workflow to create and edit a device info file using the off-line method.
1. Generate an empty device info file with the required format and header information for the current release of NetIM.
2. Open the device info file using a spreadsheet application.
3. Add device entries to the spreadsheet including device name, access address, and any other field that you want to import.
4. Save the spreadsheet as a text file with the correct delimiter.
Exporting a Device Entries File
The following procedure provides instructions for generating a correctly-formatted device info file that can be edited off-line and then imported.
1. Login as a user with administrative privilege.
2. Choose CONFIGURE->Device Manager.
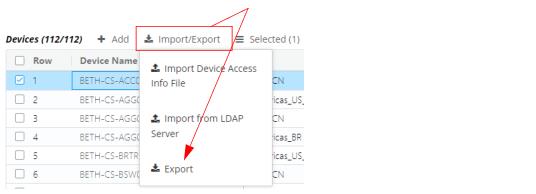
3. Click the

icon in the toolbar. The following popup appears:
4. Select Export.
– The file is exported and saved to the export directory on NetIM core.
– A dialog box appears to permit you to save a local copy of the exported device info file on the host that you are using to connect to the NetIM UI.
Perform the following procedure to create device entries by importing a text file.
Importing a Device Entries File
1. Login as a user with administrative privilege.
2. Choose CONFIGURE->Device Manager.
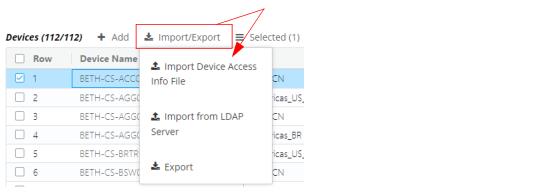
3. Click the

icon in the toolbar. The following popup appears:
4. Specify the type of import
– Import Device Access Info File
Upload and import a file that is stored on your local machine. When you select this option the following screen appears:
Click the Select File button, navigate to the directory and select the filename. Click Open to upload the file. When you upload a file, a copy of it is saved in vnes_device_info folder in the Device Input File Repository.
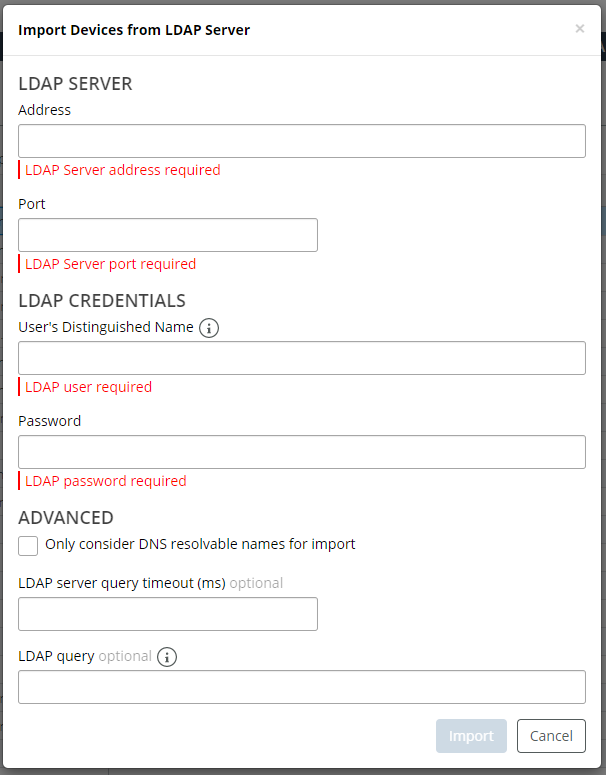
– Import from LDAP Server
Upload and import a file that is stored on an LDAP server. When you select this option the following screen appears:
Working with your LDAP administrator, fill out the required fields, then click the Import button.


 icon in the toolbar. The following popup appears:
 icon in the toolbar. The following popup appears:

