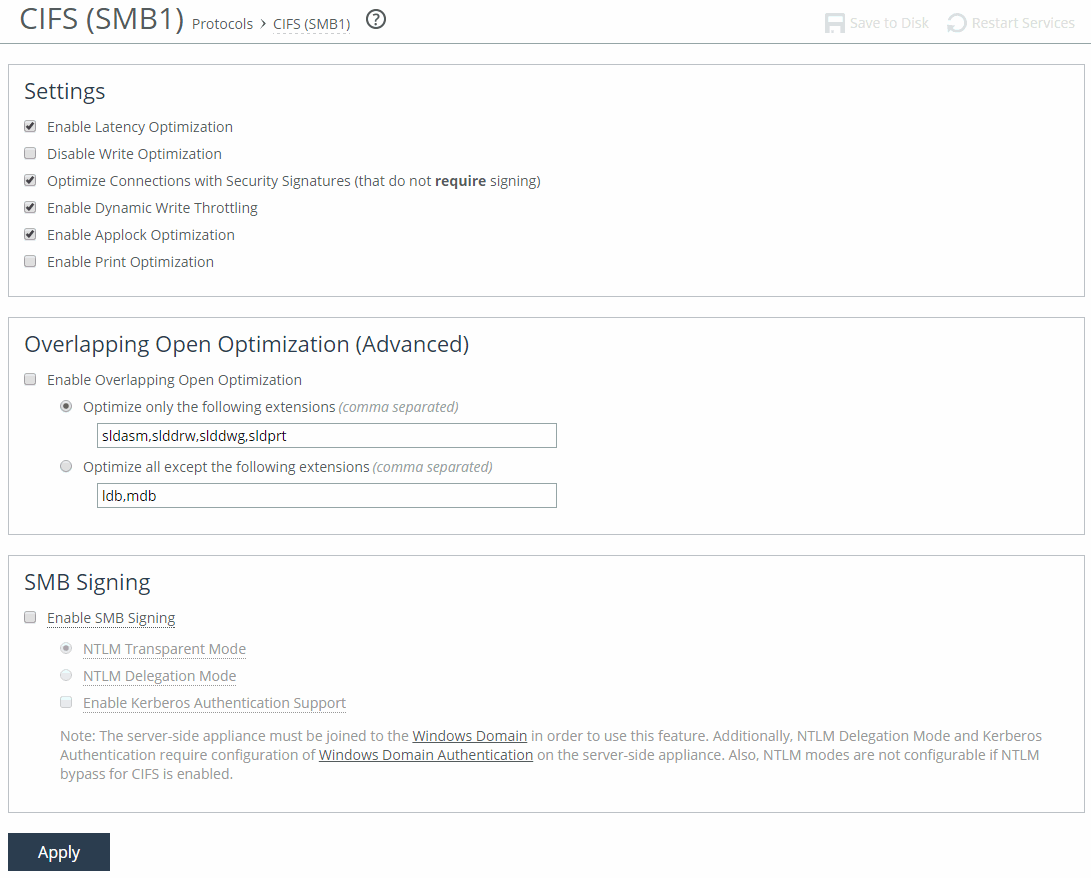
CIFS (SMB1) page


Control | Description |
Enable Latency Optimization | Enables SMB1 optimized connections for file opens and reads. Latency optimization is the fundamental component of the CIFS module and is required for base optimized connections for file opens and reads. Although latency optimization incorporates several hundred individual optimized connection types, the most frequent type of file opens is where exclusive opportunistic locks have been granted, and read-ahead operations are initiated on the file data. RiOS optimizes the bandwidth used to transfer the read-ahead data from the server side to the client side. This is the default setting. Only clear this check box if you want to disable latency optimization. Typically, you disable latency optimization to troubleshoot problems with the system. Latency optimization must be enabled (or disabled) on both SteelHeads. You must restart the optimization service on the client-side SteelHead after enabling latency optimization. |
Disable Write Optimization | Prevents write optimization. If you disable write optimization, the SteelHead still provides optimization for CIFS reads and for other protocols, but you might experience a slight decrease in overall optimization. Select this control only if you have applications that assume and require write-through in the network. Most applications operate safely with write optimization because CIFS allows you to explicitly specify write-through on each write operation. However, if you have an application that doesn’t support explicit write-through operations, you must disable it in the SteelHead. If you don’t disable write-through, the SteelHead acknowledges writes before they’re fully committed to disk, to speed up the write operation. The SteelHead doesn’t acknowledge the file close until the file is safely written. |
Optimize Connections with Security Signatures (that do not require signing) | Prevents Windows SMB signing. This is the default setting. This feature automatically stops Windows SMB signing. SMB signing prevents the SteelHead from applying full optimization on CIFS connections and significantly reduces the performance gain from a SteelHead deployment. Because many enterprises already take additional security precautions (such as firewalls, internal-only reachable servers, and so on), SMB signing adds minimal additional security at a significant performance cost (even without SteelHeads). Before you enable this control, consider these factors: • If the client-side machine has Required signing, enabling this feature prevents the client from connecting to the server. • If the server-side machine has Required signing, the client and the server connect but you can’t perform full latency optimization with the SteelHead. Domain Controllers default to Required. If your deployment requires SMB signing, you can optimize signed CIFS messages using the Enable SMB Signing feature. For details about SMB signing and the performance cost associated with it, see the SteelHead Deployment Guide - Protocols. |
Enable Dynamic Write Throttling | Enables the CIFS dynamic throttling mechanism that replaces the current static buffer scheme. When there’s congestion on the server side of the optimized connection, dynamic write throttling provides feedback to the client side, allowing the write buffers to be used more dynamically to smooth out any traffic bursts. We recommend that you enable dynamic write throttling because it prevents clients from buffering too much file-write data. This is the default setting. If you enable CIFS dynamic throttling, it’s activated only when there are suboptimal conditions on the server-side causing a backlog of write messages; it doesn’t have a negative effect under normal network conditions. |
Enable Applock Optimization | Enables CIFS latency optimizations to improve read and write performance for Microsoft Word (.doc) and Excel (.xls) documents when multiple users have the file open. This control enhances the Enable Overlapping Open Optimization feature by identifying and obtaining locks on read write access at the application level. The overlapping open optimization feature handles locks at the file level. Enable the applock optimization feature on the client-side SteelHead. |
Enable Print Optimization | Improves centralized print traffic performance. For example, when the print server is located in the data center and the printer is located in the branch office, enabling this option speeds the transfer of a print job spooled across the WAN to the server and back again to the printer. By default, this setting is disabled. Enable this control on the client-side SteelHead. Enabling this control requires an optimization service restart. This option supports Windows XP (client), Vista (client), Windows 2003 (server), and Windows 2008 (server). This feature doesn’t improve optimization for a Windows Vista client printing over a Windows 2008 server, because this client and server pair uses a different print protocol. |
Control | Description |
Enable Overlapping Open Optimization | Enables overlapping opens to obtain better performance with applications that perform multiple opens on the same file (for example, CAD applications). By default, this setting is disabled. Enable this setting on the client-side SteelHead. With overlapping opens enabled the SteelHead optimizes data where exclusive access is available (in other words, when locks are granted). When an oplock is not available, the SteelHead doesn’t perform application-level latency optimizations but still performs SDR and compression on the data as well as TCP optimizations. If a remote user opens a file that is optimized using the overlapping opens feature and a second user opens the same file, they might receive an error if the file fails to go through a SteelHead (for example, certain applications that are sent over the LAN). If this occurs, disable overlapping opens for those applications. Use the radio buttons to set either an include list or exclude list of file types subject to overlapping open optimization. |
Optimize only the following extensions | Specify a list of extensions you want to include in overlapping open optimization. |
Optimize all except the following extensions | Specify a list of extensions you don’t want to include. For example, specify any file extensions that Enable Applock Optimization is being used for. |