Mounting and mapping NFS exports
In the Mount and Map Exports wizard, you will mount the NFS export(s) from the storage array to the Core, map the export(s) from the Core to the Edge, optionally pin them on the Edge by reserving space on the blockstore for the entire export, and optionally prepopulate the blockstore. When the export is mapped to the Edge, existing data on the export is copied to the blockstore.
Before starting the wizard, we recommend that you first connect the Edge to the Core, and then connect the storage array to the Core.
To mount and map exports
1. Choose Configure > NFS: Exports to display the Exports page.
Figure: Exports page
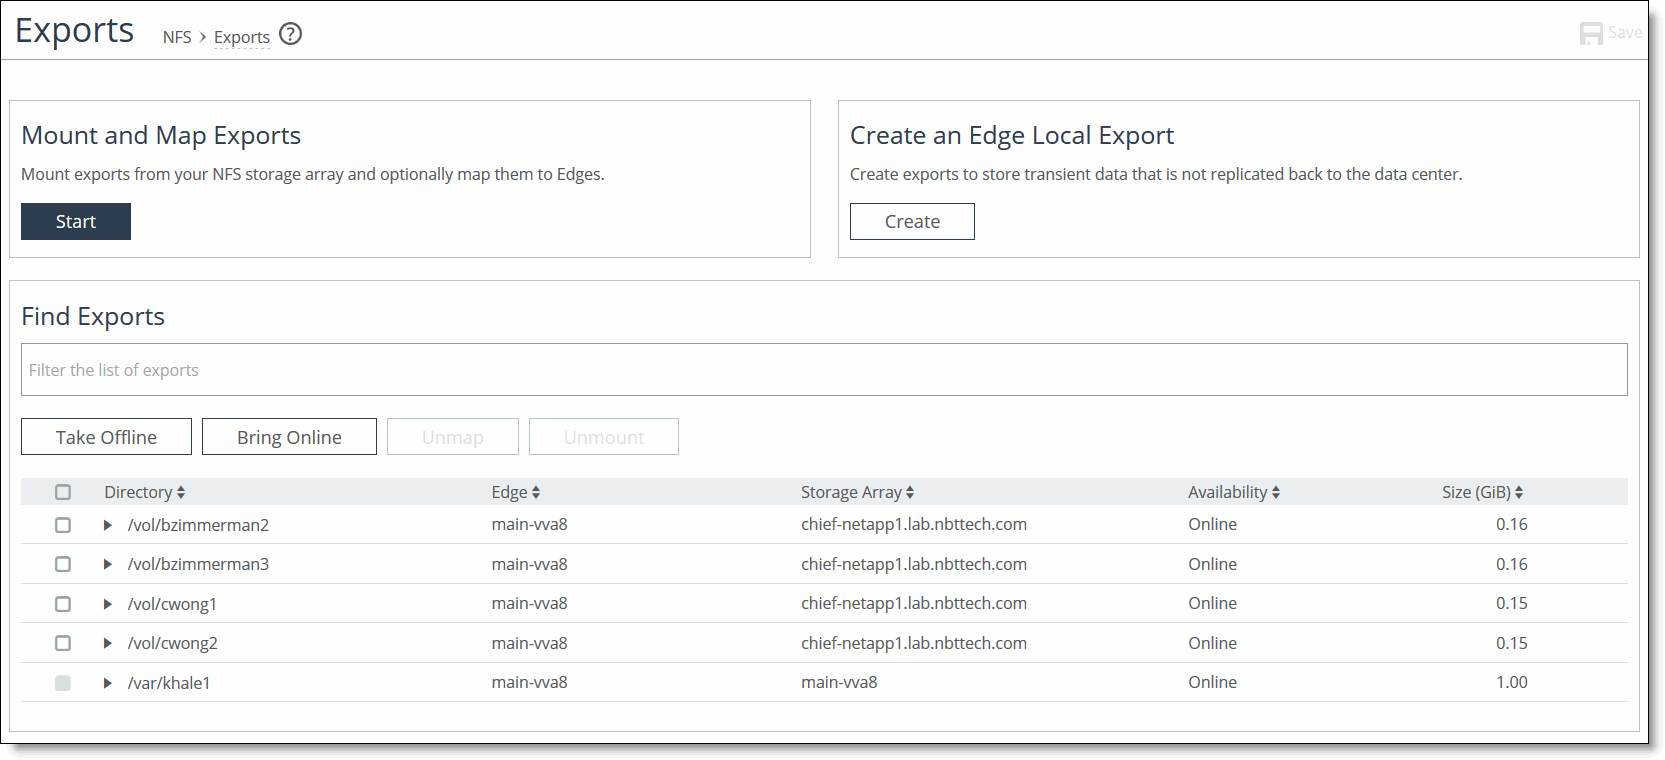
2. Click Start in the Mount and Map Exports pane to display the Mount and Map Exports wizard.
If you have already mounted exports, skip the storage array configuration step by clicking “Map previously mounted exports” instead of Start. To create an Edge Local Export instead, see
Creating an Edge Local Export.
3. In the Storage Array page, select a storage array from the drop-down list or click Add a new storage array.
Figure: Mount and Map Exports wizard - Storage Array page
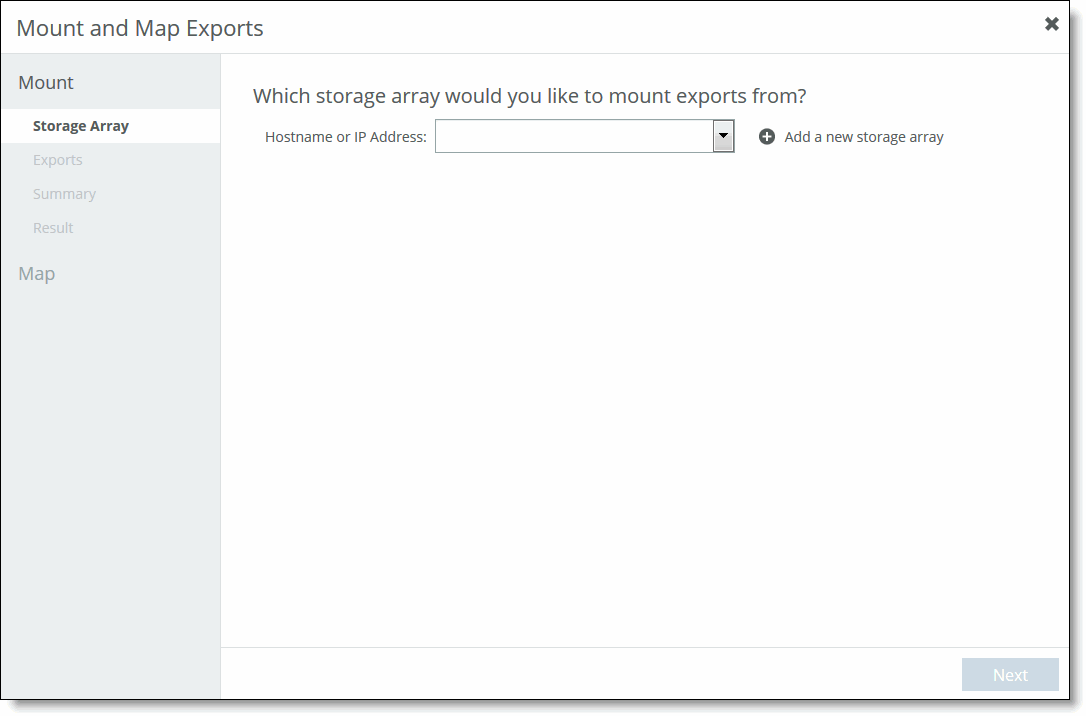
The drop-down list is prepopulated with storage arrays you have previously added. If you clicked Add a new storage array, specify the storage array name or IP address and click Add.
To prevent mounting the same export twice, don’t:
• use two IP addresses associated with the same storage array.
• use an IP address and a hostname for the same storage array.
• use two hostnames associated with the same storage array.
Note: If Core isn’t able to discover exported directories on the storage array, ensure that you are using a supported storage array (NetApp or EMC Isilon). If your storage array is NetApp version 8.3 or later, enable the showmount option on the storage array. For details on enabling this option, see the Riverbed Support site at https://support.riverbed.com.
4. Click Next.
5. In the Exports page, select the exports you would like to mount and click the right arrow to move them from the Available list to the Selected list. You can only mount exports that you have read/write access to, and that have not previously been mounted on the Core.
Figure: Mount and Map Exports wizard - Exports page
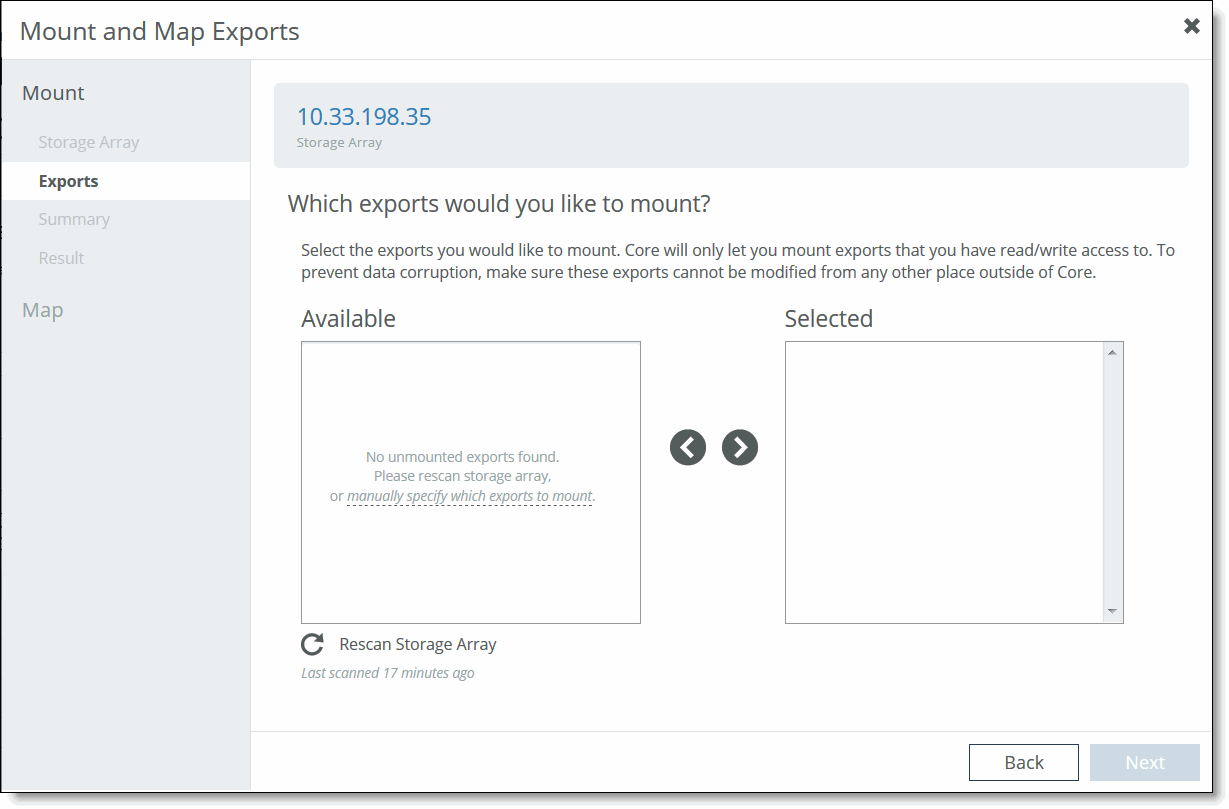
If an unmounted export you were expecting to see isn’t displayed, click Rescan Storage Array or click the “manually specify which exports to mount” link to specify the directories in the next page.
Typically, sub-millisecond latency is expected between the Core and the storage array. When higher latency exists, scanning the storage array can fail and an error will display. Resolve any network issues between the Core and the storage array to ensure sub-millisecond latency, and click Rescan Storage Array again.
Note: If there are large number of exports the scan status may time out. However, the scan will continue in the background and the exports found during the scan will be available for mounting after the scan is complete. To verify when the scan is complete, choose Reports > Logs: System Logs.
Figure: Mount and Map Exports wizard - Exports page - Manually entering export(s)
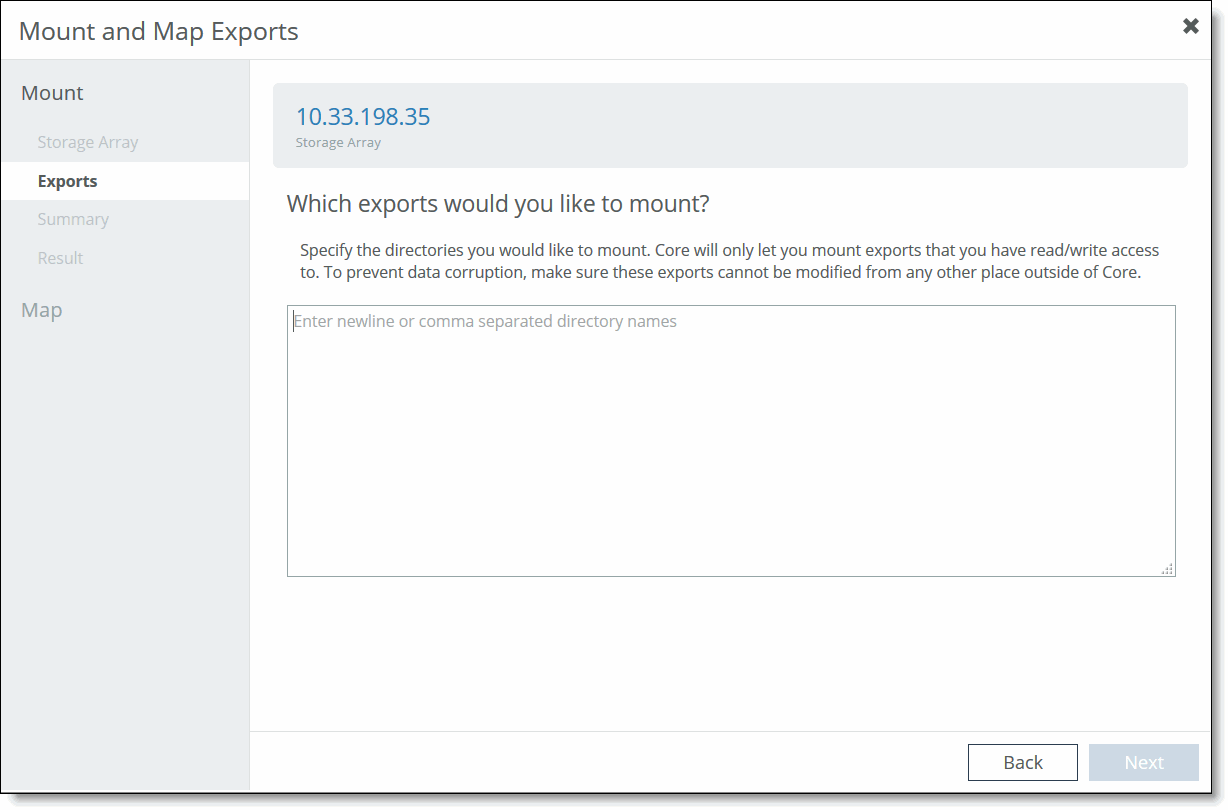
6. Click Next to display the Summary page, listing the exports to be mounted.
Figure: Mount and Map wizard - Summary page
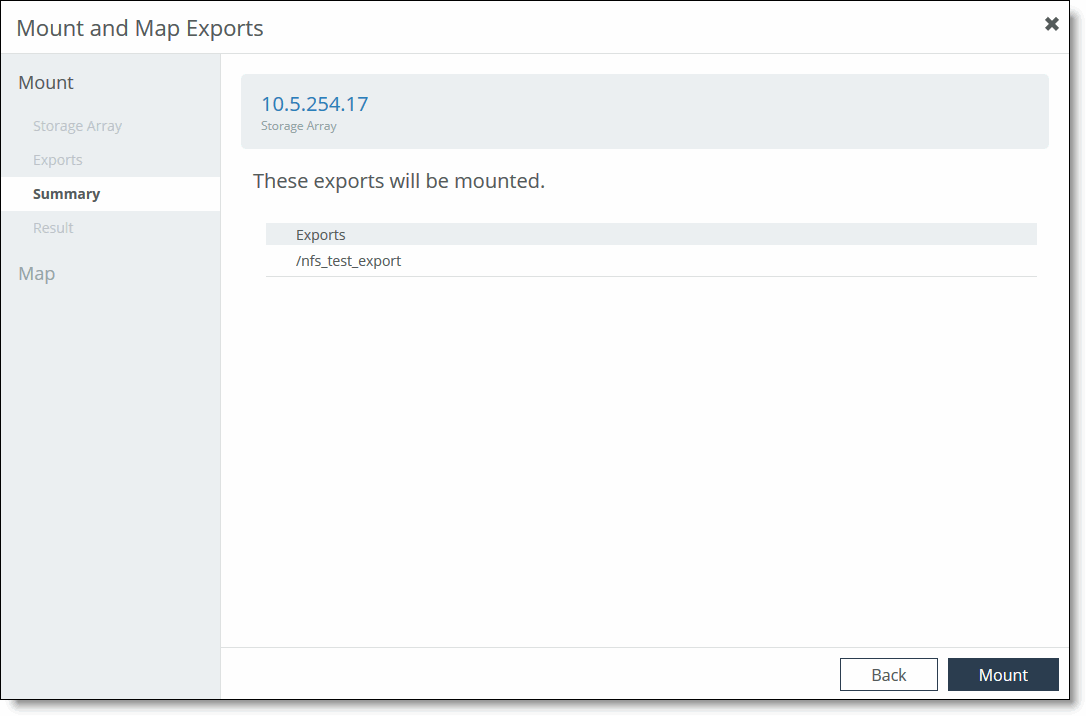
7. Click Mount.
8. In the Result page, successfully mounted exports (and any failed mounts) are listed. Review the settings.
Note: Mounting an export may fail if the storage array is disconnected or if you don’t have sufficient permissions.
9. Click Next.
If there aren’t any Edges connected to the Core, a warning message appears. Click Done to exit and connect an Edge.
If there are Edges connected to the Core and you’re ready to proceed with mapping the mounted exports, the Map Introduction page appears, listing the exports ready for mapping.
10. Click Continue with Mapping to display the Edge and Exports page.
Figure: Map and Mount wizard - Edge and Exports page
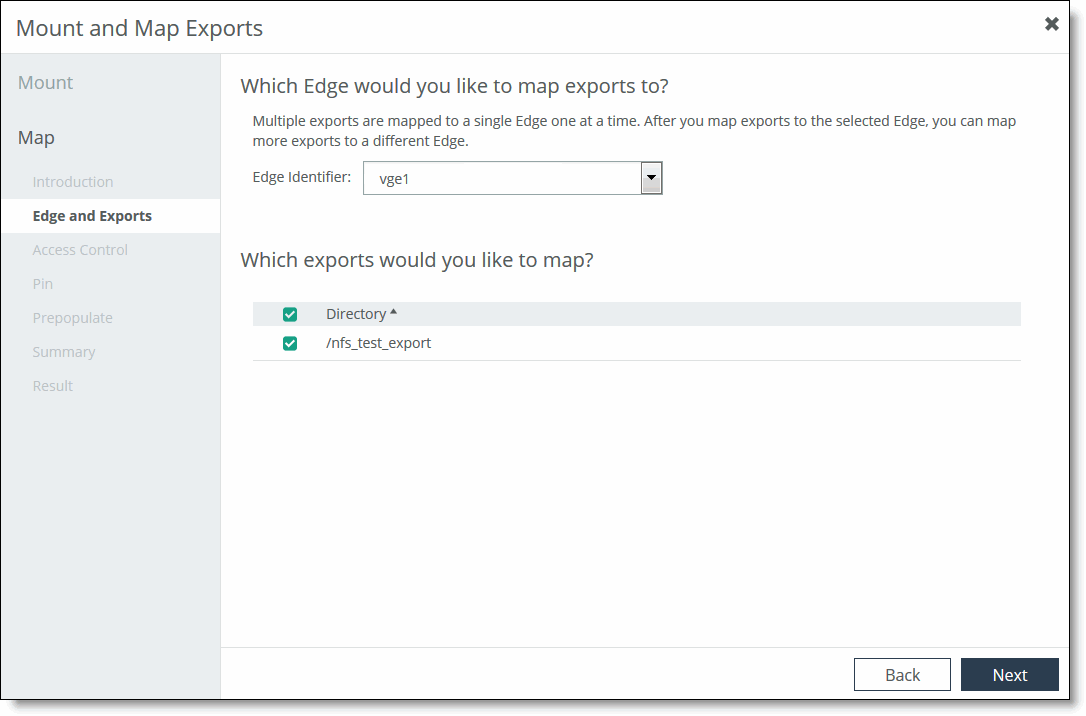
To keep the exports mounted and ready for mapping at a later time, click Exit without Mapping.
11. In the Edge Identifier field, specify the Edge to map the exports to.
Note: Exports can only be mapped to an Edge with a “connected” status. If you specify an Edge that isn’t currently connected to the Core, an error message appears.
12. Select the exports you want to map and click Next.
13. In the Access Control page, specify the who will have access from the Edge for the selected exports.
Figure: Mount and Map wizard - Access Control page
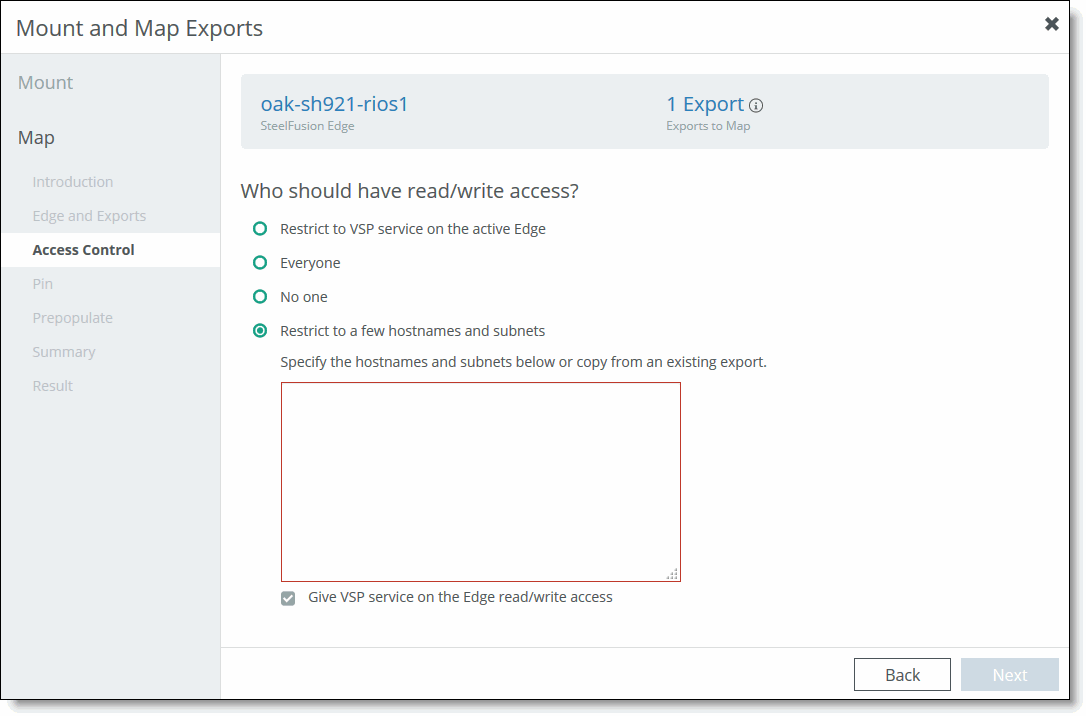
Restrict to VSP service on the active Edge - Restricts access to these exports to the hypervisor on the active Edge (this option is selected by default).
Everyone - Any ESXi with access to the Edge Virtual IP (VIP) will be able to mount the selected exports. For details on the Edge VIP, see the SteelFusion Edge Management Console User Guide.
No one - No one can access the selected exports.
Restrict to a few hostnames and subnets - Access to these exports is restricted to specific hostnames, subnets, or IPv4 addresses that you specify. From the drop-down list, you can copy settings from another export on the currently selected Edge. If your Edges are connected in a high-availability configuration, specify the VSP IP address for each Edge’s ESXi in this section to enable communication between each Edge’s VSP.
14. In the Pin page, select the exports to be pinned so there is enough space reserved for it in the blockstore. The table shows the space required to pin each export.
As you select or deselect exports, the graphic bar changes to show the amount of space used and the amount of space to be pinned in relation to the amount of available space. Available space is a dynamic number for active Edges, and therefore is an estimate and not a guarantee of available space.
Figure: Mount and Map wizard - Pin page
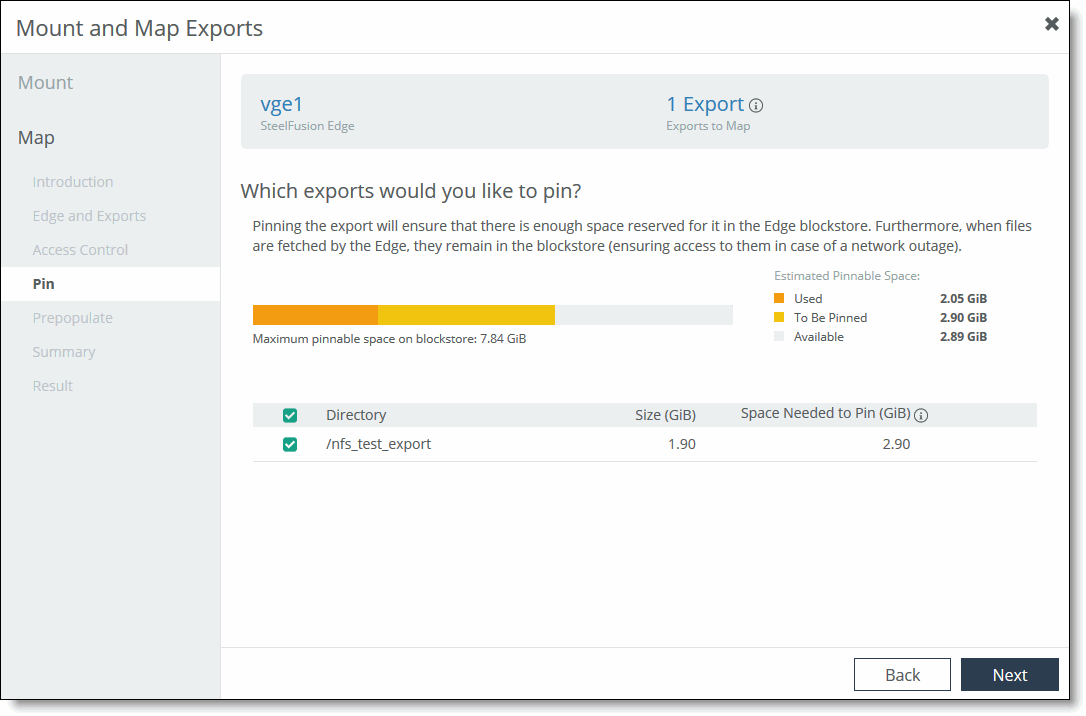
15. Click Next to display the Prepopulate page.
Figure: Mount and Map wizard - Prepopulate page
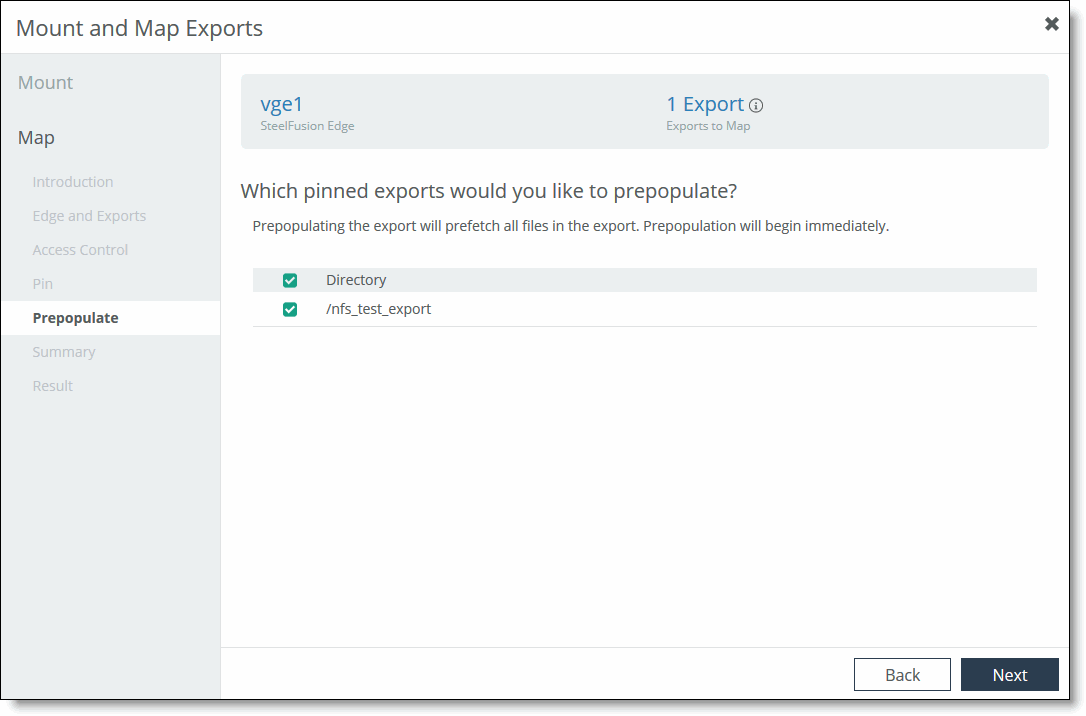
16. Select the pinned exports available to be prepopulated are listed. Select the exports you want to prepopulate and click Next.
Note: Only pinned exports can be prepopulated.
17. In the Summary page, review the exports to be mapped and click Map Exports.
Figure: Mount and Map wizard - Summary page
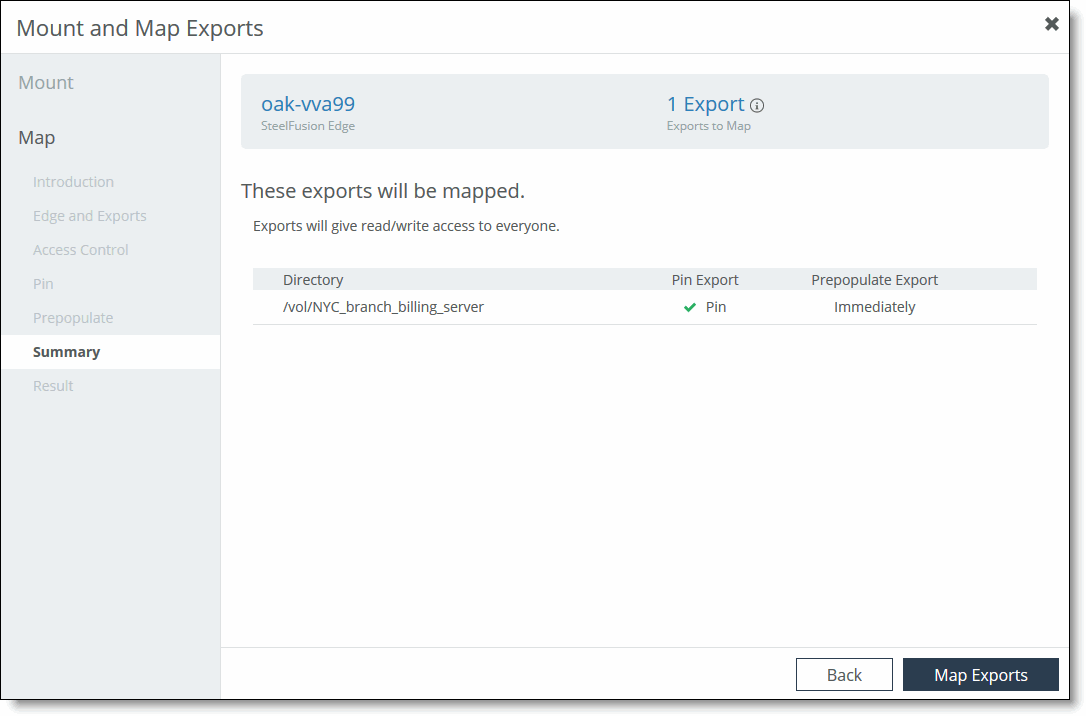
The result of the mounting and mapping is displayed in the Result page.
18. Click Done.
Figure: Mount and Map wizard - Result page
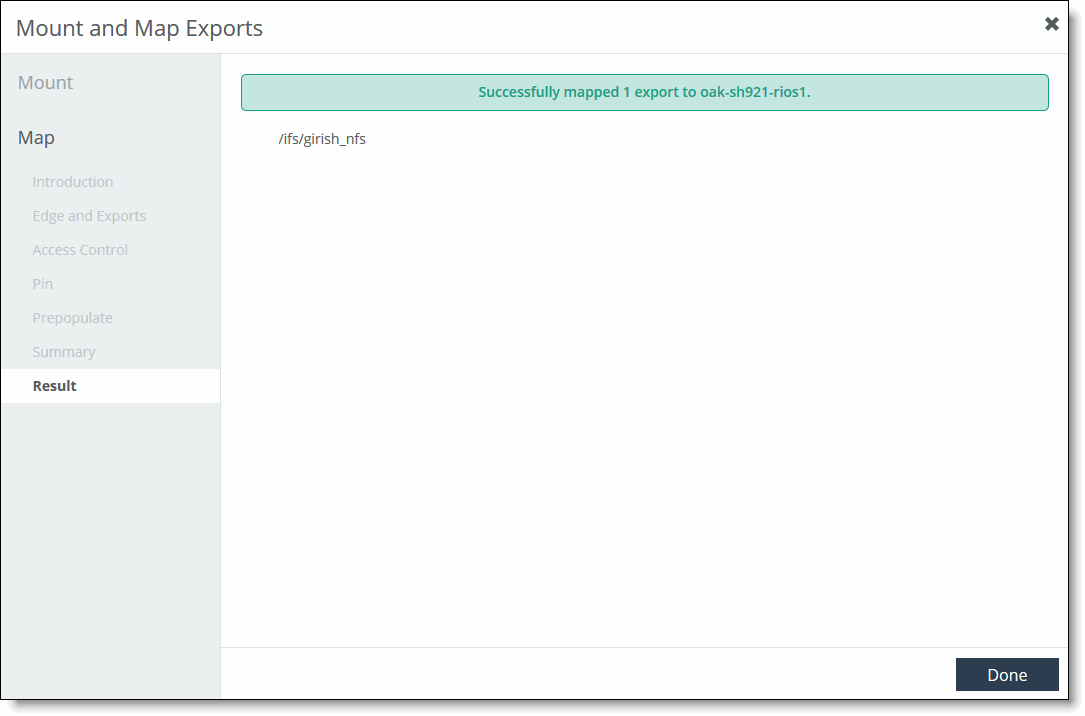
19. Verify the results in the Find Exports pane of the Exports page.
The mounted and mapped exports display the Edge they are mapped to and their status (online, offline, etc.) is displayed in the Availability column. On the SteelFusion Edge, the exports are displayed in the Exports tab of the Storage > Storage Edge Configuration page. Next, you will run the Hypervisor Installer on the Edge. For details, see the hypervisor chapter of the SteelFusion Edge Management Console User Guide.


