Removing the Chassis Cover
This section describes how to remove the chassis cover on x55, xx60, and SteelFusion Core appliances. It includes the following procedures:
Removing the Chassis Cover on the Desktop Appliances
This section describes how to remove the chassis covers for the CX555 and CX755 appliances.
For instructions to remove the cover on CX255, CX570, CX770, SMC9000, and SSC1000 see
Removing Disk Drives in Desktop Appliances.
To remove the chassis cover on desktop appliances
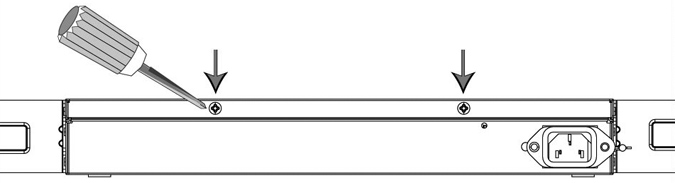
1. With the included screwdriver, remove the two locking screws on the back of the chassis cover.
Figure: Removing the Locking Screws
2. Position your thumbs on the top of the appliance and slide the cover back from the chassis.
Removing the Chassis Cover on 1U Appliances
This section describes how to remove the chassis covers for the CX1555 and EX1160 appliances.
To remove the chassis cover on 1U appliances
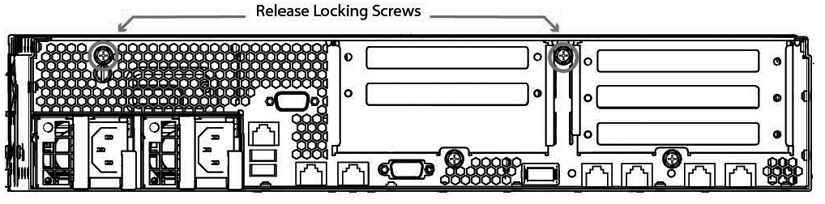
1. Loosen the two locking screws on the back of the chassis.
Figure: Unscrewing the Locking Screws

2. Remove the third locking screw on the left side near the back of the top cover.
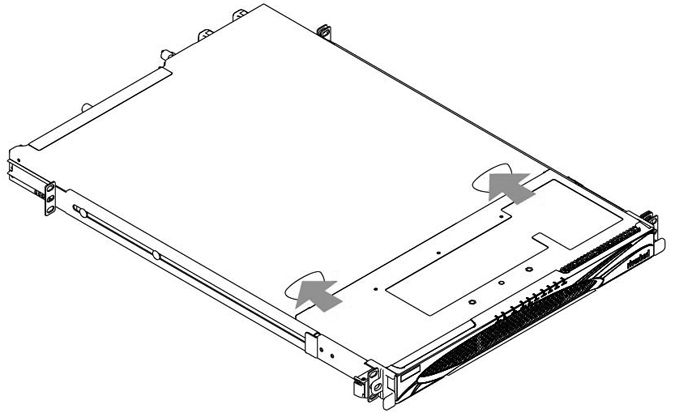
3. Position your thumbs in the indentations at the front of the appliance and slide the cover back from the chassis.
Figure: Removing the Chassis Cover
Removing the Chassis Cover on 2U Appliances
This section describes how to remove the chassis covers for the CX5055, CX7055, DX8000, EX1260, EX1360, SteelFusion Core 2000, and SteelFusion Core 3000 appliances.
To remove the chassis cover on 2U appliances
1. Loosen the two locking screws on the back of the chassis.
Figure: Unscrewing the Locking Screws
2. Remove the third locking screw on the right side of the top cover.
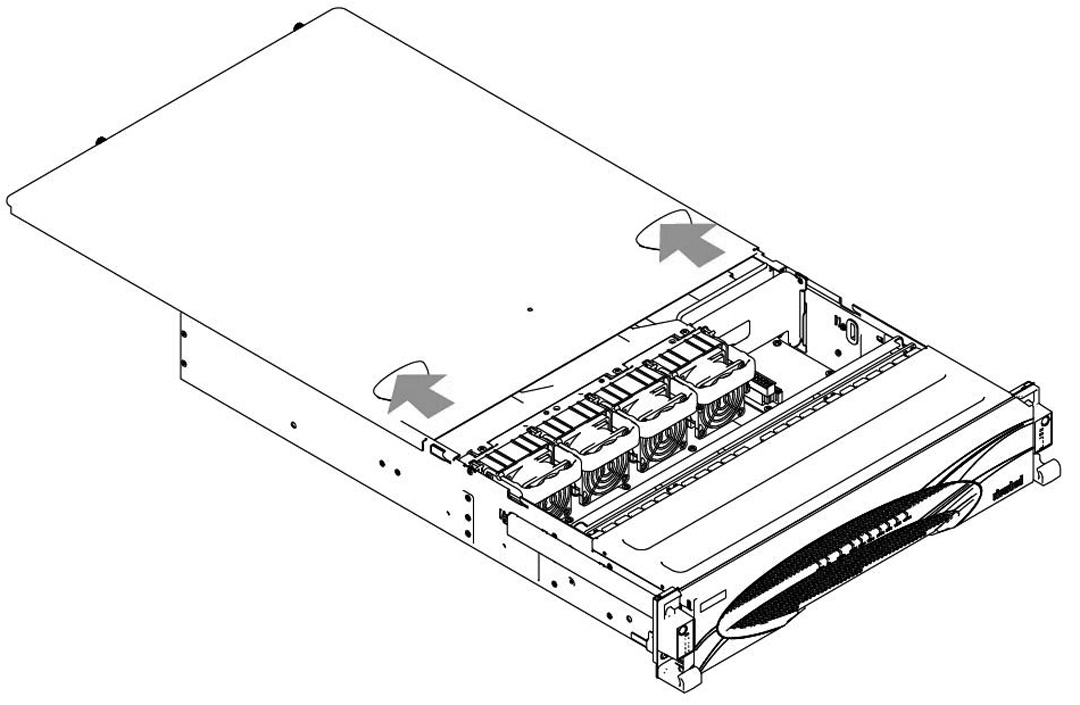
3. Position your thumbs in the indentations at the front of the appliance and slide the cover back from the chassis.
Figure: Removing the Chassis Cover