Exporting Reports
NetIM allows you to export reports two ways, by saving generated reports on your system as CSV files and by configuring a template that tells NetIM what reports you want exported to the
output file directory on NetIM and in what format.
The following sections explain how to export reports in more detail:
Manually Exporting a Generated Report
To manually export a report, follow these steps:
If you want to print a report you must first export it.
1. Log into the UI as admin.
2. Navigate to MORE->Generate Reports. The following screen appears:
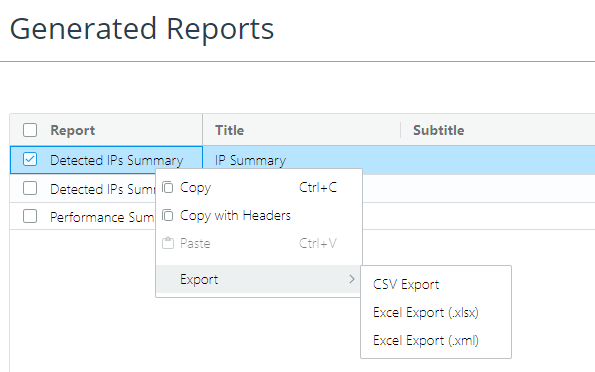
3. Right click on the report you want to export, as shown in the following screen.
4. Decide to export as one of the following by clicking on the option:
– CSV
– Excel (xlsx)
– Excel (xml)
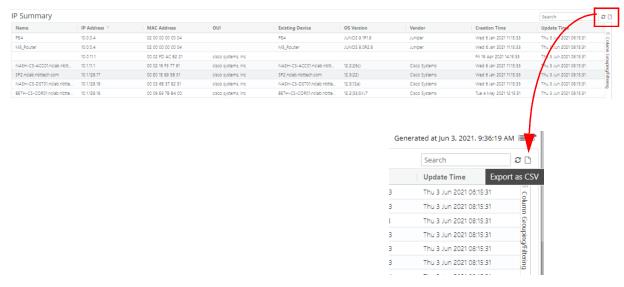
5. (Optional) If you elect to run the report, you can export it as a CSV file by clicking on the folder icon in the upper right corner, as shown in the following screen:
Scheduling Reports for Export
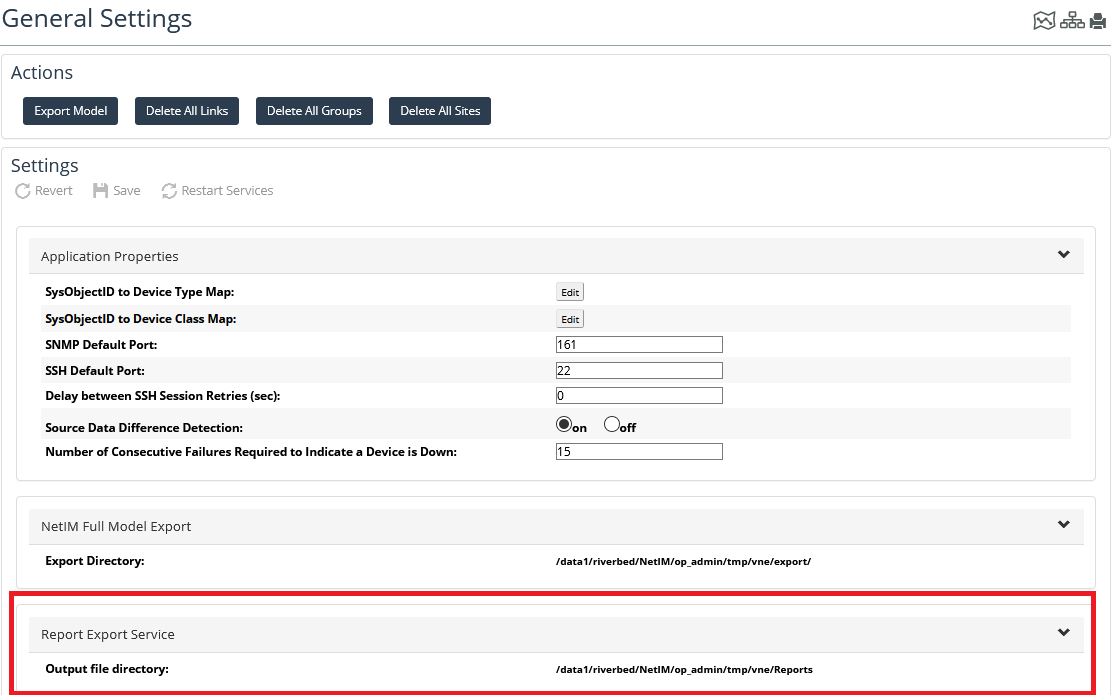
The Report Export Configurations Page allows you to select reports you want to be produced as part of the NetIM model refresh process. The selected reports can be run against all devices or just the devices in the groups you select, and then they are exported to the directory specified in the CONFIGURE->All Settings->Customize->General Settings page, as follows:
To configure reports for export, follow these steps:
1. Log into the UI as admin.
2. Navigate to CONFIGURE->All Settings->Configure->Report Export Configurations.
The following page appears:
3. To create a new export report configuration, click the

icon in the upper left corner of the page
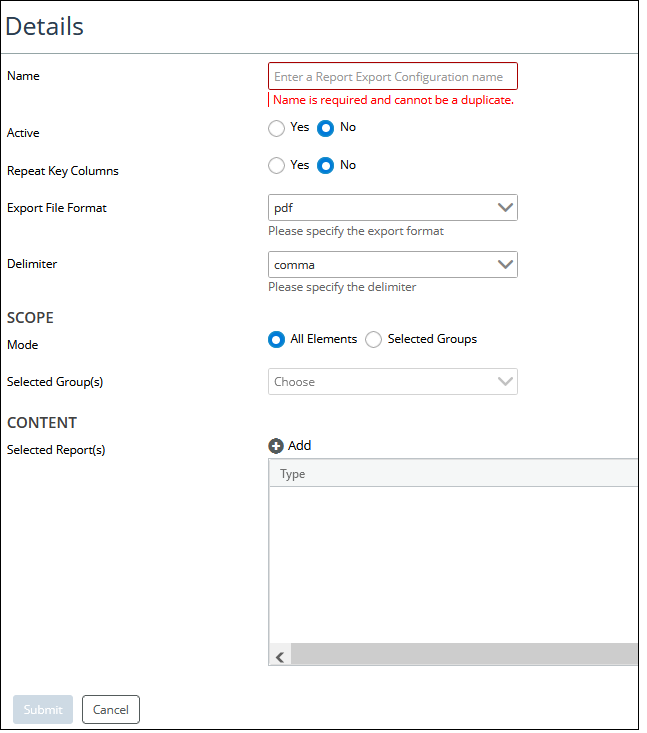
The following screen appears:
4. Add the following information to the Details screen to configure a report export configuration,:
– Name - provide a name for the export rule
– Active - determine if you want the export rule to be Active. The default is No.
– Repeat Key Columns - determine if you want key columns in reports repeated. The default is No,
– Export File Format - select an export format (pdf, html, text, doc) from the pull-down menu. The default is pdf.
– Delimiter - select the delimiter (space, comma, tab) from the pull-down menu. The default is comma.
– SCOPE/Mode - select All Elements or Selected Groups. The default is All Elements. If you select Selected Groups you choose the groups from a pull-down menu.
– CONTENT/Selected Reports - Click the

button to select reports to export. The following screen appears:
.
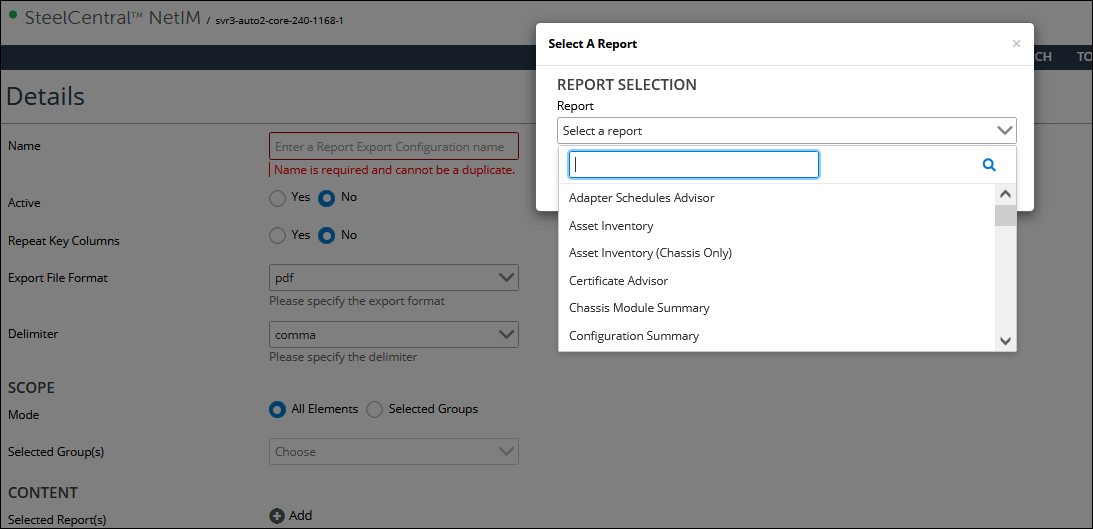
Select the report to export from the drop-down list.
You can select multiple reports for export by clicking the

button again.
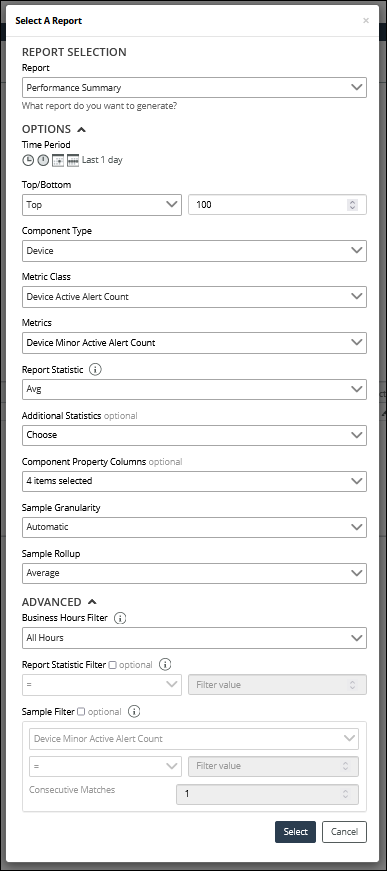
5. (Optional) If you select to export a Performance Report, you are presented with additional options, as shown in the following screen:
6. When you are satisfied with your choices, click the Submit button to create the configuration.
If set to
Active, the reports you selected will be created and exported in the file format you selected to the directory specified in
the
General Settings page, as explained in
Scheduling Reports for Export.
You can edit or delete an export report configuration by clicking on the appropriate icon

in the
Action column.
Related Topics




 in the Action column.