Setting Time Zones and Business Hours
This section explains how to set and modify time zones associated with devices and how to configure business hours profiles and apply them to devices.
This section consists of the following topics:
Setting Time Zones For All Devices
You set the time zone for all devices during the initial setup of NetIM using the Basic Setup wizard. By default, the initial value for the time zone is the time zone of the local server.
Modifying Time Zones for One or More Devices
To modify the time zone associated with one or more devices, follow these steps:
1. Login to the UI as a user with administrative privilege.
2. Choose CONFIGURE->Device Manager.
The Device Manager screen appears, as shown in the following screen:
3. Select the device entries that you want to modify, then click on the hamburger menu at the top of the page and select General->Edit, as shown in the following screen:
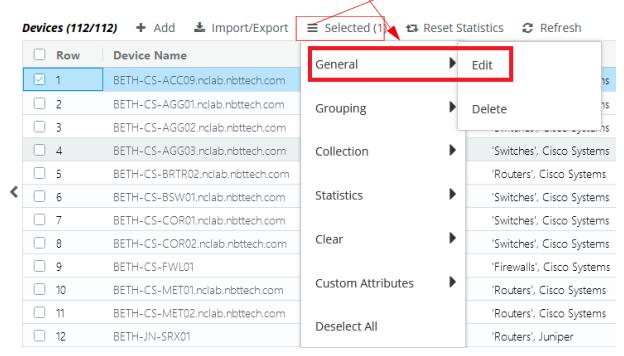
The
Edit Device(s) screen appears.
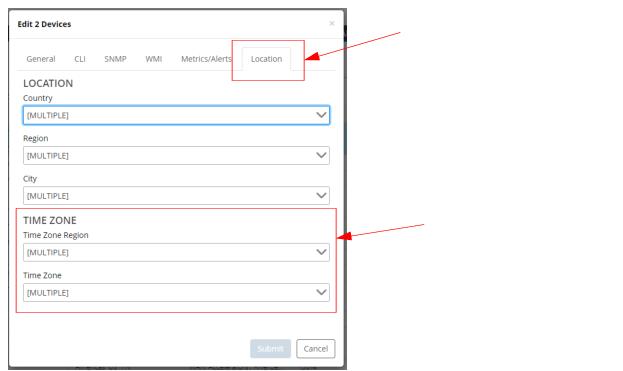
4. Select the Location tab, as shown in the following screen:
5. In the Time Zone field, select the appropriate time zone for the chosen location.
6. To record your selection, click the Submit button.
Defining a Business Hour Profile
Use the Business Hours wizard to create, manage, and assign business hour profiles. A business hour profile defines the business working hours (day of the week, start time/stop time) for a set of devices.Perform one of the following procedures:
Creating a Business Hour Profile
1. Login to the UI as a user with administrative privilege.
2. Navigate to CONFIGURE->All Settings->Alert->Business Hours.
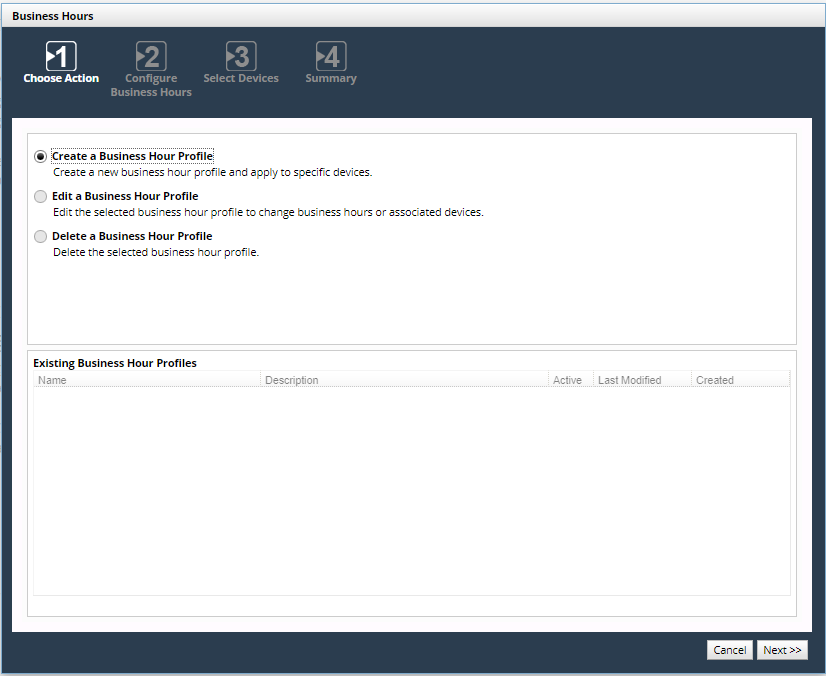
The Business Hours wizard appears, as shown in the following screen:
Wizard Step 1 - Choose Action:
1. Select Create a Business Hour Profile and click Next >>.
Wizard Step 2 - Configure Business Hours:
2. Enter the following information and click Next >>.
• Active: Whether the profile is active. By default, the option is selected.
• Name: A unique name to identify the profile
• Description: An optional user-specified description of the profile.
• Day of the week: The business days of the week for the profile. Select one or more days.
• Start time / Stop time: For each selected day, specify the start time and end time. Either select the time from the pull-down menu or enter a value into the field. Additionally, you can copy and paste values for quicker input.
Wizard Step 3 - Select Devices:
3. Select the devices to assign to the profile and click Next>>.
Use the panel on the left to filter devices. Devices can be filtered by group, country, region, and city. Then select the devices to associate with the profile. Select the checkbox in the header to select all devices in the current list. Changing the filter does not unselect devices.
A device can be assigned to only one profile. If you assign a profile to a device that has already been assigned to a profile, the most recent assignment replaces the assignment to the older profile.
Wizard Step 4 - Summary:
4. Review the summary of the profile. If you need to make changes click << Previous. When the information is correct, click Finish to save the new profile. Alternately, click the Run Again to save the profile and return to Wizard Step 1 - Choose Action to define/edit/delete a profile.
If a device has been previously assigned to a business hour profile, the Current Profile column in the list of associated devices displays name of the previously associated profile. Because a device can be associated with only one profile, when the profile is saved, the device will be associated with the current profile and removed from the previously-defined profile.
Editing a Business Hour Profile
1. Login to the UI as a user with administrative privilege.
2. Navigate to CONFIGURE->All Settings->Alert->Business Hours.
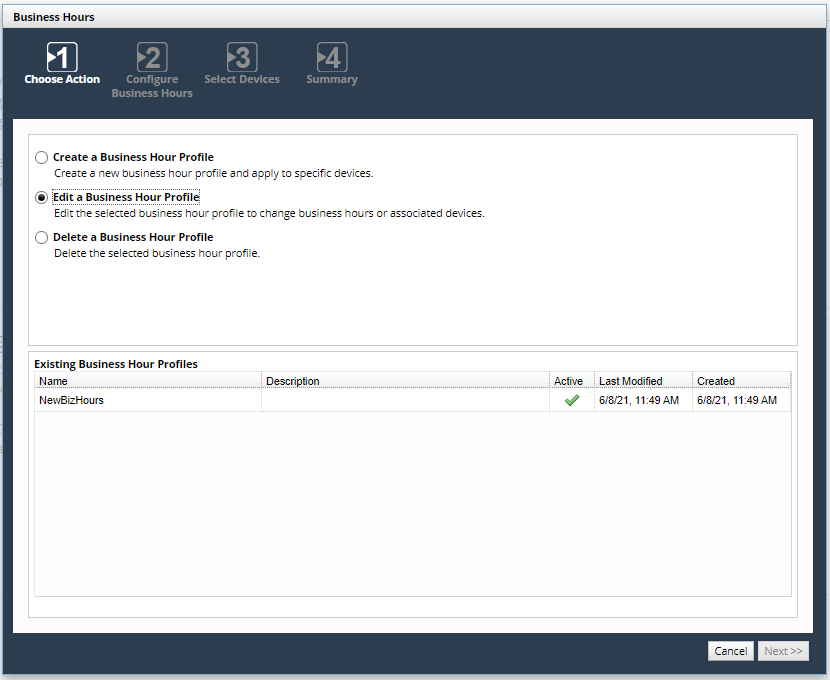
The Business Hours wizard appears, as shown in the following screen:
Wizard Step 1 - Choose Action:
3. Select Edit a Business Hour Profile.
4. From the list of existing Business Hour Profiles, select the profile that you want to edit and click Next >>.
Wizard Step 2 - Configure Business Hours:
5. Edit the information as necessary and click Next >>.
Wizard Step 3 - Select Devices:
Wizard Step 4 - Summary:
7. Review the summary of the profile. If you need to make changes click << Previous. When the information is correct, click Finish to save the new profile. Alternately, click the Run Again to save the profile and return to Wizard Step 1 - Choose Action to define/edit/delete a profile.
If a device has been previously assigned to a business hour profile, the Current Profile column in the list of associated devices displays name of the previously associated profile. Because a device can be associated with only one profile, when the profile is saved, the device will be associated with the current profile and removed from the previously-defined profile.
Deleting a Business Hour Profile
1. Login to the UI as a user with administrative privilege.
2. Navigate to CONFIGURE->All Settings->Alert->Business Hours.
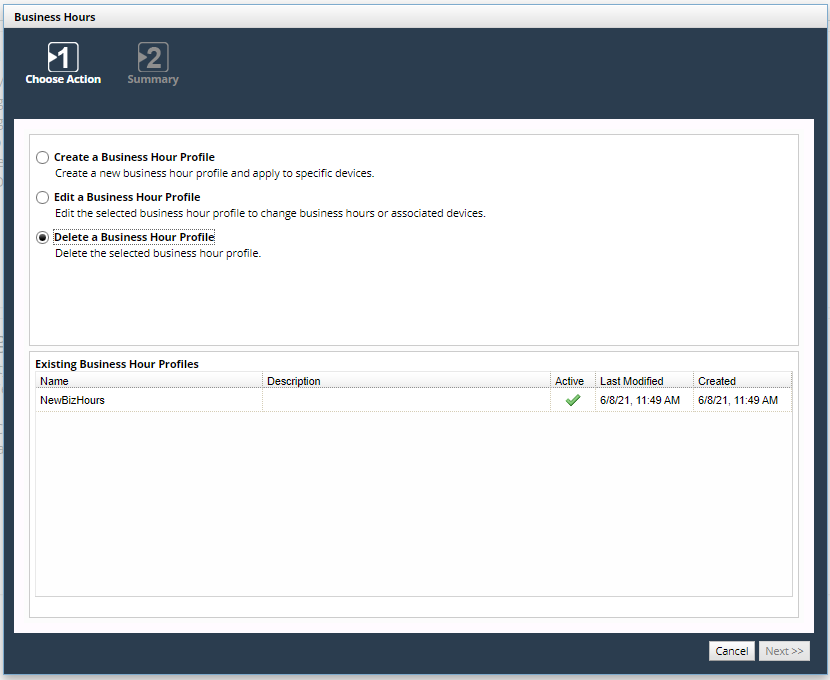
The Business Hours wizard appears, as shown in the following screen:
Wizard Step 1 - Choose Action:
3. Select Delete a Business Hour Profile.
4. From the list of existing Business Hour Profiles, select the profile that you want to delete and click Next >>.
Wizard Step 4 - Summary:
5. Review the summary of the profile to verify that you selected the correct profile to delete. Click Finish to delete the new profile. Alternately, click the Run Again to delete the profile and return to Wizard Step 1 - Choose Action to define/edit/delete a profile.
If you delete a business hour profile that is assigned to one or more devices, those devices will not have defined business hours until you assign a new business hour profile.
Associating a Business Hour Profile with a Device Using the Device Manager
After you have created a business hour profile, you can manually associate/unassociate the profile with one or more devices, as described in the following procedure. Alternately, you can edit the business hour profile, as described in
“Editing a Business Hour Profile". Manually Associate Business Hour Profiles with Devices
1. Login to the UI as a user with administrative privilege.
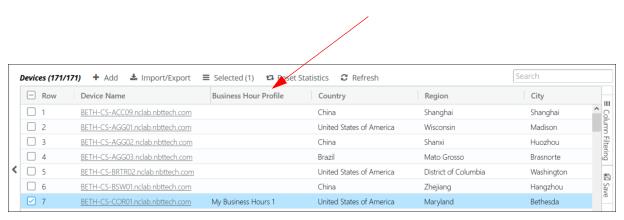
2. Navigate to CONFIGURE->Device Manager. The following screen appears:
The Business Hours Profile column lists the associated business hour profile for each device.
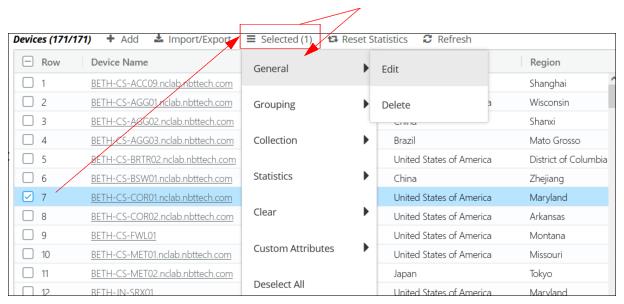
3. Select the device(s) to associate/unassociate with a business hour profile, and then click on the hamburger menu as shown in the following screen:
A device can only have one assigned business hour profile at a time.
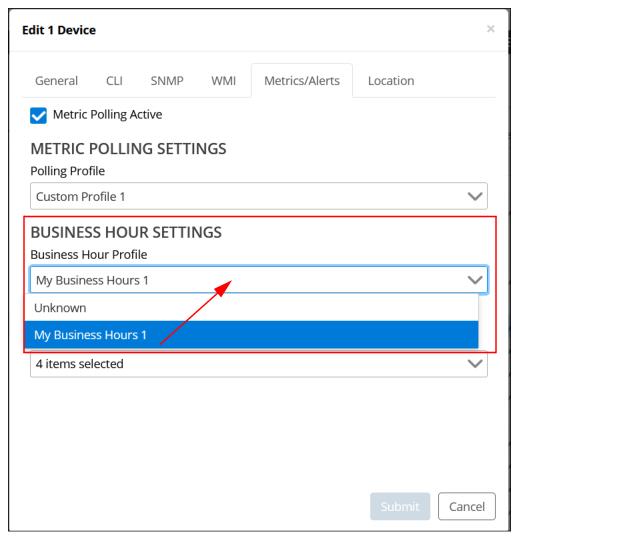
The following screen appears:
4. Navigate to the Metrics/Alerts tab.
5. In the Business Hours Settings frame, select the Business Hours Profile you want to apply the device(s) from the pull-down menu.
If a Business Hours profile is associated with a device, then metric roll-up will begin to perform business hours-based and non-business hours-based roll-up. Metric roll-up continues to perform the existing “All Hours” metric roll-up. The time-zone of the device together with the business hours profile are used to determine what hours are used to perform the business hours-based and non-business-hours based roll-up.
6. When you are satisfied with your selection, click the Submit button.
With the addition of Business Hours, you have another option when configuring a Performance Summary report. For more information, see
Creating and Viewing Reports.


