About base interfaces
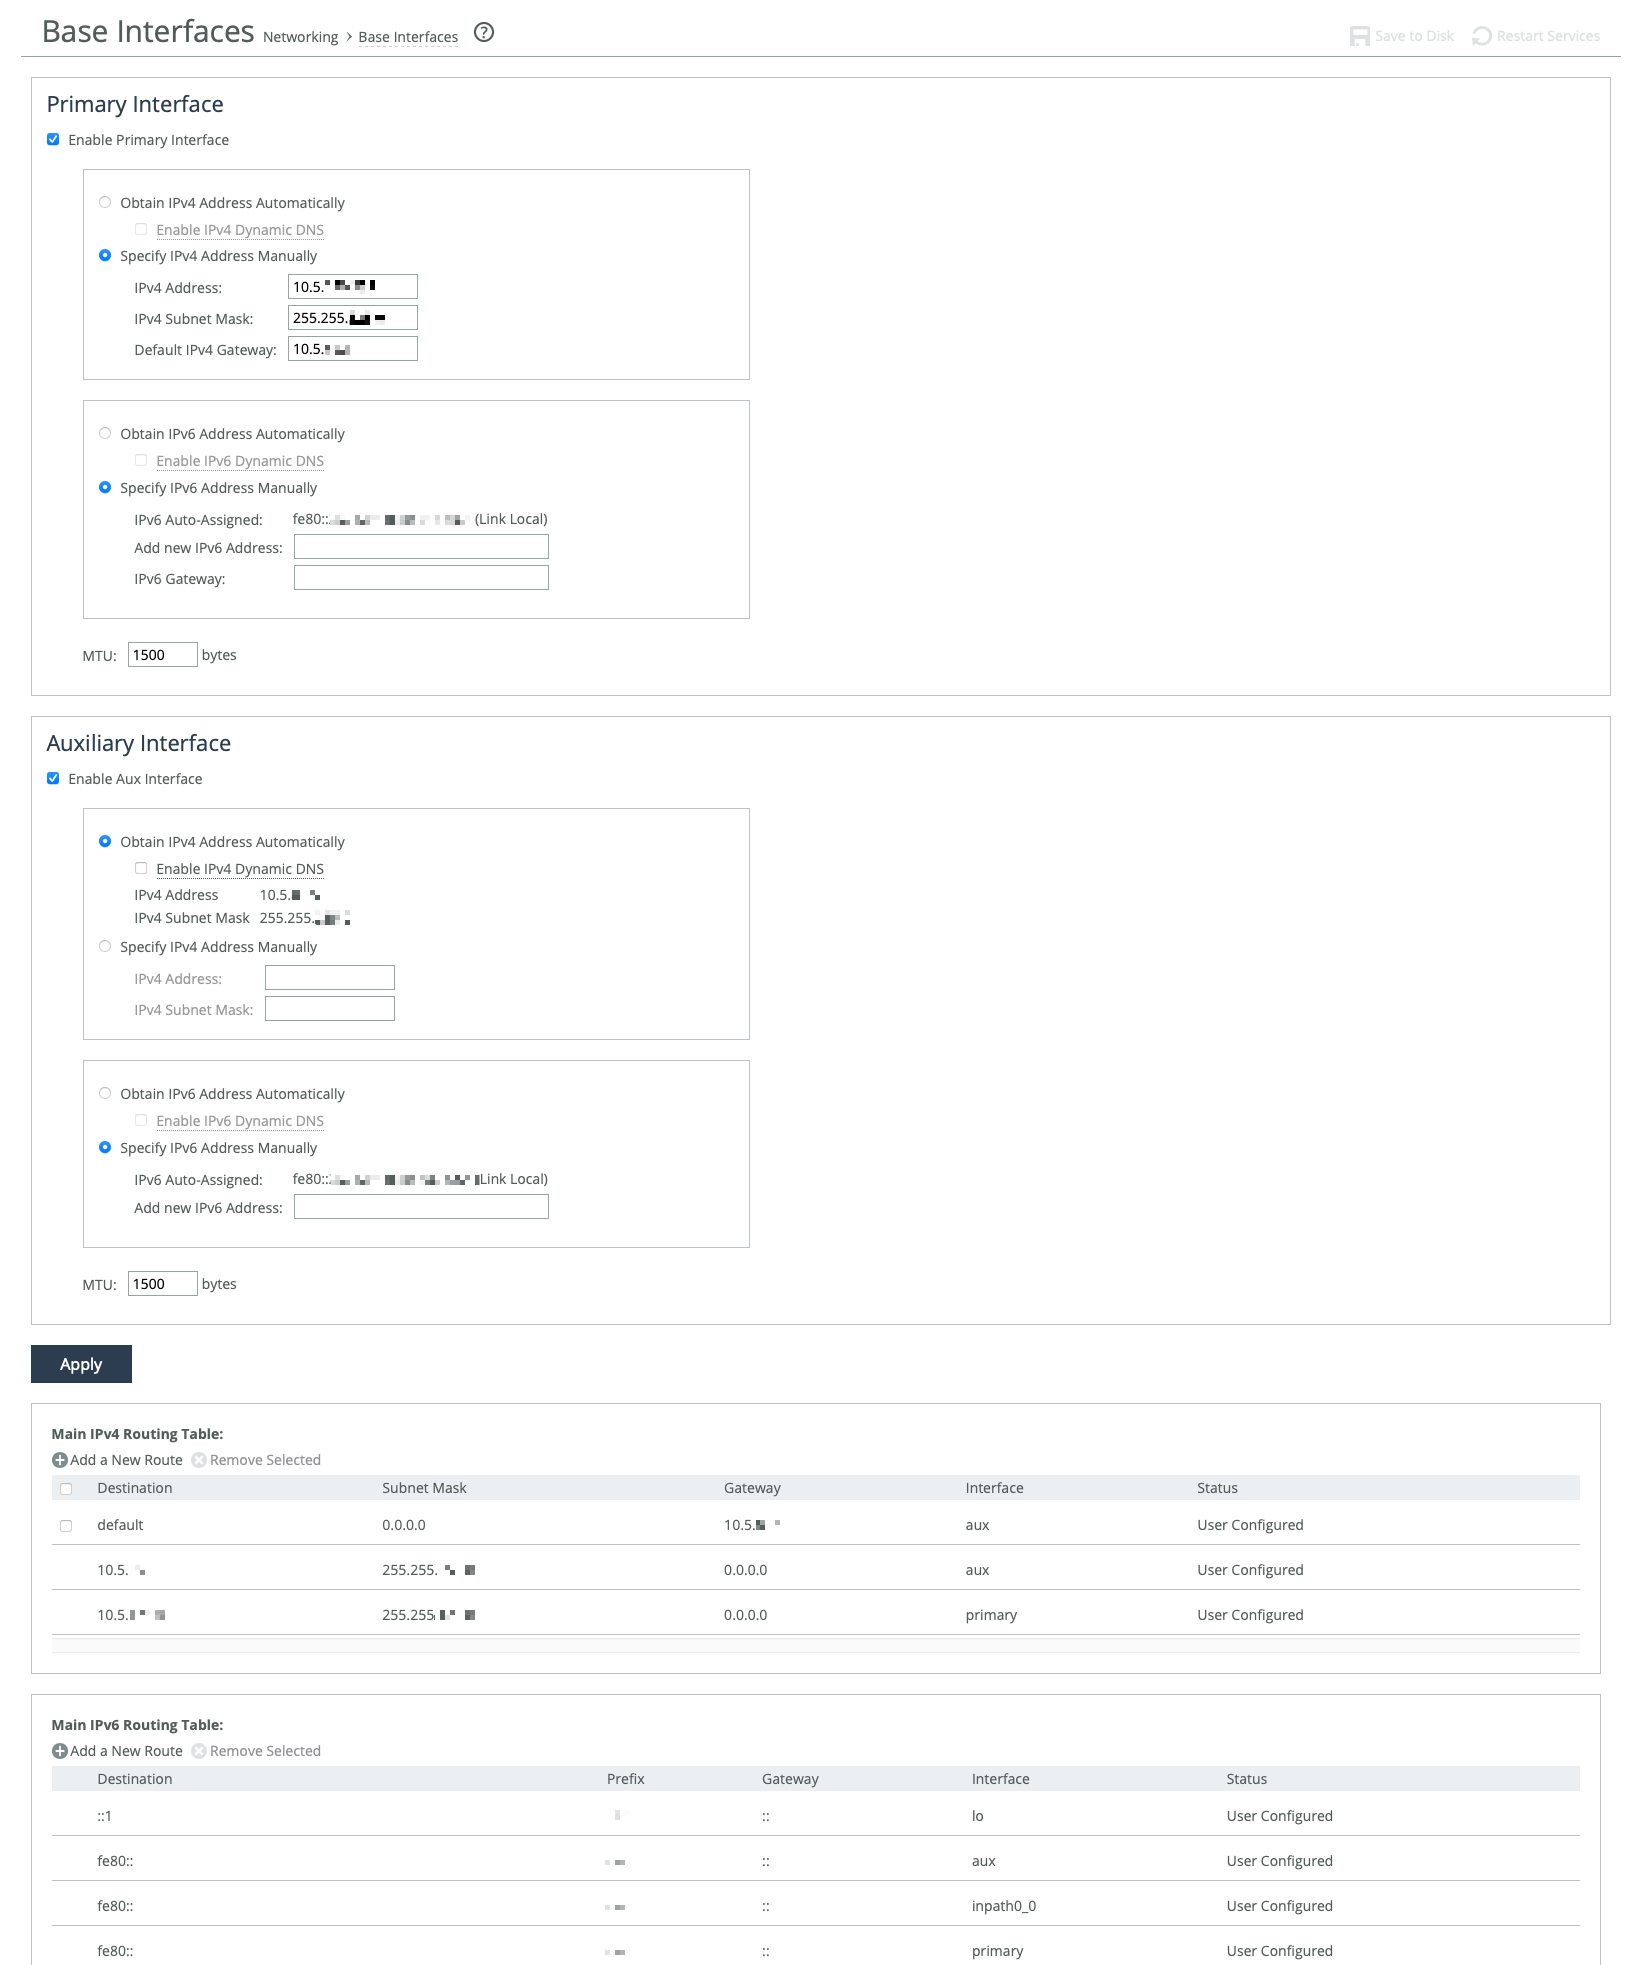
Settings for the appliance’s primary and auxiliary interfaces are under Networking > Networking: Base Interfaces. Routing table settings are also available there. IPv4 and IPv6 are supported.
Base Interfaces page

The primary interface connects to the LAN switch and serves as both the data and management interface for the appliance. You can use it to access the Management Console or CLI. It may also be used for a server-side out-of-path (OOP) deployment.
The auxiliary interface is an optional port for connecting the appliance to a non-Riverbed network management device. Its IP address must be on a different subnet than the primary interface. The auxiliary interface is only for management purposes and cannot be used for OOP deployments. Auxiliary interfaces are not applicable to cloud appliances.
Primary and in-path interfaces can share the same network subnet. Primary and auxiliary interfaces can’t.
Use the main routing table to add static routes for OOP deployments or specific management subnets.
These options are available for configuring interfaces:
Obtain IP Address Automatically
Enables the appliance to automatically get its IP addresses from a DHCP server. The appliance must be able to reach the DHCP server to request the IP addresses. You can also enable Dynamic DNS to send the appliance’s hostname with the DHCP request.
Specify IP Addresses Manually
Enables you to manually set the appliance’s IP addresses if your organization does not use DHCP. The default gateway must be in the same network as the primary interface. You must set the default gateway for in-path configurations. You do not set gateways for auxiliary interfaces.
IPv6 Auto-Assigned
Displays the link-local address that is automatically generated when IPv6 is enabled on the base interfaces.
Add New IPv6 Address
Specifies new IPv6 addresses.
MTU
Specifies the minimum transmission unit (MTU), the largest physical packet size in bytes that a network can send. The default is 1500.
Speed and duplex
These settings allow you to manually set the speed and duplex for the appliance's interface if the host device doesn't do it automatically. The speed and duplex must be the same on both the LAN and WAN interfaces. If they don’t match, you may see many errors when the appliance is in bypass mode. The default setting is "Auto."
For physical appliances, you can configure speed and duplex through the appliance’s GUI. For virtual models, these settings are managed at the virtual interface level and are not shown in the GUI.
Speed and duplex mismatches can happen easily. For example, if one end of a link is set to half or full-duplex and the other is set to auto-negotiate, the link defaults to half-duplex, causing interface errors and degraded performance.
Routers often have fixed speed and duplex settings. Make sure your router settings match the SteelHead WAN and LAN configurations, and check that your switch settings are correct.
After configuring the appliance, check for speed and duplex errors in the system logs, such as cyclic redundancy check (CRC) or frame errors. If the appliance goes into bypass mode and restarts, a mismatch might occur. To avoid this, ensure the LAN and WAN pairs have matching duplex values.
Main routing table
You can add static routes for out-of-path deployments or if your network management requires them. When adding a route, specify the destination IP address, subnet mask (for IPv4) or prefix (for IPv6), gateway address, and the interface for the route. The gateway must be in the same network as the primary or auxiliary interface you are configuring.


