Upgrading the Core software
This section provides information about upgrading your Core software and using the Riverbed Host Tools installer. It includes these sections:
Core version 5.0 in iSCSI/block mode is backward-compatible with previous Core versions. However, if you are running different versions of Core software in your network, the releases may support different features and you will not be able to take full advantage of the latest enhancements. To obtain the full benefits of the new features in Core 5.0, we recommend that you upgrade both Core and Edge software.
Upgrades to Core version 5.0 are supported and will automatically configure the storage mode to iSCSI/block.
If you purchased an SFNFS license, your physical Core appliance already supports NFS mode. To configure your Core-v for NFS mode, see
Setting the storage mode to NFS.
Specification enforcement in iSCSI mode
Core version 5.0 and later includes support for enforcement of Core specifications. If your Core configuration is over-provisioned (too many configured LUNs or Edges) and you attempt to upgrade from Core version 4.x to version 5.0 or later, any future configuration will fail and an alarm will be raised warning you that the specifications have already been exceeded by a configuration that was applied prior to upgrading. However, the SteelFusion deployment will continue to operate normally. For example, if you have configured 41 LUNs and the LUN limit is 40, the alarm will warn you that you have exceeded the licensed capacity by 1.
The specification enforcement does not apply to local LUNs. If an existing LUN is resized to a capacity that will exceed the specification limit for the Core, it will be allowed, but an alarm will be raised.
Upgrading the Core software version
Follow these steps to upgrade your Core software. These instructions assume you are familiar with the Core, the CLI, and the SteelFusion Core Management Console.
Before upgrading, we recommend exporting your configuration as a precautionary measure and to ensure that the most current configuration is saved and easily accessible.
Note: You can upgrade software versions for Core if they are not more than two releases apart. For example, you can upgrade from 4.5 to 5.0, but to upgrade from 4.3 to 5.0, you need to upgrade from 4.3 to 4.5 and then to 5.0.
To export the current configuration
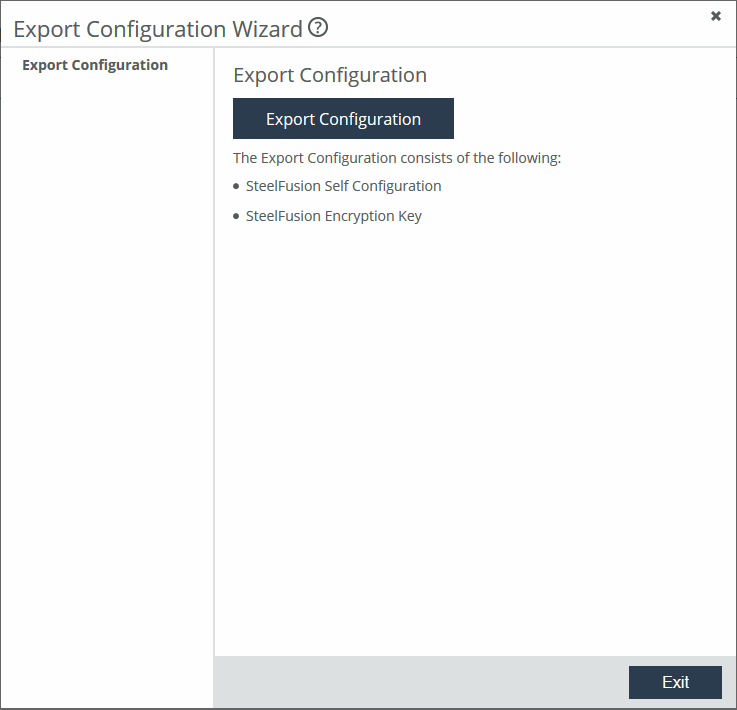
1. Choose Configure > Wizards: Export to start the Export Configuration Wizard.
Figure: Export Configuration Wizard

2. Click Export Configuration.
3. Click Exit.
To upgrade the Core software
1. Download the software image from the Riverbed Support site to a location such as your desktop.
2. Log in to the SteelFusion Core Management Console using the Administrator account (admin).
3. Choose Settings > Maintenance: Software Upgrade to display the Software Upgrade page.
4. Select one of these options under Install Upgrade:
– From URL - Type the URL that points to the software image in the text box. You can use HTTP, HTTPS, FTP, or SCP formats for the URL.
– From Local File - Browse your file system and select the software image.
– Schedule Upgrade for Later - Schedules the upgrade process. Specify the date and time to run the upgrade using the format yyyy/mm/dd hh:mm:ss.
5. Click Install.
The system installs the image in the backup partition and sets the option to load the backup partition version on reboot.
6. Choose Settings > Maintenance: Reboot/Shutdown and click Reboot.
The device can take a few minutes to reboot because the software is configuring the recovery flash device. Do not press Ctrl+C, unplug, or otherwise shut down the system during this first boot. There is no indication displayed during the system boot that the recovery flash device is being configured.
After the reboot, the Home page, Software Upgrade, and Support pages of the Management Console display the Core version upgrade.
Downgrading the Core software version
If you are downgrading to a previous version of the Core software, you must downgrade to a version of the software that has previously run on your system.
Note: In NFS/file mode, downgrading from version 5.0 to a previous version is not supported.
If the previous version of the Core software does not support any currently configured features, the downgrade will not be successful until you remove or disable these features. After a failed downgrade attempt, the Core will display the unsupported features in the system logs, which you can access by choosing Reports > Logs: System Logs.
Using the Riverbed Host Tools installer
As of version 4.3, the Riverbed Host Tools installer is available on the Riverbed Support site at
https://support.riverbed.com. This installer provides one central location for SteelFusion’s Windows plug-ins (Riverbed Turbo boot plug-in, Riverbed Hardware Snapshot Provider, and Riverbed Branch Recovery Agent). Riverbed Branch Recovery Agent is only supported on appliances in iSCSI/block mode.
Note: The installer is supported on Windows 2008 Release 2, Windows 2012, Windows 2012 Release 2, and Windows Server 2016.
To install Riverbed host tools
2. Run the installer.
3. Specify one or more of the three components to install and follow the prompts.
You can choose from Turbo Boot plug-in, Riverbed Hardware Snapshot Provider, and Branch Recovery Agent.
Note: The turbo boot installer is supported on Windows 2012 Release 2 as of Core version 4.6.
4. Once you have installed the plugins, reboot the VM.
Replacing a Core appliance
This section describes how to replace a Core appliance in iSCSI/block mode in the event of failure so you can seamlessly continue operations. To minimize downtime and data loss when recovering from a failure, we strongly recommend that you deploy two Core appliances as a high availability pair.
If you are replacing a Core appliance in NFS/file mode, you must first upgrade the Core software to a version supporting NFS, and then reset the appliance to NFS mode. For details on replacing a Core in NFS/file mode, see the SteelFusion Design Guide.
For more detailed information about high availability and Core and Edge appliance replacement scenarios, see the SteelFusion Design Guide.
Basic steps
This table describes the basic steps needed to replace a Core appliance, followed by detailed procedures.
Task | Reference |
1. Stop the SteelFusion Core service on the failed Core appliance and the replacement Core. | |
2. Export the current configuration from the failed Core appliance. | |
3. Back up the system configuration settings on the replacement Core appliance. | |
4. Import the saved configuration into the replacement Core appliance. | |
5. If you are replacing a high availability Core appliance, restart service on the replacement Core. | |
6. If you are replacing a standalone Core appliance, reboot the Core. | |
To stop the SteelFusion Core service
1. On the failed Core appliance, choose Settings > Maintenance: Service to display the Service page.
Figure: Service page

2. Click Stop to stop the SteelFusion Core service.
3. Repeat Steps 1 and 2 on the replacement Core appliance.
To export the current configuration
1. Choose Configure > Wizards: Export to start the Export Configuration Wizard.
Figure: Export Configuration Wizard

2. Click Export Configuration.
3. Click Exit.
To back up the system configuration settings on the replacement Core appliance
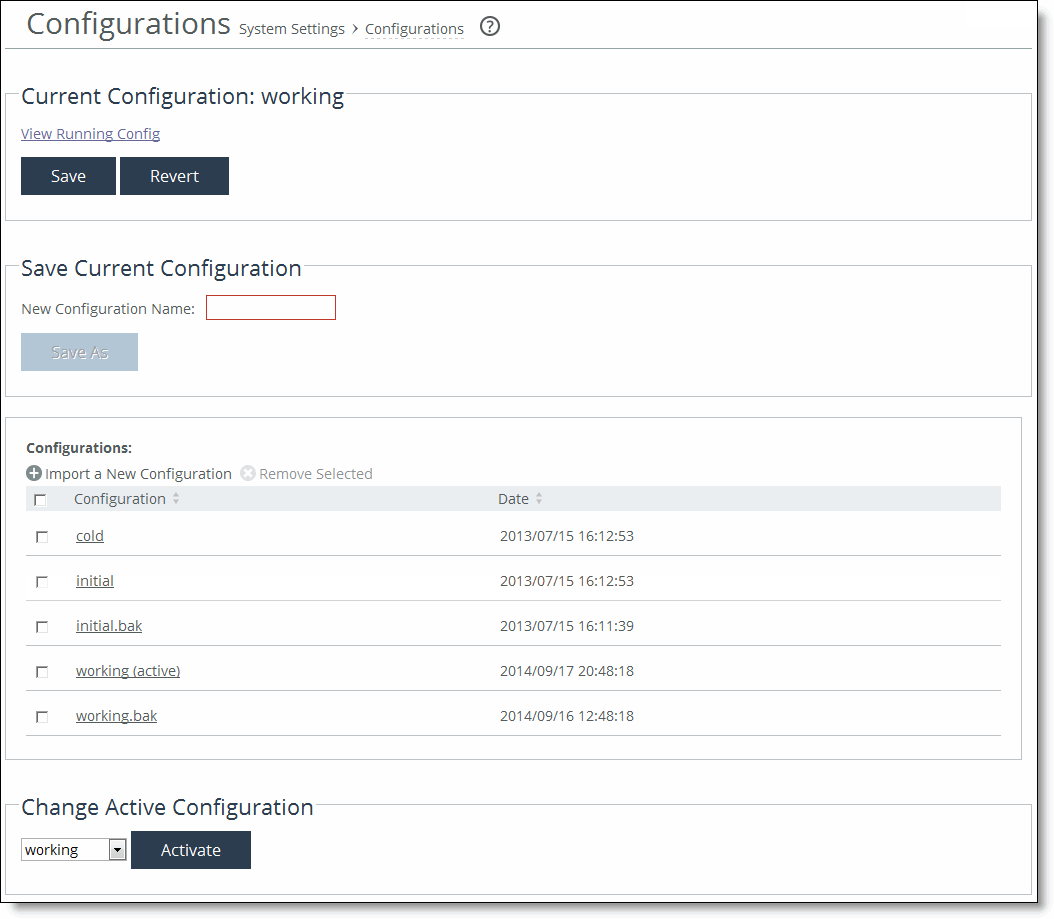
1. On the replacement Core, choose Settings > System Settings: Configurations to display the Configurations page.
Figure: Configurations page

2. Select the working configuration to display it in a pop-up window.
3. Press Ctrl+S to save the configuration file.
You can also copy, paste, and save the configuration file into a text editor.
If you are not able to export the configuration, please contact Riverbed Support at support@riverbed.com.
To import the configuration into the replacement Core
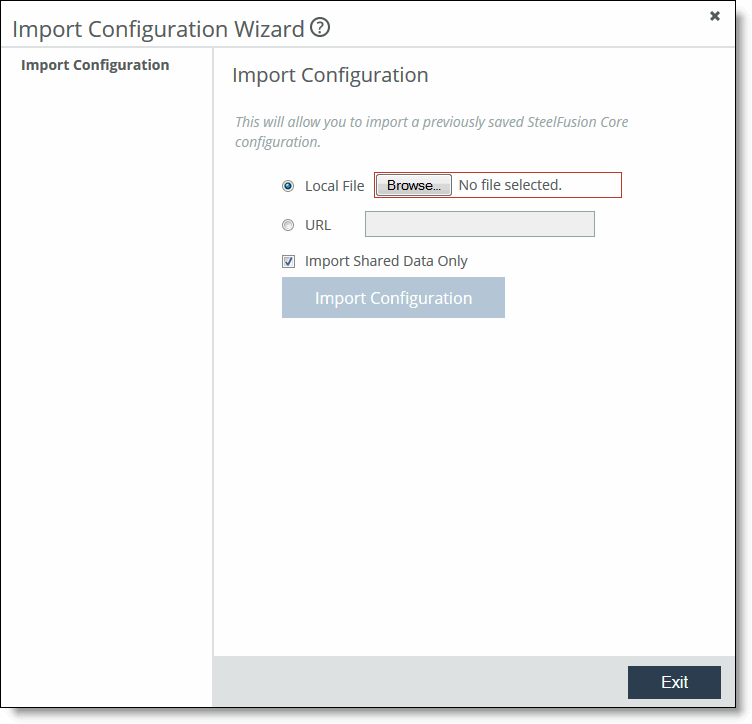
1. On the replacement Core, choose Configure > Wizards: Import to display the Import Configuration Wizard.
Figure: Import Configuration Wizard

2. Select the Local File option and click Browse to navigate to the saved configuration file.
3. Clear the Import Shared Data Only check box.
4. Click Import Configuration.
Note: If importing the configuration leads to lost Secure Shell (SSH) or web access, obtain console access to the new Core and reset the management IP address and default gateway of the new Core. You can find this information in the exported configuration file.
5. Click Exit.
To restart the SteelFusion Core service
1. On the replacement Core appliance, choose Settings > Maintenance: Service to display the Service page.
Figure: Service page

2. Click Start to restart the service using the imported configuration.
3. From a console, try connecting to the replacement Core appliance.
To reboot the Core after saving the configuration
1. Choose Settings > Maintenance: Reboot/Shutdown.
Figure: Reboot / Shutdown page

2. Click Reboot.


