Connecting to the Management Console
After you configure the Edge appliance, you can check and modify your configuration settings and view performance reports and system logs in the Management Console. You can connect to the Management Console through any supported web browser.
To connect to the Management Console, you must know the host, domain, and administrator password that you assigned in the configuration wizard.
Before you begin
• Cookies and JavaScript must be enabled in your web browser.
• Before you begin, clear your browser cache and cookies to ensure the user interface displays correctly.
To connect to the Management Console
1. Specify the URL for the Management Console in the location box of your web browser:
<protocol>://<host>.<domain>
The <protocol> variable is http or https. HTTPS uses the Secure Socket Layer (SSL) protocol to ensure a secure environment. When you connect using HTTPS, the system prompts you to inspect and verify the SSL certificate. This is a self-signed certificate that provides encrypted web connections to the Management Console. The system re-creates the certificate when you change the appliance hostname or when the certificate expires.
The secure vault does not protect the self-signed certificate used with HTTPS connections.
The <host> variable is the hostname you assigned to the Edge appliance primary interface in the configuration wizard. If your DNS server maps that IP address to a name, you can specify the DNS name.
The <domain> variable is the full domain name for the appliance.
Note: Alternatively, you can specify the IP address instead of the host and domain name.
The Management Console appears, displaying the Sign In page.
Figure: Sign in page
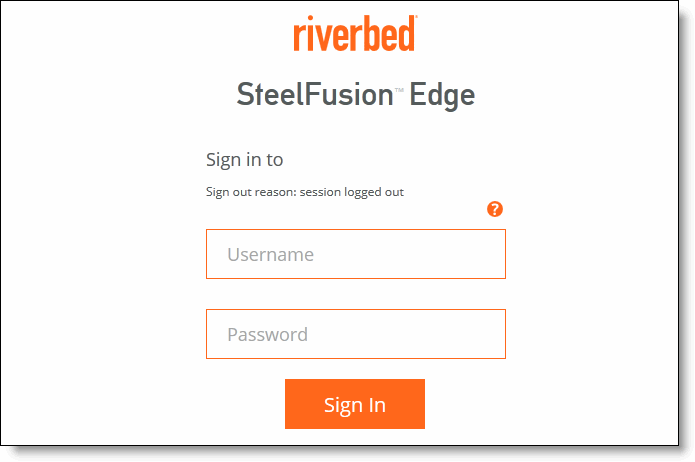
2. In the Username text box, specify the user login: admin, monitor, a login from a RADIUS or TACACS+ database, or any local accounts created using the Role-Based Accounts feature. The default login is admin.
Users with administrator (admin) privileges can configure and administer the Edge. Users with monitor privileges can view the Edge reports and user logs and change their own password. A monitor user cannot make configuration changes.
3. In the Password text box, type the password you assigned in the configuration wizard of the Edge appliance. (The default administrator password for the Edge is password.)
4. Click Sign In to display the Dashboard.
Verifying WAN optimization
Perform this procedure to verify that you have properly configured the Edge appliance.
To verify optimization
1. Choose Optimization > Reports: Bandwidth Optimization in the Management Console to verify optimization.
2. Map a remote drive on a client machine.
3. Drag and drop a 1-MB file from the client to the remote server. Ensure that the server is located across the WAN.
4. Drag and drop the 1-MB file again. Performance improves significantly.
Checking for speed and duplex errors
If you selected autonegotiation (auto) for your in-path and primary interfaces, you must ensure that the Edge appliance negotiated the speed and duplex at the rate your devices expect. For example, ensure settings are auto on the LAN and WAN and 100 FULL on the LAN and WAN. You can verify your speed and duplex settings in the Configure > Networking: Inpath0_0 page and the Networking > Networking: Base Interfaces page of the Management Console.
To check for speed and duplex errors
1. In the Management Console, choose Administration > Diagnostics: System Logs.
2. Check the system logs for duplex or speed errors.
3. Choose Networking > Reports: Current Connections page.
4. Check for duplex and speed errors.
If you find errors, change the speed and duplex settings on your LAN and WAN interface in the Configure > Networking: Inpath 0_0 page.
Next steps
This table summarizes the next steps you should take to configure the Edge appliance.
Task | Reference |
If you are using a SteelFusion Core for storage, you should configure and connect it to access remote storage at your data center and make that storage available to your hypervisor. | Choose Storage > Storage Edge Configuration. For details, see the SteelFusion Edge Management Console User Guide. |
Connect the SteelFusion Edge to the SteelFusion Core. You can also optionally connect the Edge to another active Edge as a standby peer for high availability. | Choose Storage > Storage Edge Configuration. For details, see the SteelFusion Edge Management Console User Guide. If you plan to configure the Virtual Edges for high availability, see Configuring Virtual Edge high availability. |
Configure networking and optimization features. | For details, see the SteelFusion Edge Management Console User Guide. |
Configuring Virtual Edge high availability
Virtual Edge high availability enables you to configure two appliances so that either one can fail without disrupting the service of any of the LUNs provided by the Core. To enable Virtual Edge high availability, you configure a pair of Virtual Edges: one as an active peer and the other as a standby peer. The active Virtual Edge in the pair connects to the Core and serves storage data. The active peer contains the authoritative copy of the blockstore and configuration data. The standby Virtual Edge is passive and does not service client requests but is ready to take over from the active peer immediately.
As the system writes new data to the active peer, it reflects the data to the standby peer, which stores a copy of the data in its local blockstore. The two appliances maintain a heartbeat protocol between them, so that if the active peer goes down, the standby peer can take over servicing the LUNs. If the standby peer goes down, the active peer continues servicing the LUNs, after raising a high availability alarm indicating that the system is now in a degraded state.
Note: Do not take snapshots of vSFED VMs, as taking a snapshot will trigger failover.
Configuring ESXi dynamic discovery
In addition to following the steps for HA configuration in the SteelFusion Edge Management Console User Guide, you must also configure the dynamic discovery address on the standby Virtual Edge.
To configure ESXi dynamic discovery
1. From the Virtual Edge Management Console, choose Storage > Storage Edge Configuration.
2. Select the MPIO tab.
3. Take note of all the Local Interfaces for MPIO for the Virtual Edge.
4. Log in to the vSphere client and select the ESX host from the Inventory pane.
5. Select the Configuration tab, and select Storage Adapters in the Hardware pane.
6. Select the iSCSI initiator to configure and click Properties.
The iSCSI Initiator Properties window appears.
7. Select the Dynamic Discovery tab.
8. Select the IP address from the vSFED Storage Edge Configuration page.
9. Click Add to display the Add Send Target Server window.
10. Click Close.
High availability considerations
• If the Virtual Edges are in a high availability configuration, repeat Steps 1 to 10 for each ESX host.
• After configuring ESXi dynamic discovery, ensure that the MPIO configuration for the active and standby Virtual Edges is displayed in the Dynamic Discovery Tab of both ESX hosts.
Rebooting and shutting down Virtual Edge
You can reboot or shut down the system in the Administration > Maintenance: Reboot/Shutdown page.
Rebooting the system disrupts existing network connections that are currently proxied through it. Rebooting can take a few minutes.
When you shut down the system, connections are broken and optimization ceases. Shutdown can take several minutes.
To reboot or shut down the system
1. Choose Administration > Maintenance: Reboot/Shutdown to display the Reboot/Shutdown page.
2. Click Reboot.
After you click Reboot, you are logged out of the system and it reboots.
3. Click Shutdown to shut down the system.
After you click Shutdown, the system turns off. To restart the system, you must manually turn on the Edge.
Upgrading the Edge appliance
This section describes how to upgrade your software. It includes these sections:
These instructions assume that you are upgrading an Edge appliance running version 4.0 or later.
Upgrading the Virtual Edge software
Perform this procedure to upgrade your software. These instructions assume you are familiar with the Edge appliance and the Management Console.
Software versions for SteelFusion Core and SteelFusion Edge cannot be more than two major releases apart. For example, 4.0 and 4.2 are compatible, but 4.0 and 4.3 are not compatible.
To upgrade the RiOS Edge software
1. Download the software image from the Riverbed Support site to a location such as your desktop. Optionally, you can download a delta image directly from the Riverbed Support site to the SteelHead. The delta downloaded image includes only the incremental changes. The smaller file size means a faster download and less load on the network.
2. Log in to the Edge Management Console using the Administrator account (admin).
3. Choose Administration > Maintenance: Software Upgrade and click Add Image to expand the page.
4. Complete the configuration as described in this table.
Control | Description |
From URL | Select this option and specify the URL. Use one of these formats: http://host/path/to/file
https://host/path/to/file
ftp://user:password@host/path/to/file
scp://user:password@host/path/to/file |
From Riverbed Support Site | Select this option and select the target release number from the Version drop-down list. The system uploads the new image from the Riverbed Support site immediately after you click Add Image. If you receive an “entitlement error” warning, you may not have the correct credentials for the Riverbed Support site. Contact Riverbed Support at https://support.riverbed.com. |
From Local File | Select this option and specify the path, or click Browse to go to the local file directory. If you specify a file to upload in the Local File text box, the image is uploaded immediately; however, the image is installed and the system is rebooted at the time you specify. |
Filename | Specify a new name for the added image. The default name is hyp_image.img.iso. |
Add Image | Select this option to add the new image to the Hypervisor Images list. |
5. Choose Administration > Maintenance: Reboot/Shut Down and click Reboot.
The appliance can take a few minutes to reboot because the software is configuring the recovery flash device. Do not press Ctrl+C, unplug, or shut down the system during this first boot. There is no indication displayed during the system boot that the recovery flash device is being configured.
After the reboot, the Home page, Software Upgrade, and Help pages of the Management Console display the software version upgrade.
Upgrading the hypervisor
You can upgrade the ESXi hypervisor using vCenter. For detailed information, see the VMware website.
Migrating data from the SteelHead EX appliance
There is no upgrade path from the SteelHead EX appliance to the Edge appliance as they are different products that run on different hardware platforms.
If your SteelFusion deployment previously consisted of a BlockStream-enabled SteelHead EX appliance and a SteelFusion Core appliance, and if your data is backed by a SteelFusion Core, you can migrate your data to the SteelFusion Edge appliance.
To migrate the data, you unmap the LUN from the SteelHead EX appliance and rejoin that LUN to the new Edge appliance.
Downgrading the software
If you want to downgrade to a previous version of the SteelFusion Edge software, you must downgrade to a version of the software that has previously run on your machine.
RiOS appliances cannot use an encrypted RiOS data store with an earlier RiOS version, unless the release is an update (9.0.x). For example, an encrypted RiOS data store created in 9.0.1 works with 9.0.3, but not with 9.1.
Before downgrading to an earlier software version, you must select none as the encryption type, clear the RiOS data store, and restart the service in the Management Console Data Store page. After you clear the RiOS data store, the data is removed from persistent storage and cannot be recovered. For detailed information, see the SteelFusion Edge Management Console User Guide.