SCC and Appliance Operations
This chapter describes the basic management operations for the SCC. It includes the following sections:
Backing up and restoring an appliance
The SCC automatically performs a configuration backup (snapshot) of the managed appliances. The backup occurs during the maintenance window (1:00 A.M. to 4:00 A.M. by default). To display the Maintenance Window page, choose Administration > Maintenance: Maintenance Window.
Figure: Maintenance window
To back up the configuration of a managed appliance
2. Select a Source Appliance and enter a snapshot name.
3. Click Backup.
The backup is stored on the SCC.
Figure: Managed appliance back up
Note: When you back up and restore a SteelHead running RiOS 9.0 with SCC 9.0, the SCC only backs up the legacy configuration. The new RiOS 9.0 QoS, path selection, and secure transport configurations aren’t backed up to or restored from a SteelHead. For details, see the
SteelCentral Controller backup/restore of SteelHead for 9.0.0 article at
https://supportkb.riverbed.com/support/index?page=content&id=S25391.
To restore from a backup
1. Choose Manage > Operations: Backup/Restore.
2. Select a source appliance from the drop-down menu.
3. Enter the snapshot name to restore from and the target appliance.
4. Click Restore.
Note: We recommend that you also perform a policy push to restore the configuration stored in the SteelHead secure vault.
Figure: Managed appliance restore
Restoring the backup to the source appliance is useful for rolling back configuration changes. As a best practice, create a manual backup before any major configuration changes. You can restore a backup from one appliance to another; the restore operation only restores the appliance configuration.
As a best practice, use the migrate operation when moving a configuration between compatible appliances (SteelHeads, Interceptors, Mobile Controller, and Cores). The migrate operation moves statistics and an SCC configuration from one appliance to another, including snapshots. The source appliance is deleted after a successful migration.
For details on migration, see the SteelCentral Controller for SteelHead User’s Guide.
You can restore SteelHead CX and SteelHead xx50 configurations among each other. For example, you can restore a SteelHead 1050 configuration to a SteelHead CX 1555.
The following caveats apply to for backup and restore operations:
• The destination appliance RiOS version must be equal to or greater than the source appliance RiOS version.
• You can’t back up and restore between SteelHead EX and other SteelHeads.
• You can’t back up and restore SteelHead-v (xx50) and hardware-based or SteelHead-v SteelHead CX.
• You can’t restore configurations from a SteelHead EX to a SteelHead CX or a SteelHead xx50.
• You can’t restore from a SteelHead CX or a SteelHead xx50 to a SteelHead EX.
• You can’t back up or restore VSP or SteelFusion Edge configurations on a SteelHead EX.
Migrating SteelHead settings with the SCC
You generally use the migrate operation to move the state of an existing appliance to the replacement appliance. The migrate operation moves the state statistics, SCC configuration, and snapshots from one SteelHead (referenced by serial number) to another. After you’ve a successful migrate operation, the new SteelHead is managed by the SCC and the source settings are deleted.
Figure: Migrate operation on the backup/restore page
You can’t perform a migrate operation between SteelHead CX and SteelHead EX.
For complete migration procedures, see the SteelCentral Controller for SteelHead User’s Guide.
SCC backups and high availability
The SCC can back up its own configuration, appliance snapshots, and statistics to an external file server over NFS, SSH, or CIFS. Choose Administration > Maintenance: External Backup and configure the external file server to use for backup.
Figure: External backup page
In SCC 9.2 and later, you can use a public security key associated with the user instead of a password. Configuring external backups using a public key eliminates the need for password authentication. You can generate a 2048-bit encryption key from the SCC Management Console and then cut and paste the key to your home directory target machine, for example, /u/test/.ssh/authorized_keys.
To restore an SCC from an external backup, choose Administration > Maintenance: External Backup and select a restore type from the Backup Operation (
Figure: Restore an SCC from an external backup).
Figure: Restore an SCC from an external backup
If you want to restore the SCC management IP addresses with those from the external backup configuration, select Restore Primary and Aux network interfaces. This selection is useful if the SCC you want to restore is located in the same data center and on the same subnet as the original SCC. For more information, see
Changing the IP address of a SteelCentral Controller for SteelHead (SCC) at
https://supportkb.riverbed.com/support/index?page=content&id=S13134&actp=search&viewlocale=en_US&searchid=1368563114732.
For details on the SCC external backup process, see the SteelCentral Controller for SteelHead User’s Guide.
You can maintain a second SCC offline as a cold, standby device. If the primary SCC fails and is no longer available, then you can power on the second SCC and configure it through a restore operation from the external backup configuration and data. You can manage all appliances with one SCC.
Note: The SCC doesn’t support true active-active high availability failover. If you use SCC-VE, you can restore a failed host with VMware high-availability features such as vMotion and Distributed Resource Scheduler (DRS). In addition, you can routinely restore external backups from a primary SCC to a secondary SCC to keep their state consistent. This routine restoration allows for a faster switchover in the event that the primary SCC fails.
Use one of the following methods to switch the managed SteelHeads from the primary to the secondary SCC:
• Assign the primary IP address of the primary SCC to the secondary SCC. If the secondary SCC was restored from an external backup of the primary SCC, select Restore Primary and Aux network interfaces. The secondary SCC has the list of managed appliances from the external backup.
• If you’re using automatic registration, update the SCC hostname in the DNS accordingly. The default SCC hostname configured in SteelHeads is riverbedcmc.
• Use the cmc hostname and scc hostname commands on each managed SteelHead to set it to the correct SCC.
Multiple SCCs can’t manage the same SteelHead. When performing a full restore on an SCC on warm standby, there’s potential risk that the standby SCC will take over the management for some SteelHead if there’s a temporary network disruption to the active (primary) SCC connectivity.
Note: Each SCC requires its own set of licenses. You can’t share licenses among difference SCC appliances.
Using the secure vault
You can change user passwords, change the secure vault password, and unlock the secure vault on your managed appliances from the Appliance Operation tab on the Topology > Appliances page (
Figure: Appliance operations).
Figure: Appliance operations
The SteelHead configuration contains sensitive information such as SSL private keys, authentication tokens, and the RiOS data store encryption key. These configuration settings are encrypted on the disk in the secure vault, using AES 256-bit encryption.
Initially, the secure vault is keyed with a default password known only to RiOS. This default password allows the SteelHead to automatically unlock the vault during system startup.
You can change the secure vault password. The SteelHead reboots when you change the secure vault password. The secure vault doesn’t automatically unlock on startup if you’ve changed the default password.
Certain operations such as SSL optimization and RiOS data store encryption, require you to unlock the secure vault.
If you configure the secure vault password through the SCC Change Secure Vault Password page or manage it through the Unlock Secure Vault page, the SCC automatically unlocks the SteelHead secure vault through a secure channel when the SteelHead reboots.
If you want to use the SCC to manage a SteelHead that has a nondefault secure vault password, use the unlock secure vault operation on the Appliances Operations tab on the Appliances page to unlock it. If this operation is successful, SCC automatically stores the appliance secure vault password in the SCC secure vault.
The SteelHead secure vault password is stored in the SCC secure vault. If you change the SCC secure vault password from the default, the vault must be manually unlocked when the SCC boots up.
Certificates stored in the SteelHead secure vault aren’t backed up by the nightly SCC backups. You must create a separate policy to back up the certificates.
Certificates you configure in the SCC policy are stored in the secure vault of the SCC.
REST API access
Choose Administration > Security: REST API Access to display the REST API Access page.
Representational State Transfer (REST) is a framework for API design. REST builds a simple API on top of the HTTP protocol. It is based on generic facilities of the standard HTTP protocol, including the six basic HTTP methods (GET, POST, PUT, DELETE, HEAD, INFO) and the full range of HTTP return codes. You can discover REST APIs by navigating links embedded in the resources provided by the REST API, which follow common encoding and formatting practices.
You can invoke the REST API to enable communication from one Riverbed appliance to another through REST API calls. For example:
• A SteelCentral NetProfiler communicating with a SteelCentral NetShark
• A SteelCentral NetProfiler retrieving a QoS configuration from a SteelHead
For all uses you must preconfigure an access code to authenticate communication between parties and to authorize access to protected resources. You can use an SCC policy to configure the Rest API Access Code on a managed appliance.
For more information about the SteelHead REST API, see the SteelHead Management Console User’s Guide and the SteelHead REST API Guide.
Using management ACLs
The SCC supports the Management ACL. The Management ACL enables you to restrict access to the SCC management functions by limiting network access. You configure rules to accept or reject packets that match specific source IP addresses, subnets, or ports.
For details on configuring the Management ACL, see the SteelCentral Controller for SteelHead User’s Guide. For details on SSL and SCC, see the SteelHead Deployment Guide - Protocols.
Managing licenses using the SCC
The SCC can manage licenses on SteelHead and SteelHead Interceptors.
To view licenses for an appliance on the SCC
1. Open the Appliances page.
2. Select the desired appliance.
3. Select the Appliance Pages tab.
4. Select Licenses (it is highlighted).
You can add or remove licenses from this page (
Figure: Licenses page). License information doesn’t populate until you perform the fetch operation on the Appliance Pages. Alternatively, you can configure the SCC to fetch licenses from the Riverbed licensing portal.
Figure: Licenses page
Note: The SCC doesn’t delete any licenses on the appliance. You can push licenses to the SteelHead even if you haven’t fetched appliance information.
Figure: Fetch operation shows the fetch operation. The SCC doesn’t automatically fetch the licenses from the SteelHeads. Click
Fetch Appliance Configuration to fetch licenses (and other appliance-specific information).
Figure: Fetch operation
Using the SCC for Interceptor management
SteelHead Interceptor management is supported by SCC 8.5 or later. From a topology and functional point of view, SteelHead Interceptors work in conjunction with SteelHeads. The topology you choose for your Interceptor and SteelHeads defines how you configure the function of your SteelHead Interceptor. The SCC enables you to manage all SteelHead Interceptor configurations in one centralized location. You can manage SteelHead Interceptors as individual appliances or as part of a SteelHead and SteelHead Interceptor cluster.
We recommend that you use the SCC Cluster Configuration Wizard to configure SteelHead and SteelHead Interceptor clusters instead of individually configuring each appliance. When you use the Cluster Configuration Wizard, you streamline and simplify the configuration and avoid mistakes.
If there are configuration parameters of the SteelHead Interceptors that aren’t directly related to the cluster, you can use the SCC to configure these as policies. You configure SteelHead Interceptors that aren’t in clusters the same way you configure SteelHeads—define policies and apply them to a SteelHead Interceptor or groups of SteelHead Interceptors.
The SCC doesn’t support VLAN segregation in Interceptor 4.0 or later.
For more details on SteelHead and SteelHead Interceptor clusters, see
Appliance Clusters. For more general information about the SteelHead Interceptor, see the
SteelHead Interceptor User’s Guide and the
SteelHead Interceptor Deployment Guide. For details on how to configure the SteelHead Interceptor and the SCC, see the
SteelCentral Controller for SteelHead User’s Guide.
SCC bandwidth consumption
In a steady state, the SCC is continuously gathering statistics and state information from managed appliances. Anywhere from 25 to 150 KB of data once every five minutes is gathered from the appliance.
Operations that are bandwidth intensive include configuration pushes and upgrades. A configuration push can send up to 2 to 3 MB to each appliance. When performing upgrades on SteelHeads, the SCC has to transfer the software image. The images are typically around 85 MB in size.
Application statistics
SCC 9.1 and later include application statistics. Application statistics provide an additional application visibility component. With application statistics you can view a report based on the top ten used applications traversing a SteelHead. The report shows you the number of bits per second that a certain application has incurred over a one-week period in one-hour increments. The report displays optimized traffic, pass-through traffic, and combined totals for the observed period.
For more information about application statistics, see the SteelCentral Controller for SteelHead User’s Guide.
Note: Application statistics data collection from SteelHeads might lag a few hours for an SCC managing more than 500 SteelHeads running RiOS 9.1 or later.
Application statistics leverages the Riverbed Application Flow Engine (AFE) for determining the top applications instead of relying on raw destination IP addresses and port numbers. The report displays the actual WAN traffic as reported by the independent SteelHeads.
Note: Application statistics doesn’t track custom applications. Only applications that are a part of AFE are shown.
Before you configure application statistics, you must define the topology—in that the SteelHeads must already belong to a predefined site. Multiple SteelHeads, as part of a single site have their data combined and displayed on a per-site perspective as opposed to a per-SteelHead perspective.
Application statistics configuration requires SCC 9.1 or later and RiOS 9.1 or later.
To configure application statistics
1. Configure the topology and sites accordingly.
Figure: Stats collection page
3. Select Enable Stats Collection.
4. Click Save.
5. Select the Site or Site Types from which you want to gather application statistics.
6. Click Push.
Figure: Select site or site types
The SteelHead starts to collect application statistics immediately after it is enabled with a policy push. These statistics are rolled up into an hourly average reading on the SteelHead and polled hourly by the SCC. You must allow for a short period of time to pass after configuration before you can see the statistics appear on the SCC.
Figure: Top applications repor
t
You can verify if application statistics is enabled on a SteelHead by running the following command on individual SteelHeads:
sh2 > show appstats
Application Statistics:
Enabled: yes
Resolution: 300
Rollup: AVERAGE
Consider the following restrictions when configuring application statistics:
• Application statistics is not supported in out-of-path deployments.
• In virtual in-path deployments, subnet side rules are required for proper pass-through traffic statistic collection.
• Application statistics supports IPv4 only.
• There’s a 10 to 15% CPU penalty in high connection setup rate conditions.
Using the SCC upgrade and downgrade appliance wizard
SCC 8.6 and later include a wizard to upgrade and downgrade SteelHead RiOS images. Several tasks are involved to upgrade and downgrade:
1. Specify the image library.
2. Configure upgrade or downgrade job.
3. Configure the reboot job parameter, which enables that image to run on the specific appliance.
Each specific task has its own dashboard as shown in
Figure: Specify the image library.
Figure: Specify the image library
Use the following methods to identify the image libraries available for use:
• Host the images stored locally - Local image storage is a process in which you can upload various RiOS images to the local storage of the SCC. You either browse a directory to the image or use a URL to the image and upload it to the SCC. When you use this method, the SCC holds the various images and makes them available for distribution to various other appliances according to the upgrade job parameters.
• Customer-defined URL links - Instead of locally storing the images on the SCC itself, you can provide a URL link to which various images are located. This method doesn’t upload the images to the SCC locally but serves as a trusted pointer to an available remote link.
• Integrate available images directly from Riverbed Support - The SCC validates (according to the software entitlement program) available images for use with any of the managed devices in its inventory. This method provides all the images available that the SteelHead can access from the Riverbed Support portal. You can download the chosen image directly to the SteelHead; however, you can’t store the image locally on the SCC.
Use the Jobs Wizard to guide you through the process. Consider the outcome you want to achieve prior to starting the wizard: for example, upgrading a certain set of appliances to a certain code version. To open the Jobs Wizard, choose Manage > Upgrades: Upgrade Appliances (or Downgrade Appliances) > Launch new upgrade job....
Figure: Jobs wizard
The Jobs Wizard guides you to:
1. choose the product to upgrade: for example, SteelHead, SteelHead EX, or SteelHead Interceptor.
2. target the product version (this information is provided from the image library result of the previous task).
3. select the appliances (the Jobs Wizard displays available licenses compatible with choices selected).
4. choose the upgrade settings: for example, notes about the upgrade job, upgrade time, reboot options, and so on.
5. view the summary page to review your selections.
6. initiate the upgrade or downgrade job.
The downgrade image must exist locally on the SCC or referenced as a customer-defined URL. You can’t point to referenced images on the Riverbed Support site for downgrade jobs.
Configuring and Using the SCC as a Certificate Authority Service
You can enable a certificate authority (CA) service in SCC 8.6 and later. You can configure the SCC CA as a private root CA or an intermediate CA that is trusted within your organization. The SCC CA service enables you to issue the following certificates to SteelHeads:
• Secure peering certificates
• Proxy certificates for SSL optimization (starting from SCC 9.5 and later)
• Web proxy certificates for HTTPS traffic proxy. For details, see
Web Proxy. As a SteelHead deployment size increases, independently managing certificates for secure protocol optimization and HTTPS web proxy can be a daunting and time-consuming task. The SCC CA service offers you a method to simplify, streamline and automate this task from a central console. Using the SCC CA service, you would be able to:
• Easily manage and issue secure peering certificates to SteelHeads.
• Simplify the task of configuring secure peering trust relationships between SteelHeads for secure protocol optimization.
When you replace the secure peering certificate on a SteelHead with one issued by the SCC CA, and use the SCC to configure the secure peering trust relationship, the SCC CA is configured as a trusted entity on the SteelHead. This allows the SteelHead to automatically trust all peers that have a secure peering certificate issued by the same SCC CA, and eliminates the need to configure the secure peering trust by trusting a SteelHead peer one at a time
• Automate the issue of proxy certificates for SSL optimization.
• Automate the issue of web proxy certificates for HTTPS traffic proxy.
• Increase operational efficiency by centrally managing and issuing certificates for secure protocol optimization and HTTPS web proxy
Note: You can't submit a Certificate Signing Request (CSR) to have a certificate signed by the SCC CA through the SCC Management Console. The SCC CA can only be used to issue certificates and implicitly signs all certificates that it issues. Using and trusting only CA-signed certificates increases the security of your SteelHead installation.
This section describes how to use the SCC to complete these tasks:
To enable the SCC CA service
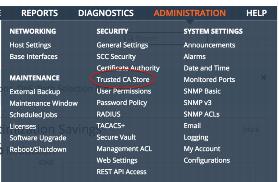
1. From the Management Console, choose Administration > Security: Certificate Authority.
2. Select Enable/disable the certificate authority and click
Apply (
Figure: SCC CA).
Figure: SCC CA
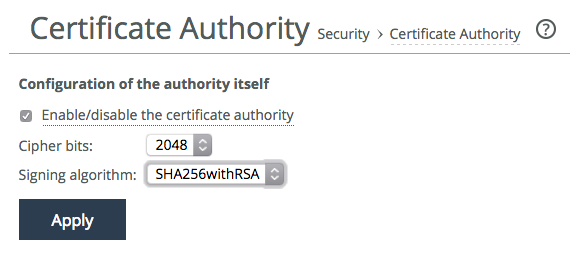
Note: Many any vendors are phasing out the support of SHA-1 certificates and it is recommended that you do so as well. A cipher bits of 2048 or higher setting is also recommended.
3. If you’re using the SCC CA as a root CA, generate the root CA certificate using the next step.
Figure: Generate keys and certificate
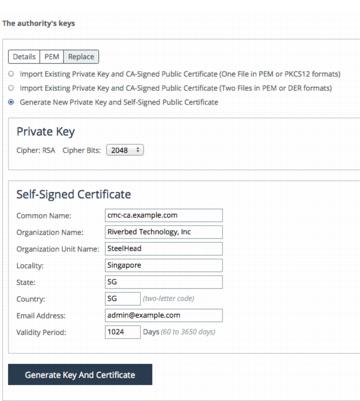
If you’re using the SCC CA as an intermediate CA, import the root CA certificate into the Trusted CA Store. The Trusted CA Store is used only by the SCC CA service for the purpose of certificate chaining to establish itself as an intermediate CA.
5. To import the root CA into the Trusted CA Store choose Administration > Security: Trusted CA Store.
Figure: Trusted CA Store
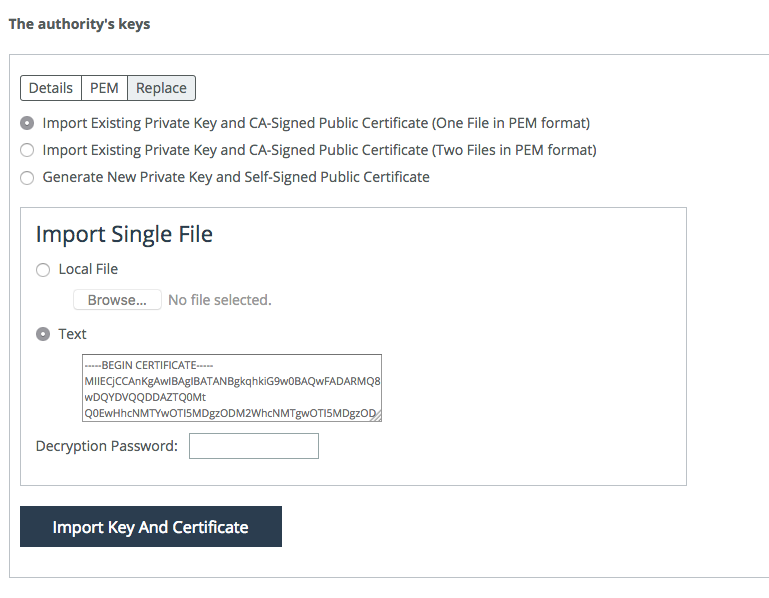
Next, import the intermediate CA certificate and private key in PEM format into the SCC CA service.
6. To import the intermediate CA and private key, choose Administration > Security: Certificate Authority and click Replace.
Figure: Importing the intermediate CA
Note: You can only enable the SCC CA service as an intermediate CA starting from SCC 9.5 and later.
Note: You can also import the entire certificate chain through the SCC CA service. The intermediate CA certificate must be the first certificate in the chain. The root CA certificate will not be automatically installed into the Trusted CA Store.
To use the SCC CA service to issue a secure peering certificate
1. From the Management Console, choose Manage > Topology: Appliances.
2. Select Appliance Operations.
Figure: Appliance operation page
4. Specify the certificate details.
5. Select the appliance in which you want to replace the secure peering certificate and click Replace.
The secure peering certificate on the SteelHead is not replaced until a Push operation is completed.
6. Select Push Policies from the drop-down menu.
Figure: Push policy page
8. From the Management Console, choose Manage > Operations: Operations History to verify that the operations are successful.
9. From the Management Console, choose Administration > Security: Certificate Authority to view the peering certificate issued by the SCC CA (
Figure: Certificate history).
Figure: Certificate history
10. From the SteelHead Management Console, verify that the secure peering certificate has been replaced.
Note: The SCC CA is automatically configured as a Trusted Entity only when an SCC secure peering policy is pushed to a SteelHead. The policy must include a peer SteelHead that has a secure peering certificate issued by the SCC CA.
For more information about SSL, see the SteelHead Deployment Guide - Protocols.
To use SCC to configure secure peering relationships
1. From the Management Console, choose Manage > Services: Policies.
3. Click Add.
Figure: Add policy page
4. Select Add/Remove Pages.
Figure: Add/Remove policy
6. Edit the Secure Peering (SSL) policy to configure a Trusted Peer SteelHead and click
Apply (
Figure: Editing policy).
Figure: Editing policy
7. Ensure that this policy page is included in the policy push.
Figure: Include setting in policy push
9. Choose Manage > Topology: Appliances to associate the policy with the SteelHead.
10. From the Appliance Operation page, select Push Policies from the drop-down menu, and push the policy to the SteelHead (
Figure: Pushing policy).
Figure: Pushing policy
11. Choose Manage > Operations: Operations History to verify that the operation is successful.
12. Verify from the SteelHead that the SCC CA is configured as a Trusted Entity.
This SCC CA is configured as a Trusted Entity on the SteelHead only if the peer SteelHead has a secure peering certificate that’s issued by the SCC CA (
Figure: SCC CA on the SteelHead).
Figure: SCC CA on the SteelHead
Note: We recommend that you maintain a uniform and consistent operational policy by using only one type of secure peering certificates across all your SteelHeads.
Using the SCC CA service to issue proxy certificates for SSL optimization
You can use the CA service of SCC 9.5 or later to perform these two functions for SSL optimization:
• Automate the issue of proxy certificates for bypassed servers.
• Issue proxy certificates.
Before SCC 9.5, you can only use the SCC to import a proxy certificate or to generate a self-signed proxy certificate.
To use the SCC CA service to issue a proxy certificate for bypassed servers
1. From the Management Console, choose Manage > Policies.
2. Add a new policy.
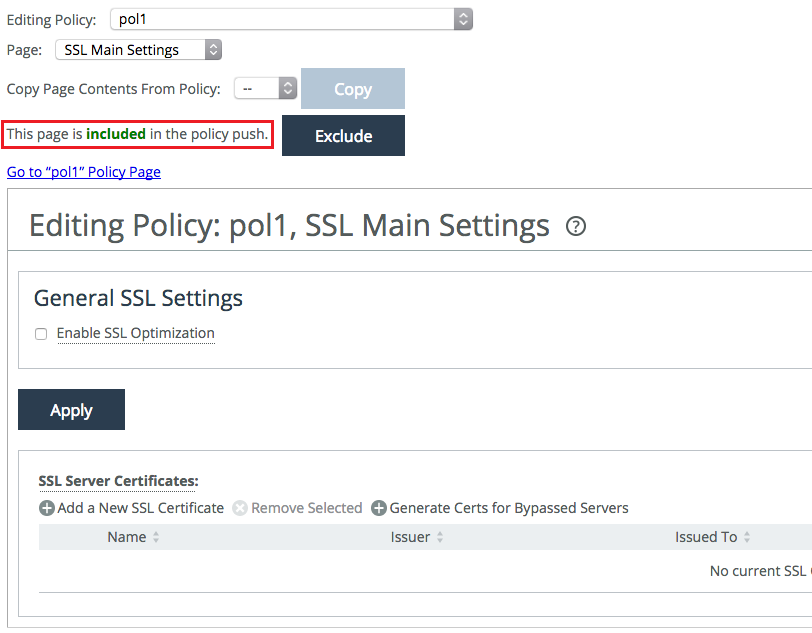
3. Add the SSL Main Settings page to the policy.
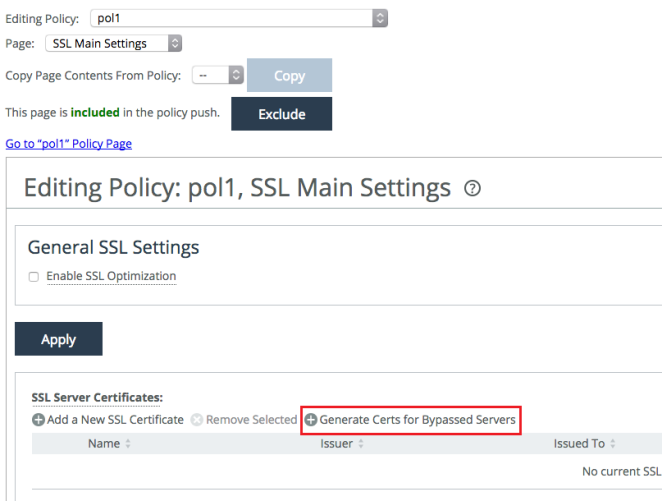
4. Edit the SSL Main Settings page and include it in the policy push.
Figure: Editing SSL Main Settings page
5. From the Management Console, choose Manage > Appliances.
6. Associate the SteelHead appliances to the policy.
Figure: Associating appliance to a policy
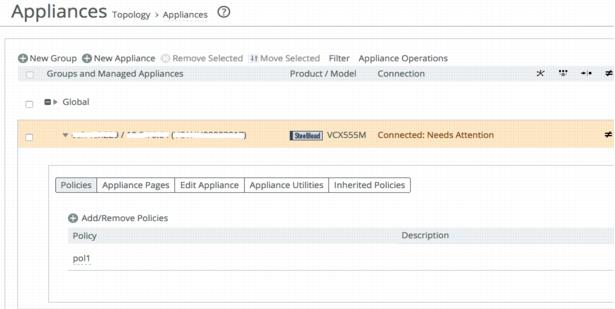
7. From the Management Console, choose Manage > Policies and go back to the policy.
8. Edit the SSL Main Settings page of the policy and select Generate Certs for Bypassed Servers.
Figure: Selecting Generate Certs for Bypassed Servers in the policy
Note: A new service on SCC queries the SteelHead once every 6 hourly for the list of bypassed SSL servers. This list is displayed when you select Generate Certs for Bypassed Servers.
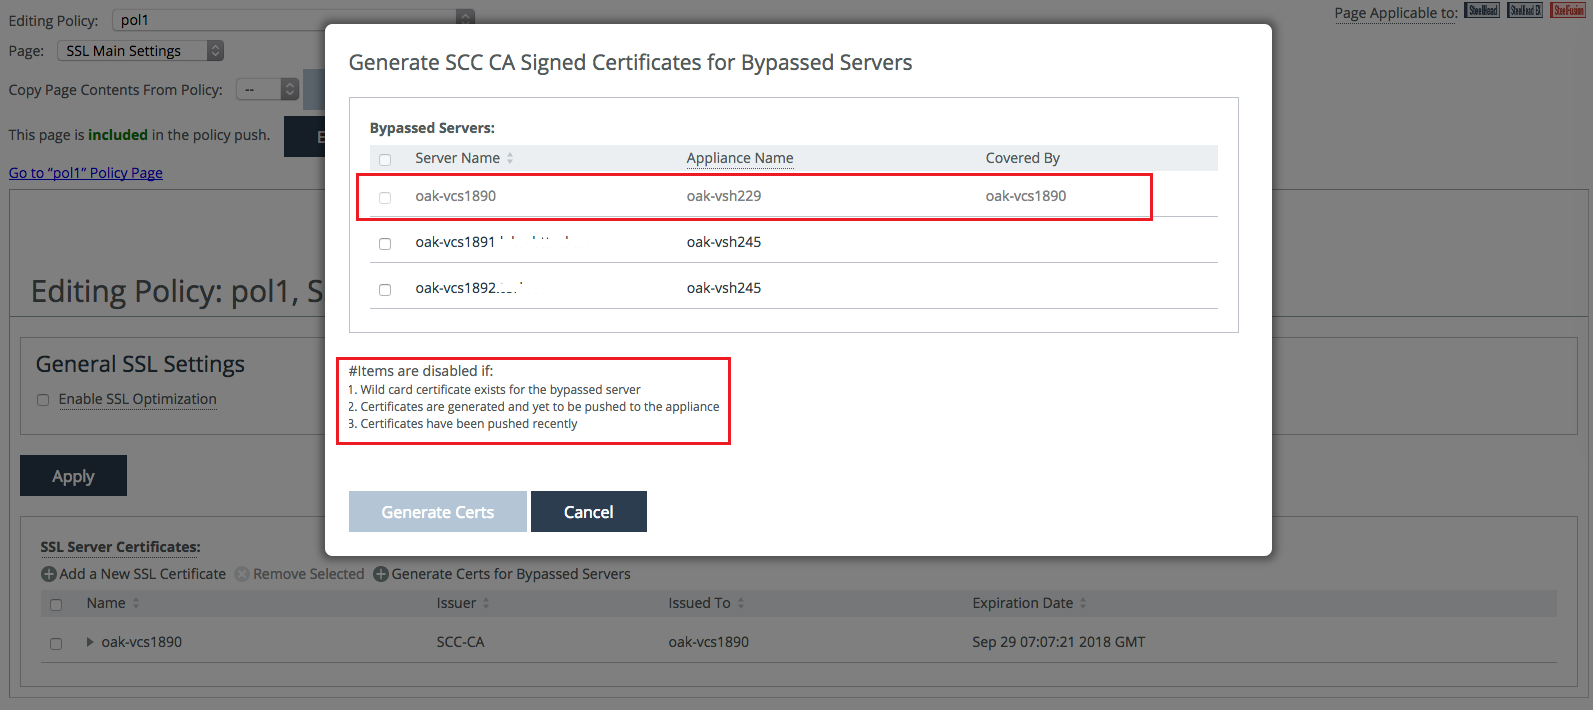
9. Select the bypassed server(s) that you would like to issue a proxy certificate for and click Generate Certs.
Figure: Selecting bypassed servers

Note: To generate proxy certificate using Generate Certs for Bypassed Servers wizard, the SCC CA certificate must have a validity of greater than 60 days.
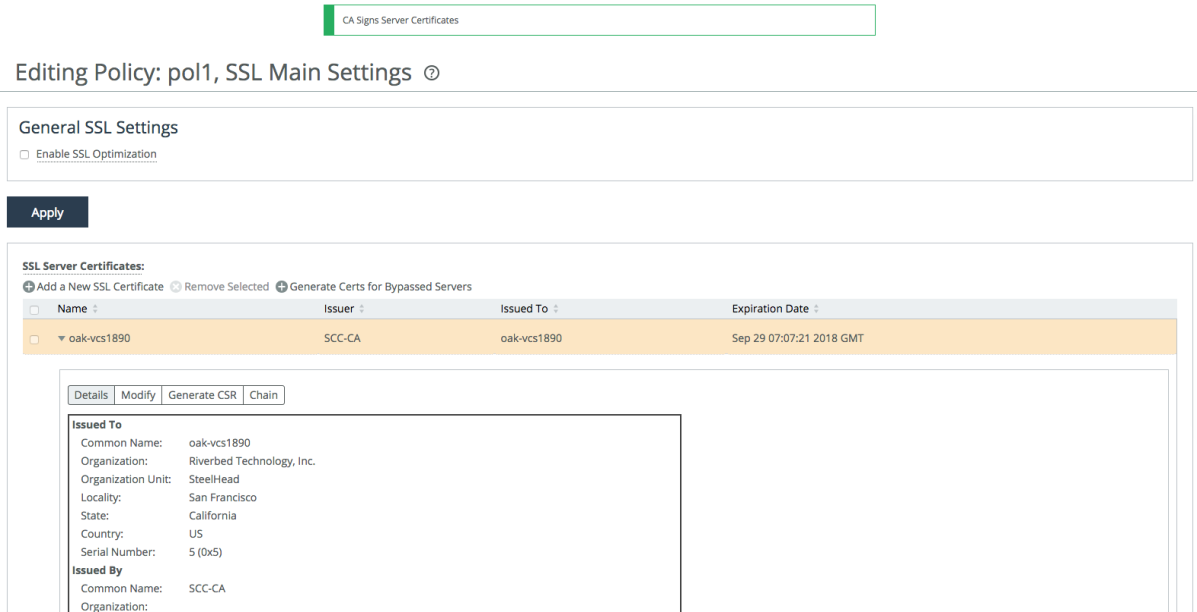
10. Verify that the Proxy Certificate is successfully generated.
Figure: Verifying the proxy certificate is generated
11. At this point, if you click Generate Certs for Bypassed Servers once again, you will see that the server that you have just generated a proxy certificate is grayed out. This means that the proxy certificate is awaiting a push operation to the SteelHead.
Figure: Greyed-out servers
12. From the Appliance Operation page, select Push Policies from the drop-down menu, and push the policy to the SteelHead.
13. Choose Manage > Operations: Operations History to verify that the operation is successful.
To use the SCC CA service to issue a proxy certificate for SSL optimization
1. It is also possible to use the SCC CA service to simply issue a proxy certificate.
Figure: SCC CA signed proxy certificate
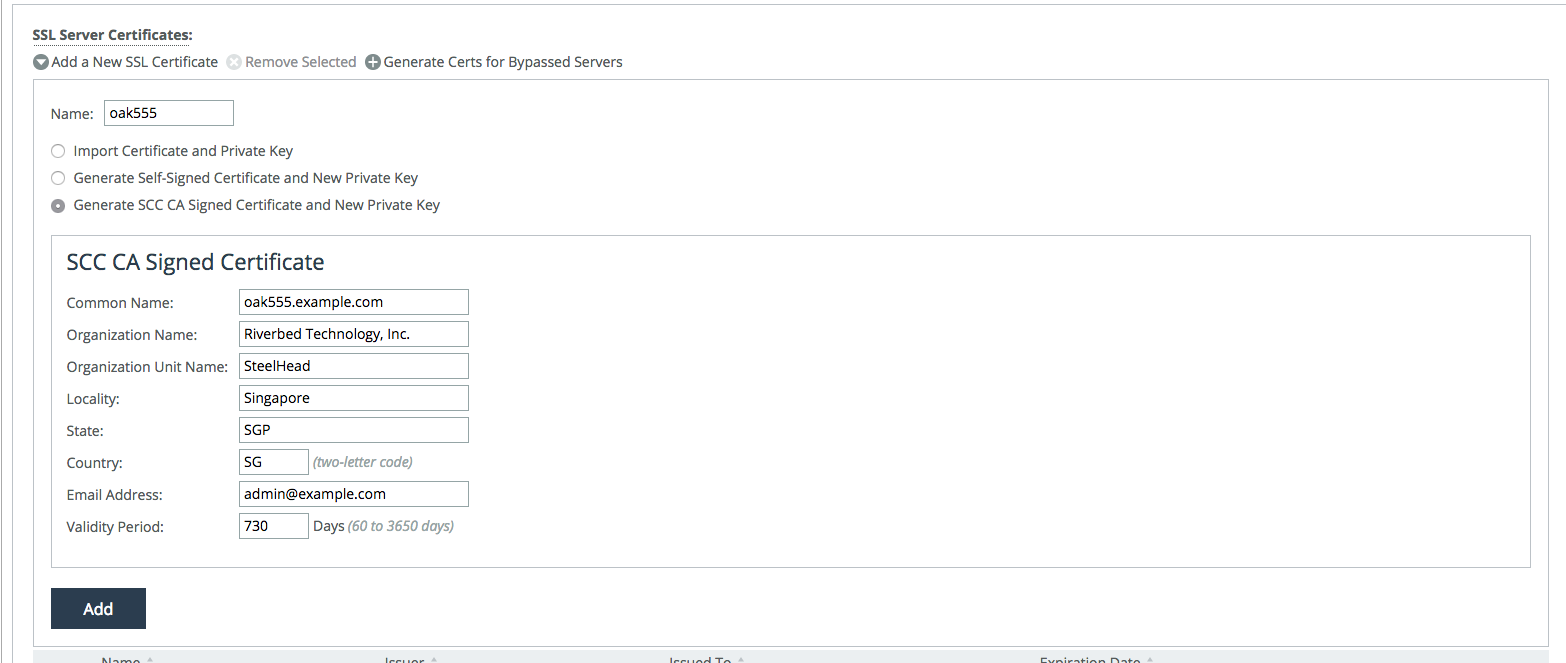
Note: As with all SCC policy push operations, the existing settings of the managed SteelHead appliance are replaced with that of the SCC policy. When a policy is used to manage the proxy certificates on a SteelHead, any proxy certificates that are installed locally on the SteelHead but not in the SCC policy will be lost after the policy push. We recommend that you review the proxy certificates that are already installed in the SteelHead and copy them to the SCC, if necessary, before you perform a proxy certificate push operation from the SCC.