Monitoring and Managing the Appliances with BMC
The SteelFusion Edge appliances include Baseboard Management Controller (BMC) support for the RiOS node.
The BMC monitors the physical state of the appliance. The BMC tracks system and network watchdogs, error logs, and sensors. The sensors of a BMC measure internal physical variables such as temperature, power settings, voltage levels, and fan speeds. You can configure alerts for activity detected outside specified limits.
The BMC also lets you start, restart, and turn off the appliance remotely.
This appendix provides an overview of the features of the BMC on the SteelFusion Edge appliances. It includes the following sections:
Note: This appendix describes some of the key features of the BMC. For complete details about each page, log in to the BMC and click the Help icon in the upper-right corner.
Setting up the BMC for initial access
Before you can access the BMC, you need to configure its network settings.
Note: Use the AUX port on your appliance for BMC access.
To configure the BMC on a SteelFusion Edge through the CLI
• Enable DHCP on the remote management port using the remote dhcp command:
amnesiac (config) # remote dhcp
• Set up a static network configuration using the remote ip address, remote ip netmask, and remote ip default-gateway commands.
The BMC address can be on a different subnet than the appliance. (Make sure that the routers are configured to support a different subnet.)
To verify the network configuration
• Enter the show remote ip command:
amnesiac (config) # show remote ip
DHCP: Enabled
IP Address: 192.168.229.185
Netmask: 255.255.255.0
Gateway: 192.168.229.1
Mac Address: 99:0e:b6:b0:2e:2f
Logging in to the BMC
The BMC provides a Web interface for monitoring and management. You can access this interface through HTTP or HTTPS.
To connect to the BMC Web interface
1. In a Web browser, enter the IP address for the BMC management port.
To display the BMC IP address, from the SteelFusion Edge command line use the show remote ip command.
2. If the connection is not trusted (possibly using a self-signed certificate), you are prompted to add and confirm a security exception.
The default user name is root; the default password is superuser.
Figure: BMC log in page
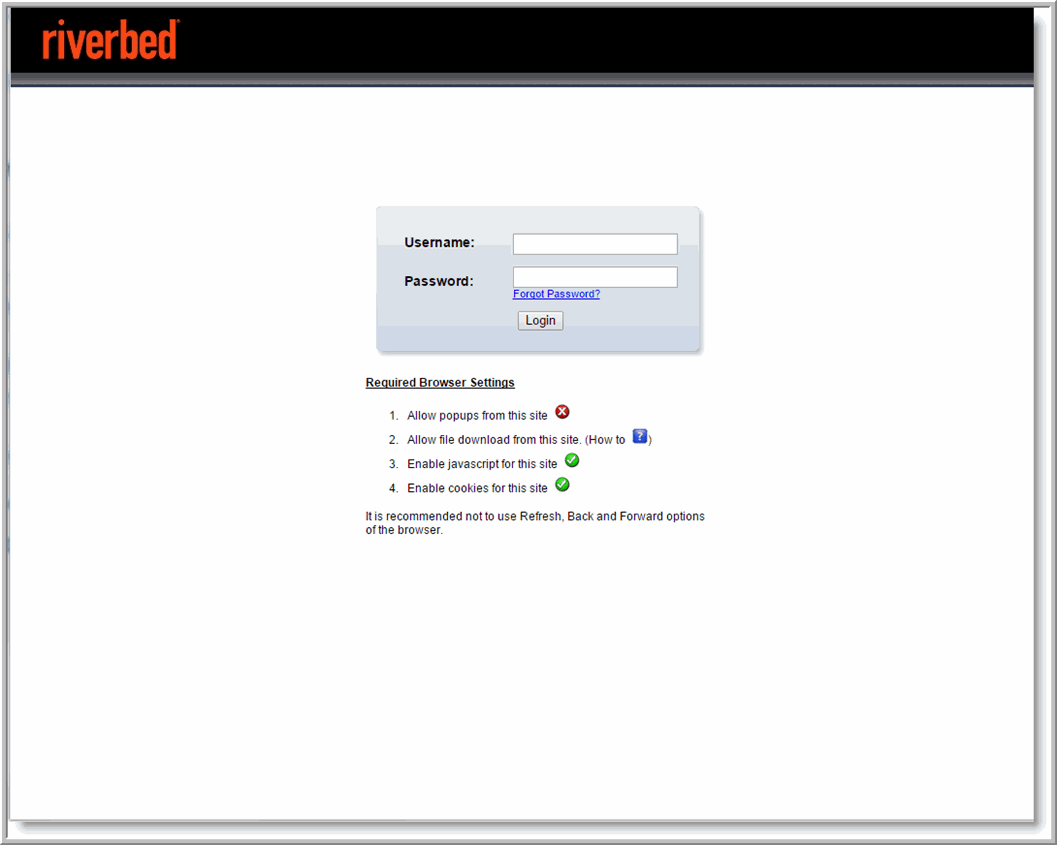
Allow pop-ups in your browser in order to log in.
Using the BMC Dashboard
When you log in, the BMC Dashboard appears and displays appliance information. (See
Figure: BMC Dashboard page.) The dashboard gives overall information about the status of the appliance and remote server.
Figure: BMC Dashboard page
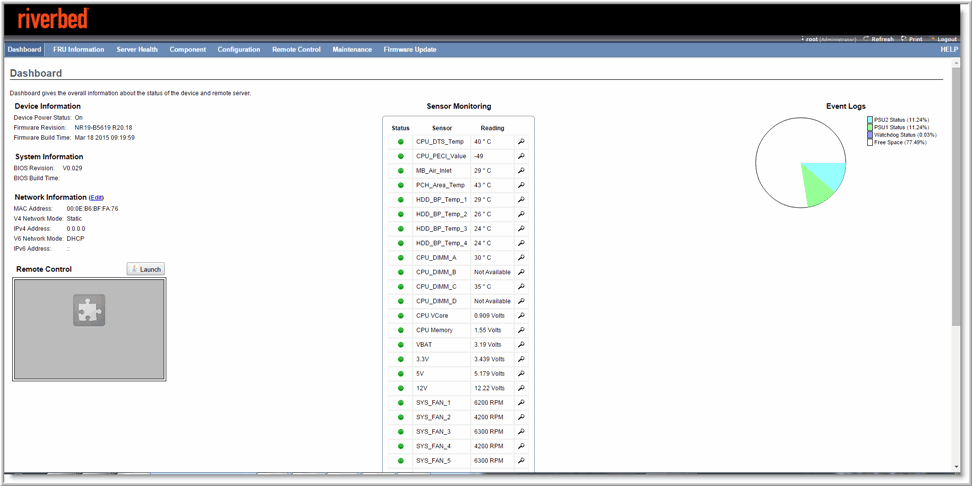
The dashboard displays an overview of the appliance status. The dashboard provides the following information:
• Device Information - Displays the firmware revision and date and time of the build for the BMC firmware.
• System Information - Displays the BIOS revision and date and time of the build for the
BMC firmware.
• Network Information - Displays network settings for the BMC. Click Edit to make any changes.
• Remote Control - Allows you to access the appliance console.
• Sensor Monitoring - Lists the appliance sensors with information such as a status icon, name, and reading. Click the magnifying glass to view the details for the sensor.
There are three possible status icons for a sensor:
– A green dot indicates a Normal state.
– A yellow exclamation mark indicates a Warning state.
– A red x indicates a Critical state.
• Event Logs - Provide a graphical representation of all events incurred by the sensors and available space in logs. Click an icon in the legend of the chart to view details of each type of event.
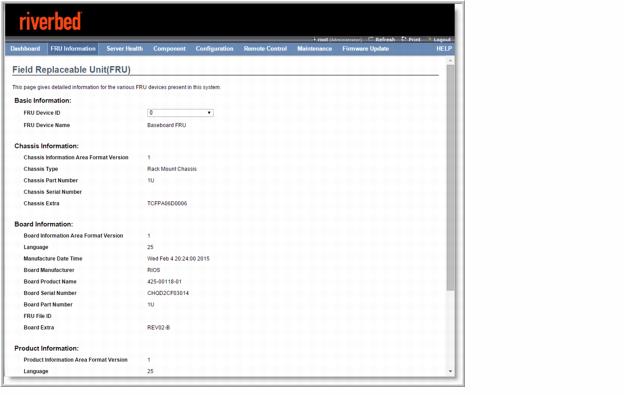
Viewing field-replaceable unit information
The FRU information page displays chassis, board, and product information. (See
Figure: FRU information.)
Figure: FRU information
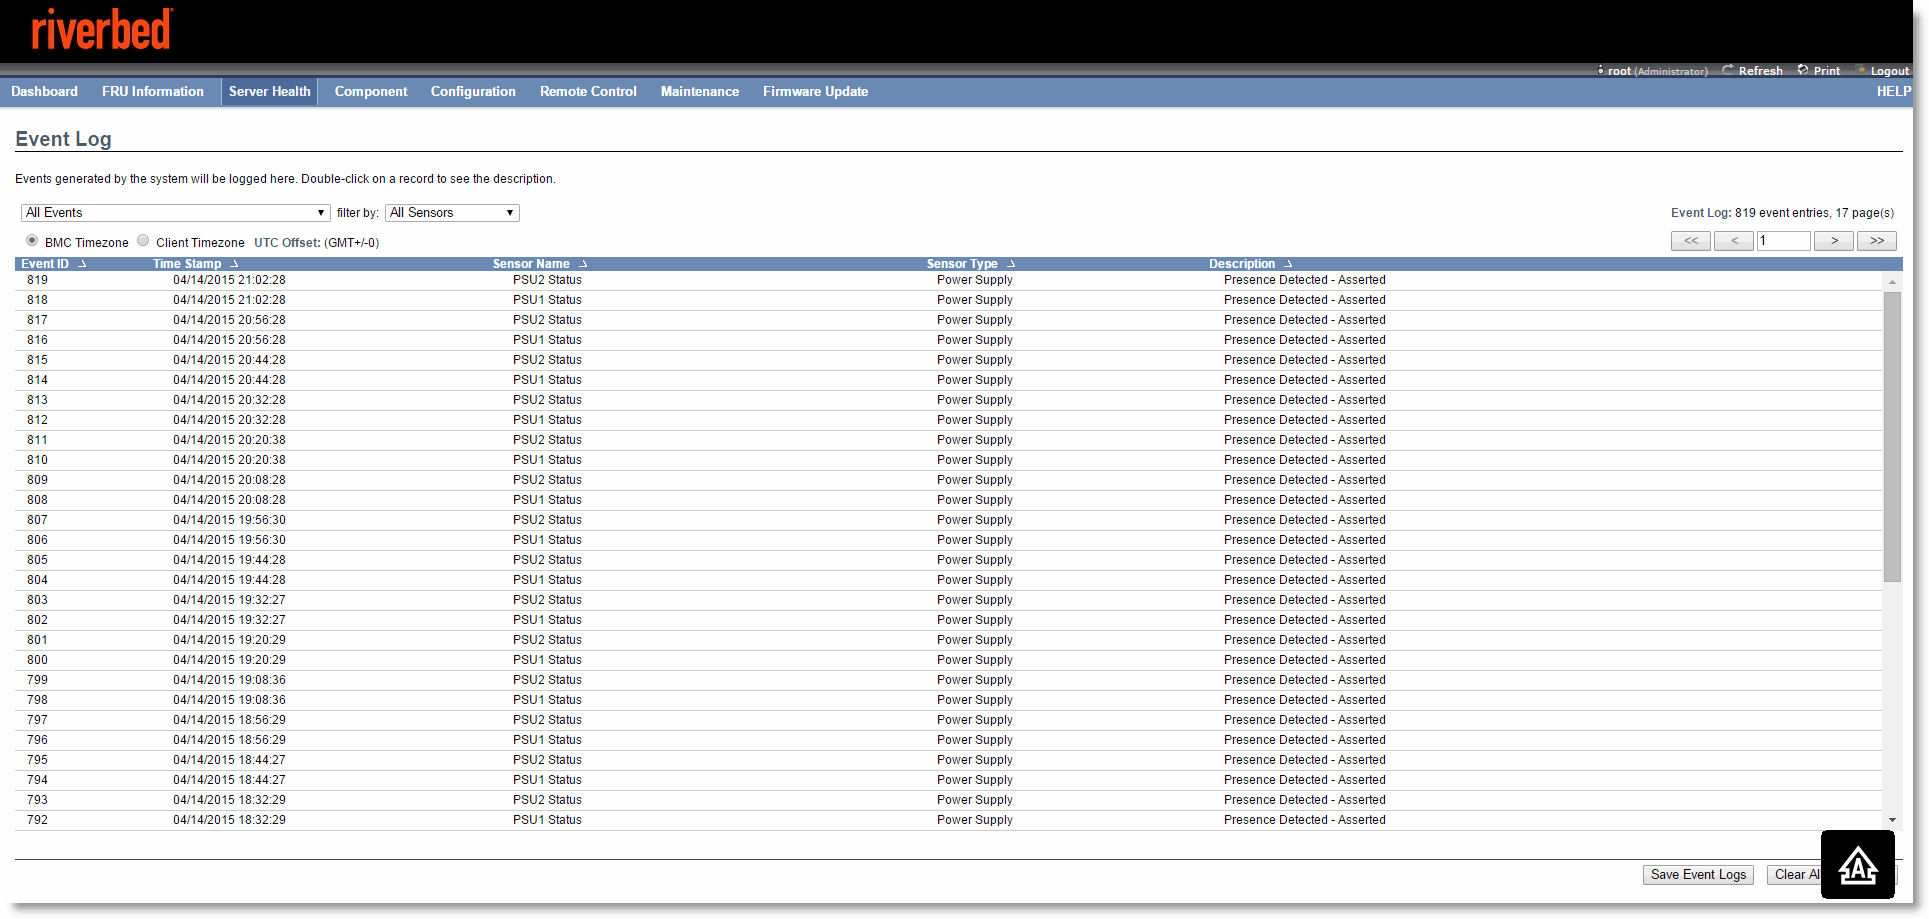
Viewing event logs
Choose Server Health > Event Log to display a list of events incurred by different sensors on this device. Double click a record to see additional details. You can also sort the list of entries by clicking any of the column headers. (See
Figure: Event log.)
You can use the sensor type or sensor name filter options to view specific events logged in the appliance.
Figure: Event log
Configuring the network
Initially, you configure the network settings for the BMC through the appliance CLI. You can use the Configuration > Network page to manage or change the settings.
Note: RiOS will not recognize an IP address change made in the BMC. Use the appliance CLI to change the IP address used to connect to the BMC module.
To change the network settings
1. Choose Configuration > Network.
2. Complete the configuration as described in this table.
Control | Description |
LAN Interface | Select the LAN interface to configure. |
LAN Settings | Check this option to enable LAN support for the selected interface. |
MAC Address | This read-only field displays the MAC address of the selected interface. |
Obtain an IP address automatically | Enable Use DHCP to dynamically configure the IP address using Dynamic Host Configuration Protocol (DHCP). |
IPv4 Address, Subnet Mask, Default Gateway | If DHCP is disabled, specify a static IP address, Subnet Mask, and Default Gateway for the selected interface. |
IPv6 Settings | Check this option to enable IPv6 support for the selected interface. |
Subnet Prefix length | Specify the subnet prefix length for the IPv6 settings. Value ranges from 0 to 128. |
VLAN Settings | Check this option to enable VLAN support for the selected interface. |
VLAN ID | Specify the Identification for VLAN configuration. Value ranges from 2 to 4094. VLAN ID 0, 1, and 4095 are reserved VLAN IDs. You cannot change the VLAN ID without resetting the VLAN configuration. |
VLAN Priority | Specify the priority for VLAN configuration. Value ranges from 1 to 7. (7 is the highest priority for the VLAN.) |
3. Click Save.
You are prompted to log out of the current session and log back in at the new IP address.
4. Click Reset to revert the changes.
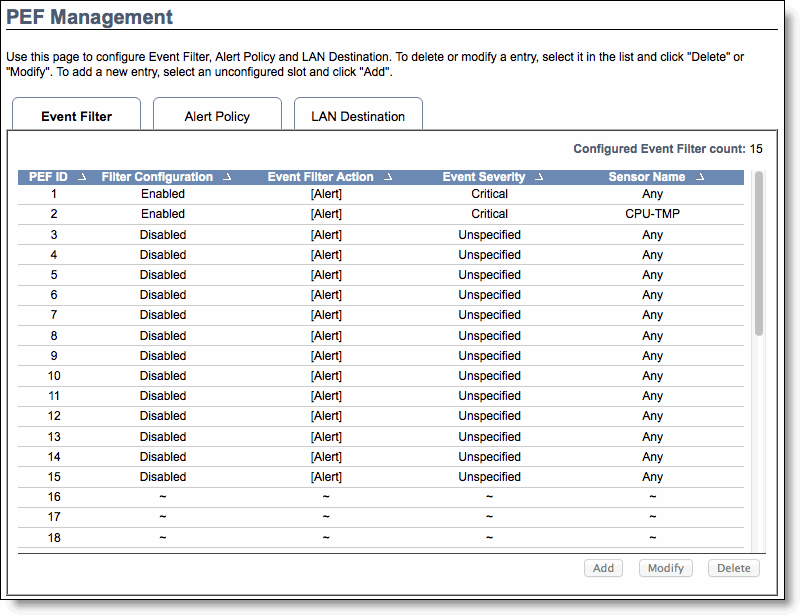
Configuring Platform Event Filtering
You can use the Configuration > PEF page to manage the Platform Event Filtering settings. You can configure the Event Filter, Alert Policy, and LAN Destination for alerts. (See
Figure: Platform Event Filtering.)
To view the page, you must at least be an Operator. To modify or add a PEF, the user must be an administrator.
The PEF page lets you configure the following:
• Event Filter - Select the Event Filter tab to display configured event filters and available slots. You can modify or add new event filter entry. By default, 15 event filter entries are configured among the 40 available slots.
• Alert Policy - Select the Alert policy tab to show configured Alert policies and available slots. You can modify or add a new alert policy entry from here. A maximum of 60 slots is available.
• LAN Destination - Select the LAN Destination tab to show configured LAN destinations and available slots. You can modify or add a new LAN destination entry. A maximum of 15 slots is available.
A tilde character (~) indicates a free slot.
Figure: Platform Event Filtering
To add a new entry
• Select a free slot and click Add. Alternatively, double click a free slot.
To modify an entry
• Select a configured entry and click Modify. Alternatively, double click the entry.
To delete an entry
• Select the entry to be deleted and click Delete.
Configuring users
You can view and manage users with access to the BMC in the Configuration > Users page. The page shows all configured users and available spaces. To view the page, you must have operator privileges.
You can set up 10 users, including the defaults of admin and anonymous. To modify or add a user, you must have administrator privileges. (See
Figure: User configuration.)
Figure: User configuration
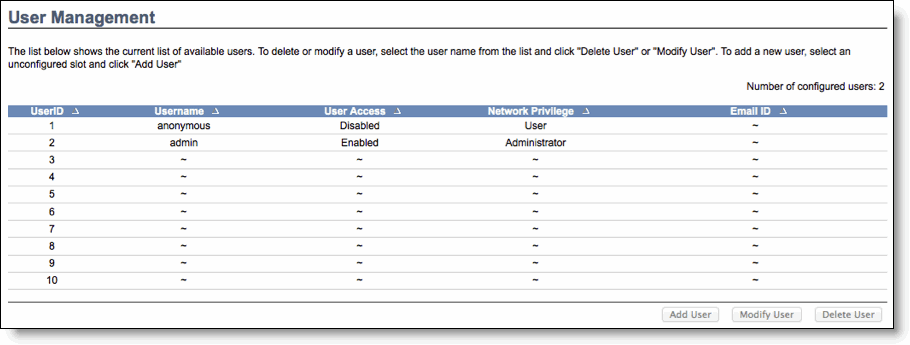
A tilde character (~) indicates a free slot.
To add a user
• Select a free slot and click Add User. Alternatively, double click a free slot.
To modify a user
• Select a configured user and click Modify User. Alternatively, double click the user.
To delete a user
• Select the user to be deleted and click Delete User.
Configuring SSL
You can use SSL to access the BMC in a secure mode. You can upload a certificate and private key file into the BMC or you can generate an SSL certificate based on configuration details.
To upload a certificate and private key
1. Choose Configuration > SSL and select the Upload SSL tab.
The Current Certificate and Current Privacy Key appear with the date and time of the upload.
Figure: Upload SSL certificate
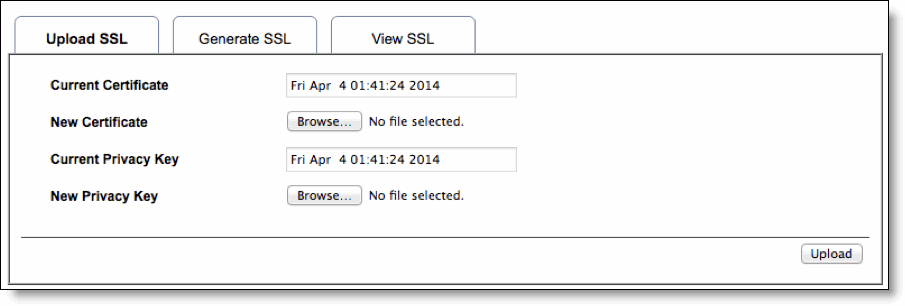
2. Click Browse and navigate to the certificate and privacy key file.
The file needs to be a PEM file.
3. Click Upload to transfer the SSL certificate and privacy key to the BMC.
Once uploaded, the HTTPS service restarts and begins using the uploaded SSL certificate.
4. Restart your browser to begin using the new certificate.
You can view the certificate details in the View SSL tab.
If this is a self-signed certificate, you need to add the certificate to the trusted list of certificates for your browser.
To generate an SSL certificate
1. Choose Configuration > SSL and select the Generate SSL tab.
Figure: Generate SSL certificate
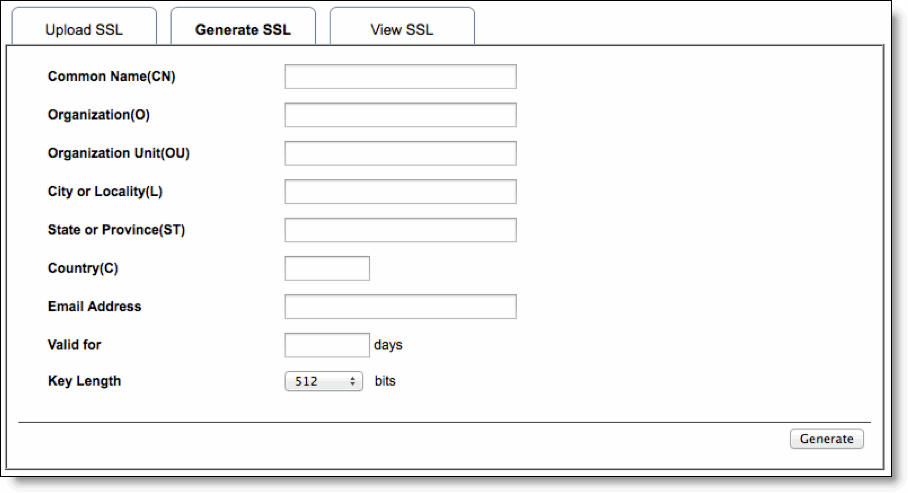
2. Complete the configuration as described in this table.
Control | Description |
Common Name (CN) | Specify a common name for the certificate. The name can contain up to 64 alphanumeric characters. Special characters # and $ are not allowed. |
Organization (O) | Specify the organization name for the certificate. The name can contain up to 64 alphanumeric characters. Special characters # and $ are not allowed. |
Organization Unit (OU) | Specify the organization section unit name for certificate. The name can contain up to 64 alphanumeric characters. Special characters # and $ are not allowed. |
City or Locality (L) | Specify the city or locality. The name can contain up to 64 alphanumeric characters. Special characters # and $ are not allowed. |
State or Province (ST) | Specify the state or province. The name can contain up to 64 alphanumeric characters. Special characters # and $ are not allowed. |
Country (C) | Specify the country code. This must be two characters. Special characters are not allowed. |
Email Address | Specify the email address of the organization. |
Valid for | Specify the number of days the certificate is valid. Value ranges from 1 to 3650 days. |
Key Length | Choose the key length bit value of the certificate. |
3. Click Generate to create a new SSL certificate.
The HTTPS service restarts and begins using the new SSL certificate.
4. Restart your browser to begin using the new certificate.
You can view the certificate details in the View SSL tab.
Controlling the Power
You can reboot or restart the appliance from the BMC. The page also shows the current status of the appliance.
To reboot, restart, or power on the appliance
1. Choose Remote Control > Server Power Control.
2. Select one of the following power control options:
– Reset Server - Reboot the system without powering off (warm boot).
– Power Off Server - Immediate - Immediately power off the SteelHead.
– Power Off Server - Orderly Shutdown - Shut down the operating system and then power off the SteelHead.
– Power On Server - Select this option to power on the SteelHead.
– Power Cycle Server - Power off and then reboot the appliance (cold boot).
– Power Button
3. Click Perform Action.
Changing the BMC administrator password
The System Administrator page lets you change the BMC password.
To change the BMC administrator password
1. Choose Maintenance > System Administrator.
2. Select Change Password.
3. Enter and confirm the new password.
The password must be between 8 and 64 characters and it cannot contain spaces.
4. Click Save.