Model upgrade overview
Some model upgrades require additional virtual hardware. When the appliance has the required virtual hardware, activating the hardware specification upgrades the appliance to the new model number. When the existing hardware is not adequate, the message “hardware required” appears after the hardware specification description.
For details about SteelHead-v model requirements, see
SteelHead-v models.
Note: Upgrading SteelHead-v from a V1050L or V1050M model to a V1050H model clears all data in the RiOS data store and requires a reboot.
Model upgrade and flexible RiOS data store
With SteelHead-v 8.5 and later, you can configure the size of the RiOS data store disk for SteelHead-v on VCX models. This configuration is still fixed for other SteelHead models.
If you upgrade to a version later than 8.0.3, your RiOS data store configuration remains intact. However, due to changes in the RiOS data store disk layout, if you modify the disk size either manually or during a model upgrade and later downgrade to the earlier image, data store corruption can result.
If you see errors related to the data store, you must clean the RiOS data store. If your disk is smaller than the SteelHead model is expecting based on the values required in the earlier version, increase the disk size to the expected size, and then enter the command restart clean.
To avoid this situation, upgrade the SteelHead model prior to upgrading to SteelHead-v 9.0 or later.
Note: When you upgrade SteelHead-v to a model that can use more of the available RiOS data store disk, the data store is automatically cleared.
Next steps
After installing a license, the next steps to complete a model upgrade depend on whether the upgrade requires additional virtual hardware:
Upgrading a model that requires no additional virtual hardware
This section describes how to activate a hardware specification that does not require additional virtual hardware on SteelHead-v.
Upgrades to models within a platform family require only a new license because the existing virtual hardware is sufficient.
To activate a hardware specification
1. Stop the optimization service.
2. Choose Administration > Maintenance: Licenses to display the Licenses page.
The hardware specifications appear at the bottom of the page. The hardware specification description includes the potential bandwidth and connection counts. The current specification appears in bold.
You might see specifications listed but grayed out. After the license or required hardware for the model is installed, these specification become available.
3. Select the hardware specification that you want to activate.
4. Click Apply.
5. Click Restart to restart the optimization service.
Upgrading a model that requires additional virtual hardware
This section describes how to activate a hardware specification that requires additional virtual hardware on SteelHead-v.
Hypervisor reservations and overhead
When you reserve CPU and other resources, reserve the full amount required for the SteelHead-v model. In addition, verify that additional unclaimed resources are available. Due to hypervisor overhead, VMs can exceed their configured reservation.
The overhead calculations for the ESX/ESXi and Hyper-V hypervisors differ:
• For ESX/ESXi, reserve the memory and CPU cycles needed for the SteelHead-v model and verify that the host has resources to accommodate the 5 percent VMware overhead.
• For Hyper-V, reserve the memory and CPU percentage needed for the SteelHead-v model and verify that the host has 1.5 GB and 15 percent CPU remaining, for overhead purposes.
Note: After you deploy SteelHead-v on Hyper-V, set the reserve weight for CPU to 100 and the memory weight to High.
To upgrade a model and add virtual hardware, perform this procedure after installing the license.
To upgrade a model
1. In the Management Console, choose Administration > Maintenance: Licenses.
2. Click Stop to stop the optimization service, and log out of SteelHead-v.
3. Right-click the name of the VM that you want to upgrade, choose Power, and choose Power Off.
4. In the vSphere Client, right-click the name of the VM that you want to upgrade and select Edit Settings.
5. Check the memory, CPU, and hard disk settings. Change any setting necessary to accommodate the model upgrade.
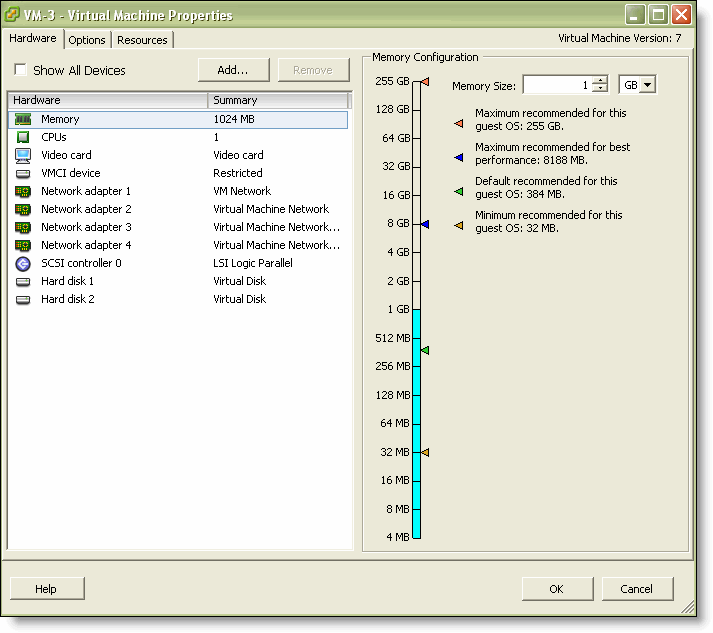
Figure: VM properties page - hardware tab
6. Right-click SteelHead-v, choose Power, and select Power On.
7. Log in to SteelHead-v and display the Management Console.
8. Choose Administration > Maintenance: Licenses to display the Licenses page.
The bottom of the screen lists the available hardware specifications. The current specification appears in bold. The hardware specification description includes the potential bandwidth and connection counts. Hardware specifications that will be available after the license or required virtual hardware have been installed are included in the list but are dimmed.
9. Select the hardware specification that you want to activate.
If a hardware specification requires a reboot after activation, you see the message “activation reboots appliance.”
10. Click Apply.
SteelHead-v reboots and the optimization service restarts.
When the upgrade is complete, the new model number appears on the SteelHead-v banner in the upper-right corner of the screen.
To add memory
1. On the Hardware tab, click Memory.
Reserve the RAM needed by the SteelHead-v model.
2. Under Memory Configuration, increase the memory by clicking a colored triangle (on the slider or in the legend), using the slider control, or selecting a number from the drop-down list.
Only multiples of 4 MB are valid for memory settings. If you manually enter a value that is not a multiple of 4 MB, a warning message appears.
3. Click OK.
To increase the size of a hard disk
1. On the Hardware tab, select Hard Disk 2.
2. In the Disk Provisioning section, specify the disk size, in gigabytes.
3. Click OK.
To add a hard disk
1. On the Hardware tab, click Add.
2. Select Hard Disk.
3. Specify the disk size, in gigabytes.
4. Click OK.
To add CPU capacity
1. On the Hardware tab, select CPUs.
2. Increase the number of virtual CPUs to two or four, depending on the model upgrade.
You can configure how the virtual CPUs are assigned in terms of sockets and cores. For example, you can configure a VM with four virtual CPUs in these ways:
– Four sockets with one core per socket
– Two sockets with two cores per socket
– One socket with four cores per socket
3. Click OK.
4. Select the Resources tab.
5. Use the slider control to reserve the number of clock cycles (in terms of CPU MHz).
For example, for a model V550M requiring two virtual CPUs running on a quad-core Xeon-based system running at 2.6 GHz on a ESX/ESXi host, reserve two virtual CPUs and 2 * 2.6 GHz CPU cycles.
6. Click OK.
Downgrade limitation
After using flexible licensing to upgrade, you cannot return SteelHead-v to a lower model.
Removing a license
You can remove a SteelHead-v license.
To remove a license
1. Choose Administration > Maintenance: Licenses to display the Licenses page.
2. Select the license you want to delete.
3. Click Remove Selected.
4. Click Save to save your settings permanently.
Upgrading RiOS software
Your new RiOS software is backward compatible with previous RiOS versions. However, to obtain the full benefits of the new features in this version, you must upgrade the client-side and server-side SteelHeads on any given WAN link. After you have upgraded all appliances, all the benefits of the new RiOS features and enhancements are available.
If you mix RiOS software versions in your network, you might not be able to take full advantage of new features that are not part of older software versions.
Note: Software images can be quite large. Uploading images can take several minutes. After installing a new image, reboot the virtual appliance. After reboot, the new software version displays on the Dashboard page of the Management Console
To upgrade RiOS software
1. Download the software image from the Riverbed Support site to a location such as your desktop.
2. Log in to the Management Console using the Administrator account (admin).
3. Choose the Administration > Maintenance: Software Upgrade and select one of these options:
– From URL - Enter the URL that points to the software image in the text box.
– From Local File - Browse your file system and select the software image.
4. Optionally choose Schedule Upgrade for Later and select a date and time when you want the action to take place.
5. Click Install.
6. Reboot the appliance.
Rebooting and shutting down SteelHead-v
You can reboot or shut down the system in the Administration > Maintenance: Reboot/Shutdown page.
Rebooting the system disrupts existing network connections that are currently proxied through it. Rebooting can take a few minutes.
When you shut down the system, connections are broken and optimization ceases. Shutdown can take several minutes.
To reboot or shut down the system
1. Choose Administration > Maintenance: Reboot/Shutdown to display the Reboot/Shutdown page.
2. Optionally select Clear Data Store to remove data from the RiOS data store when the action takes place.
3. Optionally select a date and time when you want the action to take place.
4. Click Reboot.
After you click Reboot, you are logged out of the system and it reboots.
5. Click Shutdown to shut down the system.
After you click Shutdown, the system turns off. To restart the system, you must manually turn on the SteelHead.
Verifying your connections
This section describes how to verify that you have properly connected SteelHead-v.
To verify your connections
1. From a remote host, connect to the CLI. At the system prompt, enter one of these commands:
# ssh admin@<host>.<domain>
# ssh admin@<ip-address>
2. When you are prompted for a password, specify the administrator password you set when you ran the configuration wizard.
3. At the system prompt, enter ping commands to verify the connections. For example:
# ping -I <primary-ip-address> <primary-default-gateway>
—or, to verify in-path connectivity—
# ping -I <inpath-interface> <ip-address>
Verifying your configuration
This section describes how to verify that you have properly configured SteelHead-v.
To verify optimization in an in-path configuration
1. Choose Reports > Optimization: Bandwidth Optimization page in the Management Console to verify optimization.
2. Map a remote drive on a client machine.
3. Drag and drop a 1-MB file from the client to the remote server.
4. Drag and drop the 1-MB file again.
Note: For details about managing and configuring SteelHead-v, see the SteelHead Management Console User’s Guide, the SteelHead Deployment Guide, and the Riverbed Command-Line Interface Reference Manual. In the Riverbed product documentation, the term “SteelHead” refers to the physical SteelHead as well as SteelHead-v unless otherwise stated.
Verifying hardware capabilities of virtual appliances
After you deploy a SteelHead-v appliance, you might want to verify the appliance’s optimization and disk usage performance before using the appliance in a production environment. You can run tests that benchmark your appliance’s performance against that of other Riverbed products from the Reports > Diagnostics: Benchmarks screen. Test results indicate the highest virtual appliance that can be run on the hardware supporting the tested appliance.
Note: Running these tests will delete all data store contents.
To verify hardware capabilities
1. Log in to the management console on the appliance.
2. Navigate to Reports > Diagnostics: Benchmarks.
3. Ensure that optimization services are stopped.
4. Select the tests that you want to run.
5. Click Run Selected Tests.