Figure: TCP Dumps Report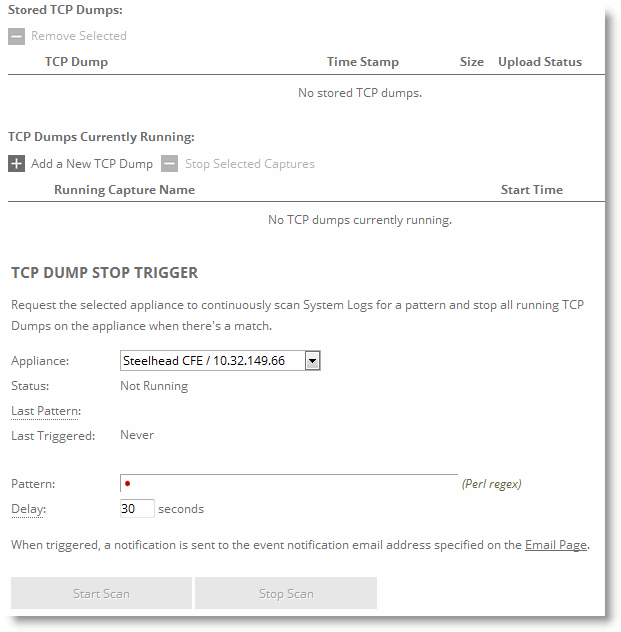
Control | Description |
Add a New TCP Dump | Displays the controls for creating a TCP trace dump. |
Capture Name | Specify the name of the capture file. Use a unique filename to prevent overwriting an existing TCP dump. The default filename uses this format: <hostname>_<interface>_<time-stamp>.cap Where <hostname> is the hostname of the SCC, <interface> is the name of the interface selected for the trace (for example, lan0_0, wan0_0), and <time-stamp> is in the YYYY-MM-DD-HH-MM-SS format. If this trace dump relates to an open Riverbed Support case, specify the capture filename case_<number> where <number> is your Riverbed Support case number: for example, case_12345. Note: The .cap file extension is not included with the filename when it appears in the capture queue. |
Appliances | Select an appliance from the list. |
Endpoints | Specify IP addresses and port numbers to capture packets between them: IPs - Specify IP addresses of endpoints on one side. Separate multiple IP addresses using commas. You can enter IPv6 addresses separated by commas. The default setting is all IP addresses. Ports - Specify ports on one side. Separate multiple ports using commas. The default setting is all ports. —and— IPs - Specify IP addresses of endpoints on the other side. Separate multiple IP addresses using commas. You can enter IPv6 addresses separated by commas. The default setting is all IP addresses. Ports - Specify ports on the other side. Separate multiple ports using commas. The default setting is all ports. To capture traffic flowing in only one direction or to enter a custom command, use the CLI tcpdump command. For details, see the Riverbed Command-Line Interface Reference Manual. |
Capture Interfaces | Captures the TCP trace dump on the selected interface(s). You can select all interfaces or a base, in-path, or RSP interface. The default setting is none. You must specify a capture interface. If you select several interfaces at a time, the data is automatically placed into separate capture files. When path selection is enabled, Riverbed recommends that you collect packet traces on all LAN and WAN interfaces. |
Capture Parameters | These parameters let you capture information about dot1q VLAN traffic. You can match traffic based on VLAN-tagged or untagged packets, or both. You can also filter by port number or host IP address and include or exclude ARP packets. Select one of these parameters for capturing VLAN packets: • Capture Untagged Traffic Only - Select this option for the following captures: – All untagged VLAN traffic. – Untagged 7850 traffic and ARP packets. You must also specify arp in the custom flags field on this page. – Only untagged ARP packets. You must also specify arp in the custom flags field on this page. • Capture VLAN-Tagged Traffic Only - Select this option for the following captures: – Only VLAN-tagged traffic. – VLAN-tagged packets with host 10.11.0.6 traffic and ARP packets. You must also specify 10.11.0.6 in the IPs field, and specify or arp in the custom flags field on this page. – VLAN-tagged ARP packets only. You must also specify arp in the custom flags field on this page. • Capture both VLAN and Untagged Traffic - Select this option for the following captures: – All VLAN traffic. – Both tagged and untagged 7850 traffic and ARP packets. You must also specify the following in the custom flags field on this page: port 7850 or arp —or— vlan and port 7850 or arp – Both tagged and untagged 7850 traffic only. You must also specify 7850 in one of the port fields on this page. – Both tagged and untagged ARP packets. You must also specify the following in the custom flags field on this page: arp —or— vlan and arp |
Capture Duration (Seconds) | Specify how long the capture runs, in seconds. The default value is 30. Specify 0 or continuous to initiate a continuous trace. Continuous traces are not permitted from the SCC, so the value must be at least 1. |
Maximum Capture Size (MB) | Specify the maximum capture file size, in megabytes. The default value is 100 MB. Riverbed recommends a maximum capture file size of 1024 MB (1 GB). Riverbed recommends a maximum capture file size of 1024 MB (1 GB). |
Buffer Size (KB) | Optionally, specify the maximum amount of data, in kilobytes, allowed to queue up while awaiting processing by the TCP trace dump. The default value is 154 KB. |
Snap Length | Optionally, specify the snap length value for the capture file, which equals the number of bytes captured for each packet. Having a snap length smaller than the maximum packet size on the network enables you to store more packets, but you might not be able to inspect the full packet content. Specify 0 for a full packet capture (recommended for CIFS, MAPI, and SSL captures). The default value is 1518 bytes. |
Number of Files to Rotate | Specify how many TCP trace dump files to rotate. The default value is 5. The maximum value is a 32-bit integer. Specify how many capture files to keep for each interface before overwriting the oldest file. To stop file rotation, you can specify 0; however, Riverbed recommends rotating files, because stopping the rotation can fill the disk partition. This limits the number of files created to the specified number, and begins overwriting files from the beginning, thus creating a rotating buffer. |
Custom Flags | Specify custom flags as additional statements within the filter expression. Custom flags are added to the end of the expression created from the Endpoints fields and the Capture Parameters radio buttons (pertaining to VLANs). If you require an “and” statement between the expression created from other fields and the expression that you are entering in the custom flags field, you must include the “and” statement at the start of the custom flags field. Do not use host, src, or dst statements in the custom flags field. Although it is possible in trivial cases to get these to start without a syntax error, they do not capture GRE-encapsulated packets that some modes of SteelHead communications use, such as WCCP deployments or Interceptor connection-setup traffic. Riverbed recommends using bidirectional filters by specifying endpoints. For complete control of your filter expression, use the CLI tcpdump command. For details, see the Riverbed Command-Line Interface Reference Manual. For examples, see Custom Flag Use Examples. |
Schedule Dump | Schedules the trace dump to run at a later date. • Start Date - Specify a date to initiate the trace dump in this format: YYYY/MM/DD. • Start Time - Specify a time to initiate the trace dump in this format: HH:MM:SS. |
Add | Adds the TCP trace dump to the capture queue. |
Remove Selected | Under Stored TCP Dumps, select the TCP Dump check box and click Remove Selected. |
Control | Description |
Add a New TCP Dump | Displays the controls for creating a TCP trace dump. |
Capture Name | Specify the name of the capture file. The default filename uses this format: <hostname>_<interface>_<time-stamp>.cap Where <hostname> is the hostname of the SCC, <interface> is the name of the interface selected for the trace (for example, lan0_0, wan0_0), and <time-stamp> is in the YYYY-MM-DD-HH-MM-SS format. If this trace dump relates to an open Riverbed Support case, specify the capture filename case_<number> where <number> is your Riverbed Support case number: for example, case_12345. Note: The .cap file extension is not included with the filename when it appears in the capture queue. |
Capture Traffic Between | IPs - Specify the source IP addresses. Separate multiple IP addresses with a comma to include all addresses bidirectionally. The default setting is all IP addresses. Ports - Specify the source ports. Separate multiple ports with a comma. The default setting is all ports. and: IPs - Specify the destination IP addresses. Separate multiple IP addresses with a comma to include all addresses bidirectionally. The default setting is all IP addresses. Ports - Specify the destination ports. Separate multiple ports with a comma. The default setting is all ports. |
Capture Interfaces | Captures the TCP trace dump on the selected interface(s). You can select all interfaces or a physical, MIP, SCA, VSP, or miscellaneous interface. The default setting is none. You must specify a capture interface. If you select several interfaces at a time, the data is automatically placed into separate capture files. |
Capture Duration (Seconds) | Specify how long the capture runs, in seconds. The default value is 30. Leave this value blank to initiate a continuous trace. When a continuous trace reaches the maximum space allocation of 100 MB, the oldest file is overwritten. |
Maximum Capture Size (MB) | Specify the maximum capture file size in MBs. The default value is 100. The recommended maximum capture file size is 1024 MBs (1 GB). |
Buffer Size | Optionally, specify the maximum number of packets allowed to queue up while awaiting processing by the TCP trace dump. The default value is 154. |
Snap Length | Optionally, specify the snap length value for the trace dump. Specify 0 for a full packet capture (recommended for CIFS, MAPI, and SSL traces). The default value is 1518. |
Number of Files to Rotate | Specify how many TCP trace dump files to rotate. The default value is 5. |
Only Capture VLAN Packets | Captures only VLAN-tagged packets within a trace dump for a trunk port (802.1Q). Enabling this setting filters the trace dump by capturing only VLAN-tagged packets. This setting applies to physical interfaces only because logical interfaces (inpath0_0, mgmt0_0) do not recognize VLAN headers. |
Custom Flags | Specify custom flags to capture unidirectional traces. Examples: To capture all traffic to or from a single host host x.x.x.x To capture all traffic between a pair of hosts host x.x.x.x and host y.y.y.y To capture traffic between two hosts and two SteelHead inner channels: (host x.x.x.x and host y.y.y.y) or (host a.a.a.a and host b.b.b.b) |
Schedule Dump | Schedules the trace dump to run at a later date and time. |
Start Date | Specify a date to initiate the trace dump in this format: YYYY/MM/DD |
Start Time | Specify a time to initiate the trace dump in this format: HH:MM:SS |
Add | Adds the TCP trace dump to the capture queue. |
Control | Description |
Enable Cascade Shark | Permits remote capture analysis using Cascade Pilot. When enabled, the TCP dump capture files appear in the list of completed TCP dumps in Cascade Pilot for more detailed analysis. The Shark function does not require a separate license and is disabled by default. The Shark function uses port 61898 during the typical interaction with Cascade Pilot (for example, status requests, views configuration, and output transfer). It uses port 61899 during packet transfers. When Cascade Shark is disabled, Shark function is shut down and no processes are listening on port 61898 or 61899. To use the Shark function, you must give the username Shark a password. Capture files do not appear in Cascade Pilot until they are complete. You can create a TCP dump without the Cascade Shark enabled. The capture file appears in the TCP dump list in Cascade Pilot the next time you enable Cascade Shark and point Cascade Pilot to process TCP dumps from this SteelHead. You must be able to reach the SteelHead with Cascade Shark enabled from the computer running Cascade Pilot. |
Add a New TCP Dump | Displays the controls for creating a TCP trace dump. |
Capture Name | Specify the name of the capture file. Use a unique filename to prevent overwriting an existing TCP dump. The default filename uses this format: <hostname>_<interface>_<time-stamp>.cap Where <hostname> is the hostname of the SCC, <interface> is the name of the interface selected for the trace (for example, lan0_0, wan0_0), and <time-stamp> is in the YYYY-MM-DD-HH-MM-SS format. If this trace dump relates to an open Riverbed Support case, specify the capture filename case_<number> where <number> is your Riverbed Support case number: for example, case_12345. Note: The .cap file extension is not included with the filename when it appears in the capture queue. |
Capture Traffic Between | IPs - Specify the source IP addresses. Separate multiple IP addresses with a comma to include all addresses bidirectionally. The default setting is all IP addresses. Ports - Specify the source ports. Separate multiple ports with a comma. The default setting is all ports. and: IPs - Specify the destination IP addresses. Separate multiple IP addresses with a comma to include all addresses bidirectionally. The default setting is all IP addresses. Ports - Specify the destination ports. Separate multiple ports with a comma. The default setting is all ports. |
Capture Interfaces | Captures the TCP trace dump on the selected interface(s). You can select all interfaces or a base, in-path, or RSP interface. The default setting is none. You must specify a capture interface. If you select several interfaces at a time, the data is automatically placed into separate capture files. |
Capture Parameters | Select one of these traffic types to capture: • Capture Untagged Traffic Only - Captures only traffic without a VLAN tag. Enabling this setting filters the trace dump by capturing all untagged packets. • Capture VLAN-Tagged Traffic Only - Captures only VLAN-tagged packets within a trace dump for a trunk port (802.1Q). Enabling this setting filters the trace dump by capturing only VLAN-tagged packets. This setting applies to physical interfaces only because logical interfaces (inpath0_0, mgmt0_0) do not recognize VLAN headers. • Capture both VLAN and Untagged Traffic - Captures VLAN-tagged and untagged packets within a trace dump. |
Capture Duration (Seconds) | Specify how long the capture runs, in seconds. The default value is 30. Specify 0 or continuous to initiate a continuous trace. When a continuous trace reaches the maximum space allocation of 100 MB, the oldest file is overwritten. |
Maximum Capture Size (MB) | Specify the maximum capture file size, in megabytes. The default value is 100 MB. Riverbed recommends a maximum capture file size of 1024 MB (1 GB). |
Buffer Size | Optionally, specify the maximum amount of data, in kilobytes, allowed to queue up while awaiting processing by the TCP trace dump. The default value is 154 KB. |
Snap Length | Optionally, specify the snap length value for the trace dump. Specify 0 for a full packet capture (recommended for CIFS, MAPI, and SSL traces). The default value is 1518. |
Number of Files to Rotate | Specify how many TCP trace dump files to rotate. The default value is 5. |
Custom Flags | Specify custom flags to capture unidirectional traces. Examples: To capture all traffic to or from a single host host x.x.x.x To capture all traffic between a pair of hosts host x.x.x.x and host y.y.y.y To capture traffic between two hosts and two SteelHead inner channels: (host x.x.x.x and host y.y.y.y) or (host a.a.a.a and host b.b.b.b) |
Schedule Dump | Schedules the trace dump to run at a later date and time. |
Start Date | Specify a date to initiate the trace dump in this format: YYYY/MM/DD. |
Start Time | Specify a time to initiate the trace dump in this format: HH:MM:SS. |
Add | Adds the TCP trace dump to the capture queue. |
Filter Purpose | Custom Flag |
To capture all traffic on VLAN 10 between two specified endpoints: 1.1.1.1 and 2.2.2.2 | and vlan 10 |
To capture any packet with a SYN or an ACK | tcp[tcpflags] & (tcp-syn|tcp-ack) != 0 |
To capture any packet with a SYN | tcp[tcpflags] & (tcp-syn) != 0 —or— tcp[13] & 2 == 2 |
To capture any SYN to or from host 1.1.1.1 | and (tcp[tcpflags] & (tcp-syn) != 0) —or— and (tcp[13] & 2 == 2) |