Configuring SSL Certificate Authorities
You add SSL certificate authorities (CA) in the Optimization > SSL: Certificate Authorities page.
A CA is a third-party entity in a network that issues digital certificates and manages security credentials and public keys for message encryption. A CA issues a public key certificate, which states that the CA attests that the public key contained in the certificate belongs to the person, organization, server, or other entity noted in the certificate. The CA verifies applicant credentials, so that relying parties can trust the information in the CA certificates. If you trust the CA and can verify the CA signature, then you can also verify that a certain public key does indeed belong to whomever is identified in the certificate.
Note: Before adding a CA, it is critical to verify that it is genuine; a malicious CA can compromise network security by signing fake certificates.
You might need to add a new CA in these situations:
• Your organization has an internal CA that signs the certificates or peering certificates for the back-end server.
• The server certificates are signed by an intermediate or root CA unknown to the SteelHead (perhaps external to the organization).
• The CA certificate included in the trusted list of the SteelHead has expired or has been revoked and needs replacing.
To add SSL certificate authorities
1. On the server-side SteelHead, choose Optimization > SSL: Certificate Authorities to display the Certificate Authorities page.
Figure: Certificate Authorities Page
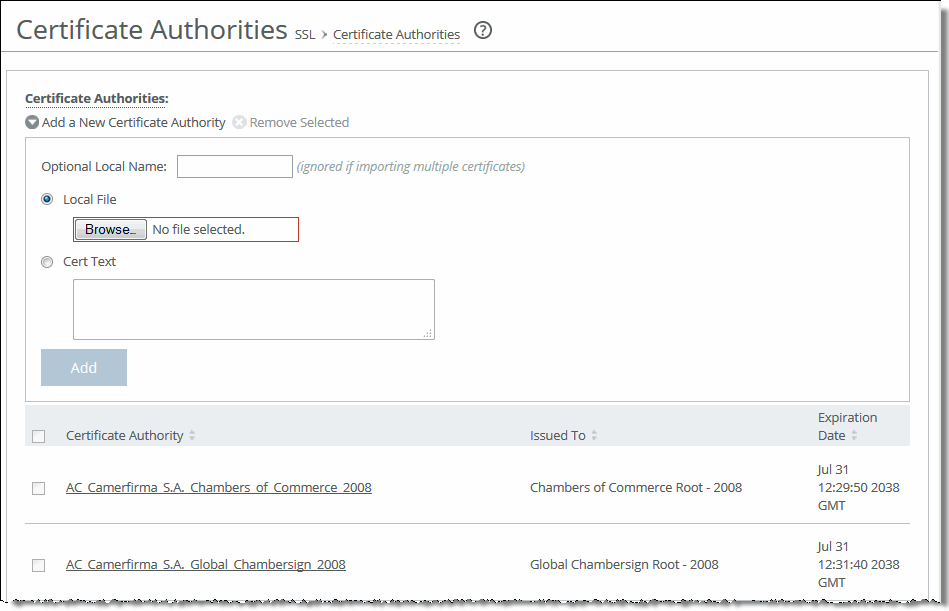
2. Under Certificate Authorities, complete the configuration as described in this table.
Control | Description |
Add a New Certificate Authority | Optional Local Name (ignored if importing multiple certificates) - Specify the local name. Local File - Browse to the local certificate authority file. Cert Text - Paste the certificate authority into the text box and click Add. |
Add | Adds the certificate authority. |
Remove Selected | Select the check box next to the name and click Remove Selected. |
Note: Select the Certificate Authority name to display details.