Covering a Network with Wi-Fi
This topic describes how Wi-Fi broadcast components provide support for embedded security, firewalls, access points, and switches. It includes these sections:
How do I plan and broadcast Wi-Fi?
You can use the SCM’s Wi-Fi broadcast component to:
•offer a unified, corporate service set identifier (SSID) for all locations that place users into the local network at their site.
•grant users seamless access to the corporate headquarters network from their home offices.
•deploy wireless access points to execute an expansion design and blanket your locations in wireless coverage. In SteelConnect 2.10 and later, SCM works with XMS-Cloud to plan, deploy, and manage access points.
Each SCM organization needs to be mapped to an XMS-Cloud domain before you can manage the XR, X2, XD, XH, and XA access points through SCM for an organization. A domain is the XMS-Cloud equivalent of an SCM organization. A dialog is presented after you log in to XMS-Cloud that provides a way to associate an XMS-Cloud domain with an SCM organization. For details, see
Wi-Fi Manager.
After connecting to XMS-Cloud and using it to configure access points, the Wi-Fi planner in SCM is hidden and unavailable. For details, see
Wi-Fi Manager. You can use the Floor Plans feature in XMS-Cloud to plan your Wi-Fi design. For details, see “Create Floor Plans” in the XMS-Cloud online help.
XMS-Cloud does not support the SDI-130W gateway.
What is an SSID?
A service set identifier (SSID) is a technical term for the name of a wireless network, used to distinguish one wireless network from another. When you set up a wireless network, you give it a name to distinguish it from all other networks in range. You connect a computer to the wireless network using this name. After you create a broadcast for the SSID on SCM, it will always be broadcast on all access points within a site.
You can create up to eight SSIDs per access point or total.
To create an SSID
1. Choose Wi-Fi > SSIDs.
2. Click New SSID.
3. Type the SSID name.
4. Select a security protocol to use to authenticate users from the drop-down list. SCM supports the common Wi-Fi protected access 2 security protocols and version 1 in compatibility mode. Open broadcasts the SSID without password protection.
After selecting a security protocol, type your password. The password is a minimum of eight characters and a maximum of 32 characters.
5. Click Submit.
A wireless network, or SSID, is not available until you broadcast it.
To broadcast an SSID
1. Choose Wi-Fi > SSIDs.
Verify that you have defined appropriate SSIDs: for example, one for your corporate network and one for your guest access.
2. Select Broadcasts and click New Broadcast.
3. Select the site, an SSID, and the default zone the clients will be mapped into when they join the network from that site. You can choose zones from different sites. A VPN tunnel will be automatically created.
4. Click Submit.
5. Repeat
Step 2 through
Step 4 for each site in which you want to broadcast the SSID.
From now on, any time you deploy hardware, the SSID will be broadcast at that location and will be mapped into the appropriate LAN.
As you configure SSIDs and broadcasts using XMS-Cloud access points with XMS-Cloud enabled, SCM communicates the configuration to XMS-Cloud, and the configuration is added to the XMS-Cloud profile associated with the access point. The configuration includes the site level settings (such as the site location). In XMS-Cloud, a profile is equivalent to a site in SCM. The access point’s serial number is also communicated to the XMS-Cloud profile. For details, see
Wi-Fi Manager.
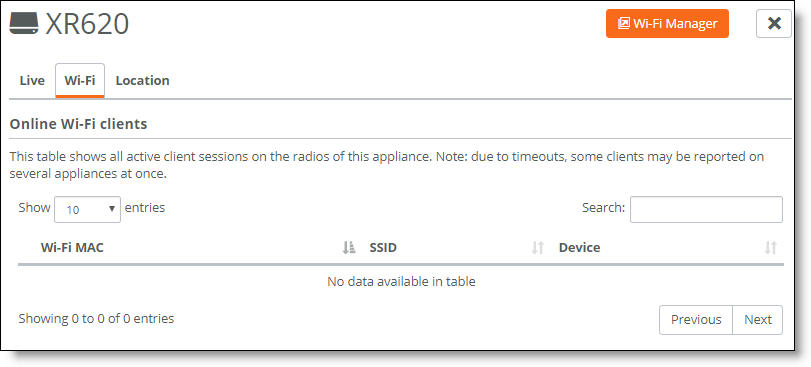
To view all active client sessions on the radios of an appliance
1. Choose Appliances.
2. Select an appliance.
3. Select the Wi-Fi tab.
Wi-Fi tab
In addition to creating and broadcasting SSIDs, you can manage these access point components using SCM:
With XMS-Cloud enabled for access points, you can manage these access point components:
•Create XMS EasyPass portals. Choose Wi-Fi > Portals, click Wi-Fi Manager, and log in to XMS-Cloud. EasyPass portals appear in the Wi-Fi > Portals page.
•Associate an EasyPass portal with a broadcast.
•Troubleshoot access points.
To enable the guest portal for a broadcast
2. Select the guest zone.
3. Select the broadcast.
4. Select the Advanced tab.
5. You can perform wireless network management such as hiding the SSID broadcast. When hidden, the broadcasted SSID becomes invisible so clients can’t find it automatically. You can also select to broadcast 2.4 GHz and 5 GHz (or only one of them).
How do I apply network access control across users or user groups?
DynZone, or dynamic zone assignment, allows you to apply network access control across users or user groups within a single wireless network broadcast. Devices (and consequently users) can be dynamically mapped into different zones, either by setting tags on zones, user groups, and users or by using RADIUS authentication.
Use DynZone to automatically tag devices into the correct VLAN. For example, you can assign the sales group to the Sales VLAN. Then, independent of where you connect the device to Wi-Fi, it receives the correct VLAN assignment dynamically without any interaction with the device.
You can also use this feature to automatically map known VoIP phones to the VoIP VLAN.
DynZone doesn’t support the Cisco LLDP-MED extension to LLDP.
In a deployment using dynamic zone assignment, a single SSID can broadcast for the entire site.
For nonenterprise SSIDs, you set policy tags for a user group, user, or device objects, and then set one of the same tags on the desired zone.
When a Wi-Fi client device connects to the SSID, the access point checks if a tag for that user or device matches a tag assigned to a zone. If it does, the system moves the client device into the appropriate VLAN. If no tag matches, the system uses the configured default zone as a fallback.
For enterprise SSIDs, the target zone VLAN tag is set on the RADIUS server. Using DynZone through RADIUS/NPS requires a RADIUS server and a WPA2 Enterprise SSID. When RADIUS is used for dynamic VLAN tagging, SteelConnect ignores all other tags such as device, user, and zone.
If DynZone is used in combination with RADIUS/NPS, SteelConnect retags the wireless clients to a specific VLAN using the following RADIUS attributes (as specified in RFC 3580 at
http://tools.ietf.org/html/rfc3580#section-3.31):
•Tunnel-Type=VLAN (13)
•Tunnel-Medium-Type=802
•Tunnel-Private-Group-ID=VLANID
Policy tag priorities
SteelConnect assigns priorities to tags in this order:
1. Device Tags (as ordered in Device Policy Tags)
2. User Tags (as ordered in User Policy Tags)
To tag users (groups) and the zones
1. Choose Users and select a user.
2. Choose Policy > Policy Tags.
3. Set a policy tag: for example, Sales.
4. Click Submit.
To match the user with a zone
1. Choose Network Design > Zones.
2. Select a zone.
3. Select VLAN > Policy Tags and select the Sales tag.
To activate DynZone
•Choose Wi-Fi > Broadcasts > DynZone.
Portals
SteelConnect provides wireless user access. In SteelConnect 2.10 and later, you use XMS-Cloud to create portals that customize the user access experience, whether the users are registered or guests. You can use the bring your own device (BYOD) registration, use guest vouchers, require users to click through to accept the terms of service, or create a guest portal that is authenticated by a guest login.
To set up a BYOD registration portal without XMS-Cloud, you must enable email and mobile messaging (SMS) as additional authentication to join and register a device using the portal.
To configure a guest portal without XMS-Cloud
1. Choose Wi-Fi > Portals.
2. Click New Portal.
3. Select the portal type Guest Portal - Authenticated.
4. Click Submit.
After creating the portal, you need to assign it to a Wi-Fi broadcast.
To assign a portal to a Wi-Fi broadcast
•Choose Wi-Fi > Broadcasts > Portal.
Registering guest devices using social media without XMS-Cloud
When the portal is active on a guest zone, guests can use these methods to register guest devices:
•Mobile phone number (via SMS)
•Email address
•Social media apps Facebook, Google, and Twitter
The Organization > Social Media tab is where an administrator configures guest access using a social media app.
The Social Media tab is not available for portals using Xirrus access points.
After guest devices are registered and validated, they are allowed access to the guest zone. Remember, guest zones are only allowed to send traffic over to the internet. Also, after you create a guest zone you can’t change it to a standard zone.
To use Facebook
2. Choose My Apps > Add a New App.
3. Select basic setup instead of selecting a platform.
4. Choose a clear display name such as Riverbed Social Wi-Fi.
5. Choose a namespace such as riverbedsocialWi-Fi.
6. Choose a category.
7. Click Create App ID.
After successful creation, the app is in development mode and is therefore publicly not available. You must enter a valid contact email to make the app available to all users.
8. Choose Settings > Basic > Contact Email and enter a valid email address.
9. Click Save Changes.
10. Go to the menu App Review.
11. Click Yes to switch on public access.
12. Confirm that you want to make the app public.
13. Choose Settings > Advanced > Security > VClient OAuth redirect URIs.
14. Insert the redirect URL displayed in your SCM (for example, https://<myCC>.riverbed.cc/portal-social-in). You can find the redirect URL under Organization > Social Media Apps.
15. Save your changes.
In the Facebook developers sidebar, choose Dashboard and copy/paste App ID and App Secret to your Organization > Social Media Apps > Facebook Application ID/secret.
To use Google
2. Click Create Project.
3. Type a representative project name. For example, Riverbed Social Wi-Fi.
To use a different project ID as the project name, click Edit and change the ID information.
4. Click Create.
6. Select your project: in this example, Riverbed Social Wi-Fi.
7. To activate the Google+ API choose API Manager > Social APIs in the sidebar on the left.
8. Click Google+API.
9. Click Enable.
10. Select the OAuth consent screen tab and assign credentials to your project.
11. Select a product name to show to users: for example, Riverbed Social Wi-Fi.
The Homepage URL, product logo, privacy policy URL, and terms of service URL are optional.
12. Click Save to store your progress.
13. In the left sidebar, choose APIS & AUTH > Credentials.
14. Click Create credentials and choose OAuth Client ID.
15. Choose a name. For example, Riverbed Social Wi-Fi.
16. Copy the redirect URI: for example, https://<myCC>.riverbed.cc/portal-social-in.
To find your redirect URL, choose Organization > Social Media. The URL appears under access parameters.
17. Click Create Client ID and copy the client ID and secret that appear in the pop-up window.
18. In SCM, choose Organization > Social Media and then copy and paste the Google client ID and secret.
19. Click Submit.
To use Twitter
2. Click Create New App.
3. In the application details, type a clear application name. For example, Riverbed Social Wi-Fi.
4. Add an application description. For example: Twitter OAuth.
5. Add your company website. For example, http://www.riverbed.com.
6. Insert a callback URL. For example, https://<myCC>.riverbed.cc/portal-social-in. To find the callback URL in SCM, choose Organization and select the Social Media tab. The URL appears under the Social Media Apps access parameters.
7. Agree to the developer rules.
8. Create your Twitter application and copy the API key and secret.
9. In SCM, choose Organization > Social Media, and then paste the Twitter API key and secret.
10. Click Submit.
Planning Wi-Fi wireless radio coverage
First you’ll need to determine how many access points you need. To assist with access point planning, SCM provides an integrated Wi-Fi planner that eliminates expensive planning tools and guesswork. Use the planner to visualize the Wi-Fi coverage in all sites, upload floor plans, and place access point placeholders as required. You can select different coverage-type presets. The Wi-Fi planner will automatically create shadow devices as placeholders that you can turn into real hardware deployments later.
After connecting to XMS-Cloud and using it to configure access points, the Wi-Fi planner in SCM is hidden and unavailable.
The Wi-Fi planning tool assumes a barrier-free wireless radio signal coverage.
We recommend using the Chrome browser for the best Wi-Fi planning experience.
To plan the Wi-Fi coverage for a site
1. Choose Wi-Fi > Planning.
2. Click New Plan.
3. Select a site.
4. Type a name for the plan.
5. Select a Wi-Fi profile to influence the recommended access point placement and range.
6. Click Upload Plan or Draw Plan.
To upload a predefined plan, choose the filename and click Open. You can upload the floor plans in .jpg, .png, .bmp, and .gif file formats.
7. Click Submit.
The next task is to set the general building dimensions to help define the signal strength and ranges.
To set the building dimensions
1. Click Set Scale.
2. Click the plan, expand an item in the drawing, and set the scale. For example: if you know one wall of your building is 26 feet long you can set the scale using this wall measurement of 26 feet.
To add access points
1. Open the Wi-Fi planner.
2. Click Create New AP3 (or AP5 or AP5r).
An access point icon appears on the plan, surrounded by a shaded transmit power area.
3. Select 2.4 or 5 GHz.
4. Move the access point to the desired location in the plan.
5. Type a name for the location.
6. Use the slider to adjust the transmit area.
7. Repeat
Step 2 through
Step 6 to add more access points, making sure they have the correct placement, amount of channel separation, and transmit power.
8. To avoid overlap between access points, right-click the access point and select another channel from the channel drop-down menu. Or, use the channel auto select (the default setting).
9. Adjust the transmit area and placement of the access point as needed.
10. Click Save.
Because the Wi-Fi planner is integrated in SCM, it uses the concept of shadow appliances for the access points. When you add an access point for future deployment, it’s called a shadow access point. Shadow access points are basically cardboard cutouts that you can use to represent what will be a physical access point. For details on shadow appliances, see
Enabling appliances.
To deploy an access point
1. Choose Appliances.
2. Click Add appliances.
3. Select Register Hardware Appliance.
4. Enter the access point serial number.
5. Select the site to deploy the access point.
6. Click Submit.
The access point receives an IP configuration through DHCP from the zone automatically.
7. Choose Wi-Fi > Broadcasts.
8. Click New Broadcast.
9. Select a site for the SSID.
10. Select an SSID.
11. Select a default zone.
12. Click Submit.
All access points in a site broadcast the SSIDs as configured in the Wi-Fi menu.
To view the access points
•Choose Appliances > Access Points.
The access points appear with a status of Shadow until they are registered.