Installing Client Accelerator-v for ESXi
This chapter describes how to install and configure the Client Accelerator-v for ESXi. It includes these sections:
This guide assumes that you’re familiar with installing, configuring, and managing networks with deployed SteelHeads. For detailed information about the SteelHead, see the SteelHead Installation and Configuration Guide, the SteelHead User Guide, and the SteelHead Deployment Guide.
Client Accelerator-v for ESXi
The Client Accelerator-v for ESXi is a virtualized edition of the Client Accelerator appliance running on VMware ESXi. The Client Accelerator-v for ESXi has the same functionality and performance as the Client Accelerator, depending on how you provision your virtual machine.
Recommended hardware resources
It is important to know the number of endpoints you plan to support before you allocate resources for your Client Accelerator-v for ESXi installation. This table lists the resources we recommend for the indicated maximum number of endpoints.
Maximum endpoints | Memory | Hard disk 2 | Minimum CPU cycles |
100 | 3 GB | 3 GB | 1 GHz |
1000 | 3 GB | 15 GB | 1 GHz |
2000 | 4 GB | 50 GB | 2 GHz |
4000 | 6 GB | 100 GB | 2 GHz |
By default, Client Accelerator-v for ESXi is configured to support 100 endpoints. To support additional endpoints, provision appropriately.
Client Accelerator-v for ESXi uses Hard Disk 1 for management and Hard Disk 2 for statistics. When the size of Hard Disk 2 is increased to accommodate additional endpoints, Client Accelerator-v resizes Hard Disk 2 nondestructively. The contents of Hard Disk 2 are deleted if the size of the disk is decreased.
If you don’t allocate memory, data storage, and CPU resources sufficient for the maximum number of endpoints, you trigger the Virtual Machine Configuration alarm “Raise Alarm When Virtual Machine is Detected to be Underprovisioned.” This alarm displays a specific message for each underprovisioned resource.
VM resource | Alarm message |
Memory | Not enough memory (available = x MB, required = x MB) |
Storage | Not enough disk 2 storage (available = x MB, required = x MB) |
CPU | Not enough cumulative CPU (available = x MHz, required = x MHz) |
For example, you might receive the following alarm message:
Not enough cumulative CPU (available = 1861.260000 MHz, required = 2000.000000 MHz)
For detailed information about Client Accelerator alarms, see the Client Accelerator User Guide.
VMware ESXi
Client Accelerator-v for ESXi is supported on VMware ESXi. The VMware ESXi is a virtualization platform that enables you to install and run the Client Accelerator-v for ESXi as a virtual appliance. For details about VMware ESXi, see the following link:
The hardware must support virtual technology.
Virtual machine snapshots are not supported by Client Accelerator-v for ESXi.
Performance guidelines
The VMware ESXi is a virtualization platform that enables you to install and run the Client Accelerator-v for ESXi as a virtual appliance. Follow these guidelines for best results:
• Always reserve virtual CPU cycles. For best performance, it is important that the
Client Accelerator-v receive sufficient CPU resources. To allocate CPU cycles, reserve the number of clock cycles (in terms of CPU MHz) required for the number of endpoints you plan to support on the Client Accelerator-v for ESXi. The overhead introduced by VMware is approximately 5 percent.
• Don’t overprovision the physical CPUs. Don’t run more virtual machines than there are CPUs. For example, if an ESXi host is running on a four-core CPU, all the virtual machines on the host should use not more than four virtual CPUs.
• Use a server-grade CPU for the ESXi host. For example, use a Xeon or Opteron CPU.
• Always reserve RAM. Memory is another very important factor in determining Client Accelerator-v performance. Reserve the RAM that is needed to accommodate the maximum number of endpoints you plan to support with your Client Accelerator-v, plus 5 percent more for the VMware overhead; this RAM allocation provides a significant increase in performance. For example, 100 endpoints require 3 GB RAM, so you need to reserve 3 GB + 110 MB.
• Don’t overprovision physical RAM. The total virtual RAM needed by all running VMs shouldn’t be greater than the physical RAM on the system.
• Don’t use low-quality storage for the datastore disk. Make sure that the Client Accelerator-v for ESXi disk used for the datastore VMDK is located on a physical disk medium that supports a high number of input/output operations per second (IOPS). For example, use NAS, SAN, or dedicated SATA disks.
• Don’t share host physical disks. VMware recommends that to achieve near-native disk I/O performance, you don’t share host physical disks (such as SCSI or SATA disks) between VMs. While deploying a Client Accelerator-v for ESXi, allocate an unshared disk for the data store disk.
Basic steps for installing and configuring Client Accelerator-v for ESXi
This table provides an overview of the basic steps to install and configure a Client Accelerator-v for ESXi. Detailed procedures are provided in the referenced sections.
Task | Reference |
1. Verify your hardware requirements, to ensure that the hardware you have set aside is sufficient to run Client Accelerator-v for ESXi. | |
2. Obtain the Client Accelerator-v for ESXi package from Riverbed Support. | |
3. Gather network settings for the configuration wizard. | |
4. Deploy the Client Accelerator-v image. | |
5. Configure your virtual machine. | |
6. Power on the VM, start the Client Accelerator-v, and log in. | — |
7. Complete the Client Accelerator-v configuration. | |
8. Exit the configuration wizard. | — |
9. Purchase a token from Riverbed Sales. | |
10. Refer to the Client Accelerator User Guide for configuration specifics and other Riverbed product documentation for additional information. | Getting Started Guide SteelHead User Guide Riverbed Command-Line Interface Reference Manual SteelHead Deployment Guide |
Obtaining the Client Accelerator-v image
The Client Accelerator-v for ESXi is provided by Riverbed as an image that contains the VMX and VMDK files necessary to create the virtual machine.
The Client Accelerator-v for ESXi image is an installable open virtual appliance (OVA) package. OVA is a platform-independent, efficient, extensible, and open packaging distribution format. The OVA package provides a complete specification for Client Accelerator-v for ESXi, including its required virtual disks, CPU, memory, networking, and storage.
The OVA file is a compressed .tar.gz package that quickly creates a virtual machine with predefined settings. It contains these files:
• OVF file - The XML description of the Client Accelerator-v.
• Two VMDK files - One file contains the management system (the smaller VMDK) and the other contains the data store. The separate files let you resize the data store without losing any data in the management partitions.
• Manifest file - The SHA1 checksum of the OVF and VMDK.
• VMX file - The primary configuration.
To obtain the OVA package, log in to your customer account at the following site:
Gathering information
Before you begin, read the release notes for the product at the following site:
They contain important information about this release. Next, gather the hostname, domain name, IP address, DNS server, in-path interface IP address, netmask, and default gateway.
Opening VMware VI or vSphere client
Each package contains a predefined virtual hardware configuration for a Client Accelerator-v designed to support up to 100 endpoints. Don’t open or modify any of the files in the package. If your Client Accelerator-v must control more than 100 endpoints, you can reconfigure your virtual machine after installation. The package files require several gigabytes of disk space.
Installation procedures vary depending on whether you’re using the VMware VI or vSphere client. The examples in this document are created using the vSphere client.
The Client Accelerator-v on ESXi is provided by Riverbed as an OVA file for VMware ESXi.
Deploying the OVA package
This section describes how to install and configure the default (100 endpoint) Client Accelerator-v on a VMware ESXi host using the vSphere client.
The standard installation puts both VMDKs in a single local storage location. The local storage holds the virtual machine files and is referred to as a “datastore” during OVF deployment, but it is not used for the Riverbed Optimization System (RiOS) data store, which is used for network optimization.
Make sure that the data store you select has enough capacity for the OVA package to be installed. You need at least 25 GB. The larger VMDK containing the management system can be installed on any data store type. The smaller VMDK contains the Client Accelerator-v statistics. The data store must have enough room to expand to the required size of the Client Accelerator-v. Don’t share host physical disks (such as SCSI or SATA disks) between VMs.
To deploy the OVA template
1. Open VMware vSphere, type the hostname IP address or name, your username, and your password, and click Login.
2. Choose File > Deploy OVF template.
3. Click Deploy from file, and then click Browse.
4. Select the OVA file (filename ending in .ova) and click Open to display the Deploy OVF Template page.
Figure 4‑1. Choosing the OVF file

5. Click Next.
6. Verify that the OVA file (shown in the OVF Template Details page) is the one you want to deploy.
Figure 4‑2. OVF template details
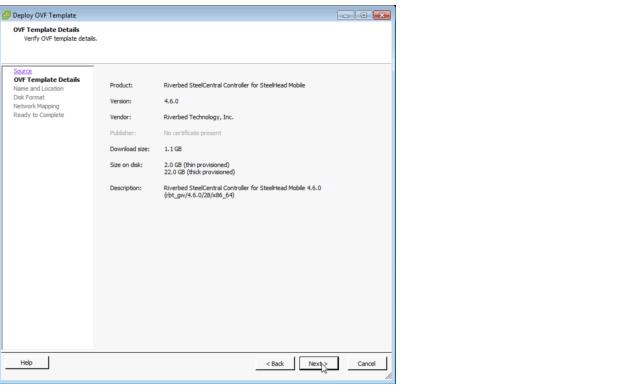
7. Click Next.
8. Type a name for the virtual machine in the Name and Location page.
Figure 4‑3. Name and location page
9. Click Next.
10. Select Thick provisioned format (in the Disk Format page) unless you have a specific reason for requiring thin provisioning.
Figure 4‑4. Disk format page

11. Click Next.
12. In the Network Mapping page, select the destination network name and select a network from the drop-down list to map the source network to a destination network. Set Primary to Aux and Aux to primary.
Figure 4‑5. Network mapping
13. Click Next.
14. Verify the deployment settings and click Finish. Deployment status messages display.
Figure 4‑6. Deployment status
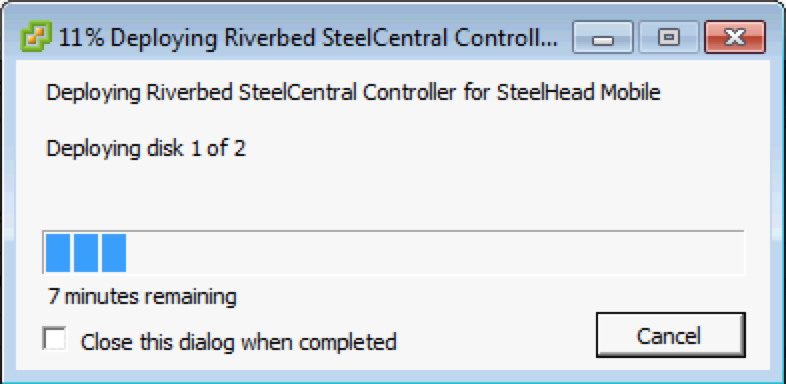
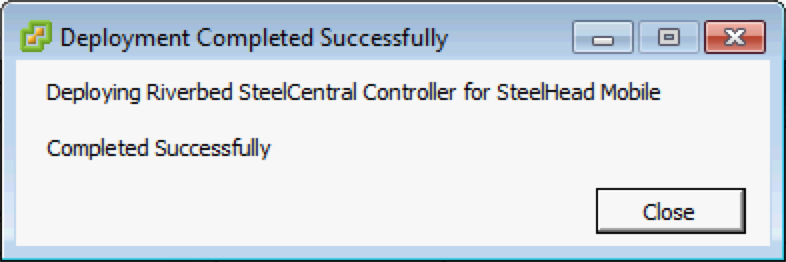
A message shows the amount of time before the deployment finishes. When the deployment finishes, a message tells you the deployment was successful (see
Figure: Successful completion message). You can edit disk size and provisioning settings later by right-clicking the name of your virtual machine.
Figure 4‑7. Successful completion message
15. Click Close.
The new virtual machine appears under the hostname or host IP address to the virtual machine inventory.
Virtual machine configuration
Log in to VMware vSphere to configure your virtual machine.
To log in to vSphere
1. Open vSphere to display the VMware vSphere Client window. Type the hostname IP address or name, type your username and password, and click Login.
Figure 4‑8. vSphere client

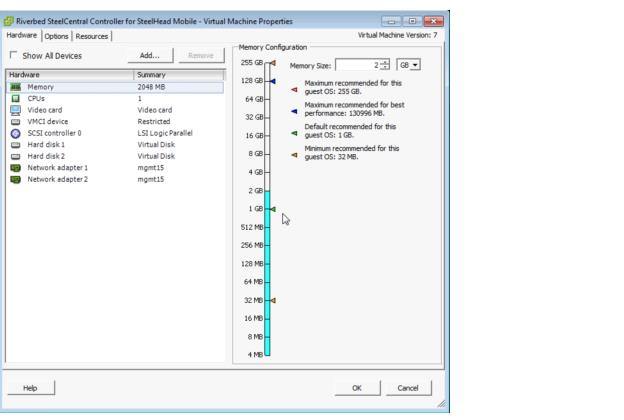
2. Select your virtual machine. Select the Resource tab and click Edit or right-click the name of your virtual machine and select Edit Settings.
Figure 4‑9. Hardware tab
Client Accelerator-v for ESXi initial configuration
Configure your Client Accelerator-v by following the instructions in the configuration wizard. Access the configuration wizard from the Console tab of the vSphere client.
To configure the Client Accelerator-v
1. In the vSphere client, click your virtual machine and select the Console tab to display the Console page.
Figure 4‑10. Console tab

2. Log in to the Client Accelerator-v as administrator (admin). The Login page is displayed.
Figure 4‑11. Logging in to the console

3. After you log in to the Client Accelerator-v as administrator, the system prompts you to start the configuration wizard.
Enter yes at the system prompt. For example:
Configuration wizard.
Do you want to use the wizard for initial configuration? yes
Press Enter to enter the default value. If you mistakenly answer no, you can start the configuration wizard by entering the configuration jump-start command at the system prompt. Click ? for help. Press Ctrl+B to go back to the previous step.
5. To log out of the system, enter exit at the system prompt:
amnesiac> exit
To release the cursor from the console, press Ctrl+Alt.
Logging in to the Client Accelerator console
You log in to the Client Accelerator Console on the Client Accelerator-v for ESXi just as you would log in to the Client Accelerator Console on a Client Accelerator Controller appliance. For instructions on logging in to the Client Accelerator Controller Console, see
Logging in to the Client Accelerator console.Purchasing the token and receiving the licenses
Before you can add licenses to Client Accelerator-v for ESXi, you must purchase a token from Riverbed. The token has a model number assigned to the new Client Accelerator-v after you complete its licensing. To view your purchased token, log in to your account at the following site:
After you receive a token, you’re ready to install the licenses.
To activate the token and install the license
1. Log in to the Client Accelerator-v and display the Client Accelerator Management Console.
2. Choose Setup > Licenses to display the Licenses page.
3. Under License Request Token, type the token and click Generate License Request Key.
When you enter the token, RiOS returns a license request key.
4. After you have obtained the license request key, go to the Riverbed Licensing Portal to generate your license keys. The license keys include the VBASE license, as well as any other licenses needed for the Client Accelerator-v.
The Licensing Portal is a public website; the Riverbed Support website requires registration.
After your licenses are generated, they appear online and are also emailed to you for reference.
5. Copy and paste the license key into the text box. Separate multiple license keys with a space, tab, or Enter.
6. Click Add License(s).
The Client Accelerator-v status should change to Healthy, indicated in green, a few seconds after you add the VBASE and Endpoint licenses.
7. Click Save, next to the Healthy status indicator, to save your configuration.