Monitoring and Managing 2U SteelHead CX5080/CX7080 Appliances with BMC
The SteelHead 2U CX5080 and CX7080 appliances include Baseboard Management Controller (BMC) support.
The BMC monitors the physical state of the appliance. The BMC tracks system and network watchdogs, error logs, and sensors. The sensors of a BMC measure internal physical variables such as temperature, power settings, voltage levels, and fan speeds. You can configure alerts for activity detected outside specified limits.
The BMC also allows you to start, restart, and turn off the appliance remotely.
The 2U SteelHead CX5080/CX7080 appliances use the RJ45 port (located above the USB ports) as the BMC port. port for communication. The PRI/AUX ports do not support BMC communication on the 2U SteelHead CX5080/CX7080 appliances.
This appendix provides an overview of the features of the BMC on these appliances. It includes these sections:
This appendix describes some of the key features of the BMC. For complete details about each page, log in to the BMC and click the Help icon in the upper-right corner.
Setting up the BMC for initial access
Before you can access the BMC, you need to configure its network settings.
Logging in to the BMC
The BMC provides a web interface for monitoring and management. You can access this interface through HTTPS.
To connect to the BMC Web interface
1. Make sure the RJ45 port is connected.
2. In a web browser, enter the IP address.
To display the BMC IP address for a SteelHead, from the command line use the show remote ip command.
3. If the connection isn’t trusted (possibly using a self-signed certificate), you are prompted to add and confirm a security exception.
4. When prompted, log in to the web interface. The default username is root; the default password is superuser.
Dashboard
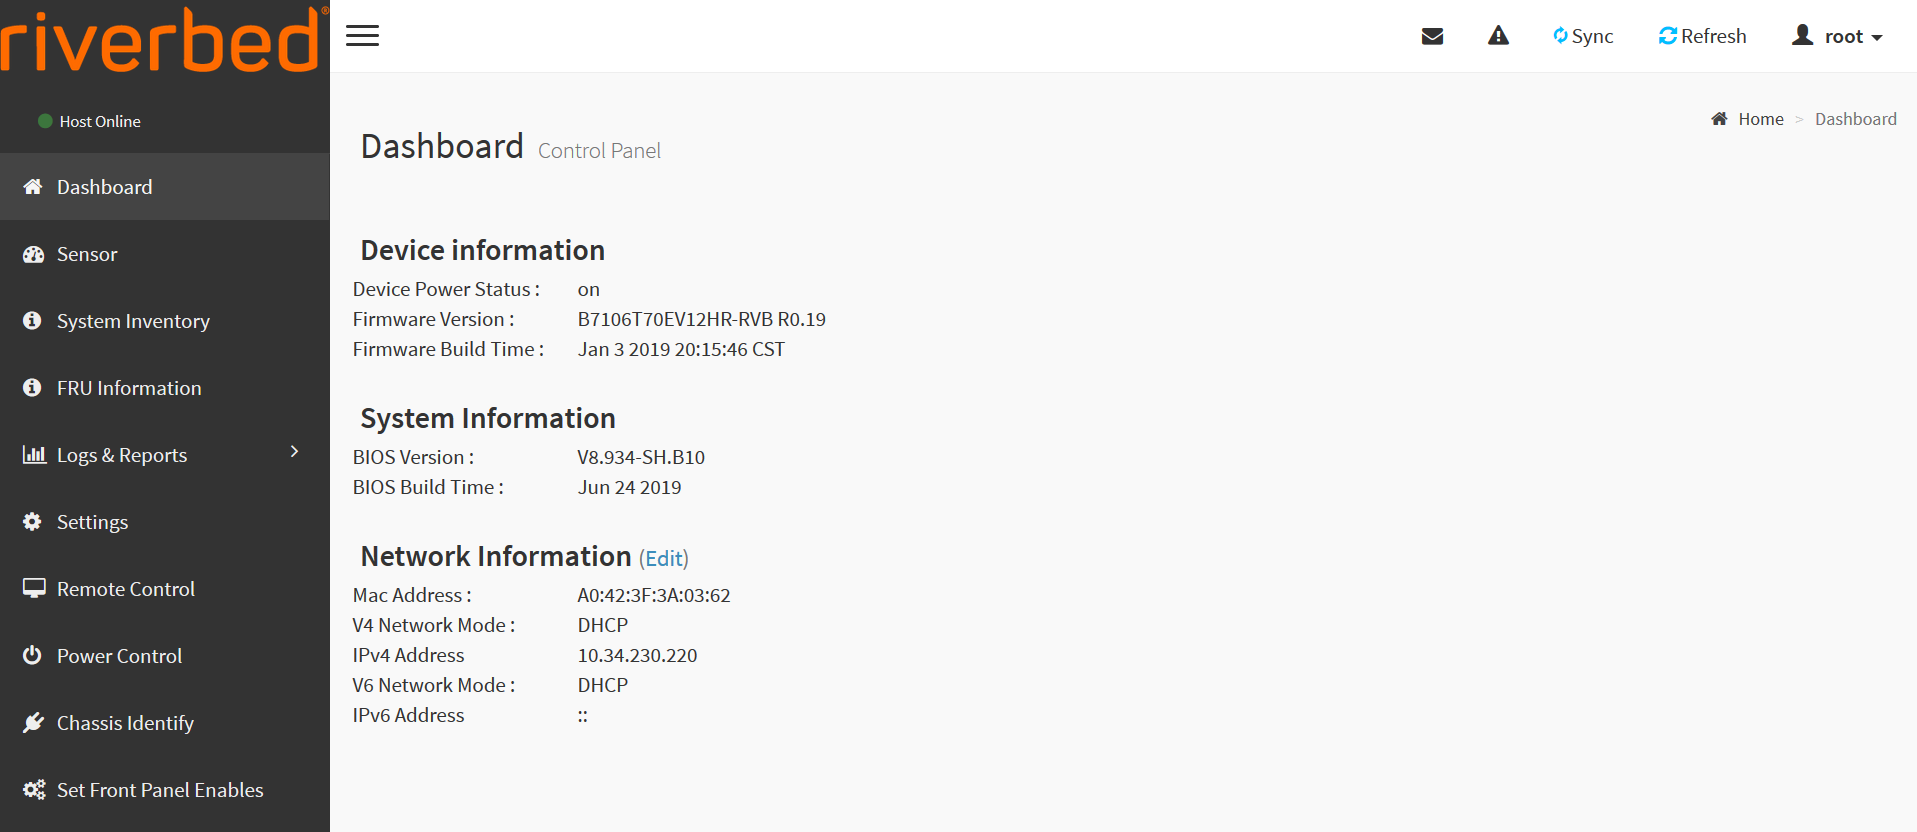
The BMC interface appears and displays the Dashboard.
Viewing sensor information
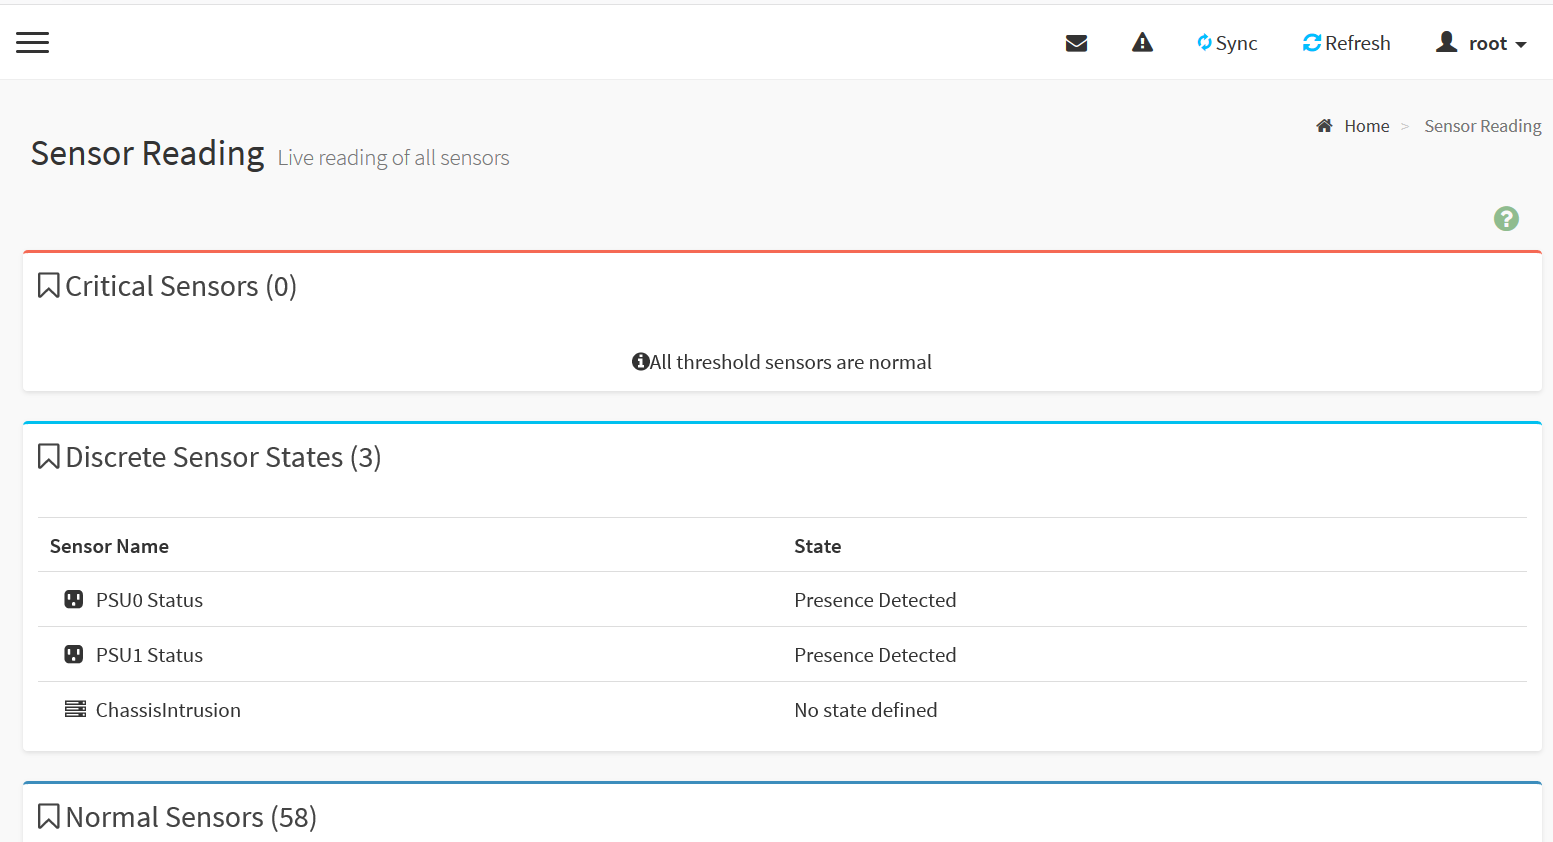
The Sensor Reading page displays all critical sensors, discrete sensor states, normal sensors, and disabled sensors. You can view sensor details and change sensor threshold (if supported on the sensor).
The Sensor Reading page refreshes automatically with live data retrieved from the database. There might be some delay in retrieving the live data.
Sensor Reading page
To view sensor details and events and changing threshold settings
1. Select the sensor name to display the Sensor detail page. This page displays information, events, and thresholds. The graph is a live representation of the sensor readings.
Sensor details page
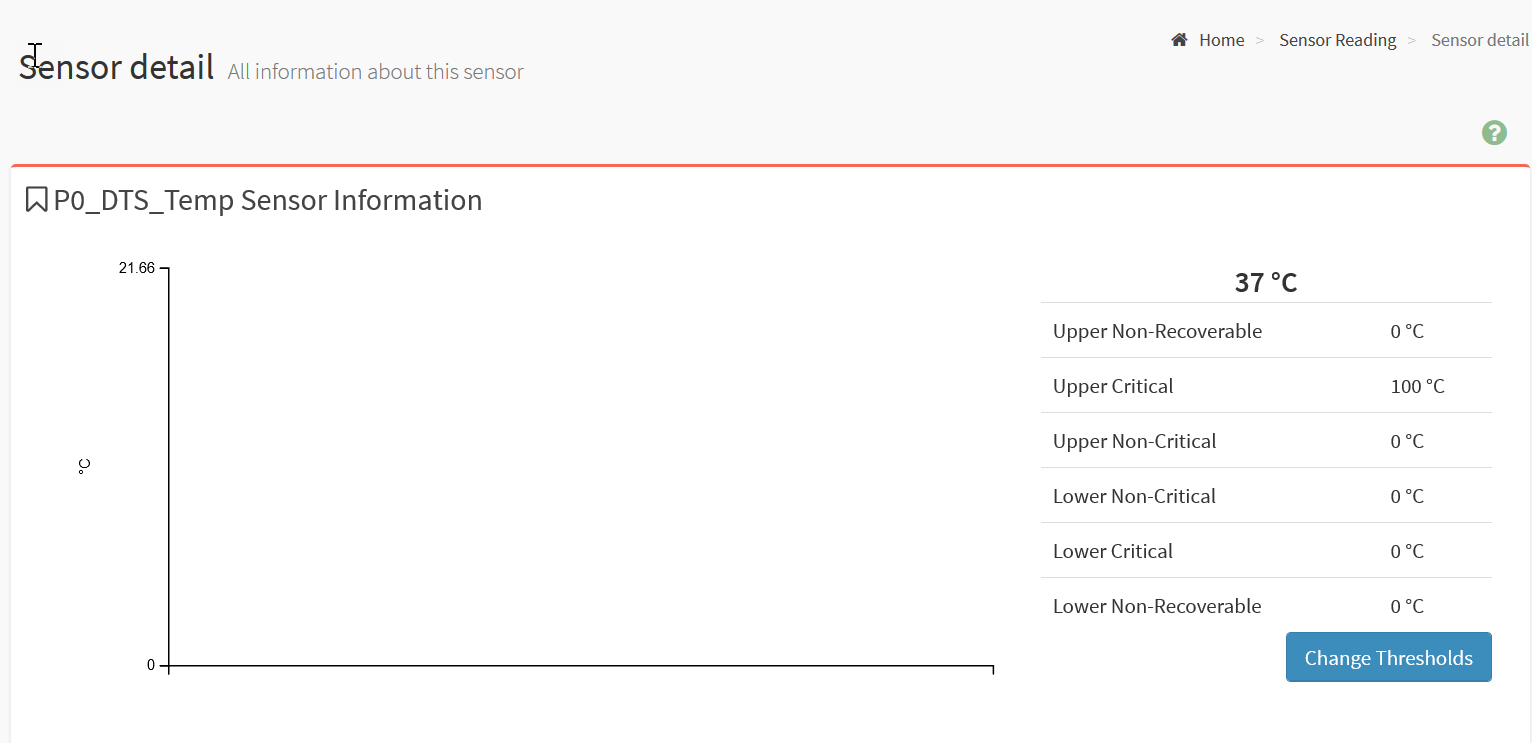
2. Hover over the graph point to view the sensor information.
3. Scroll to Sensor Events to view all the event entries for this sensor in a reverse chronological order.
4. To change sensor thresholds (if supported on the sensor), click Change Thresholds to display the Thresholds Sensor page.
The Change Thresholds button is enabled only for administrator or operator privilege users. For other users, this option is disabled.
Changing sensor thresholds
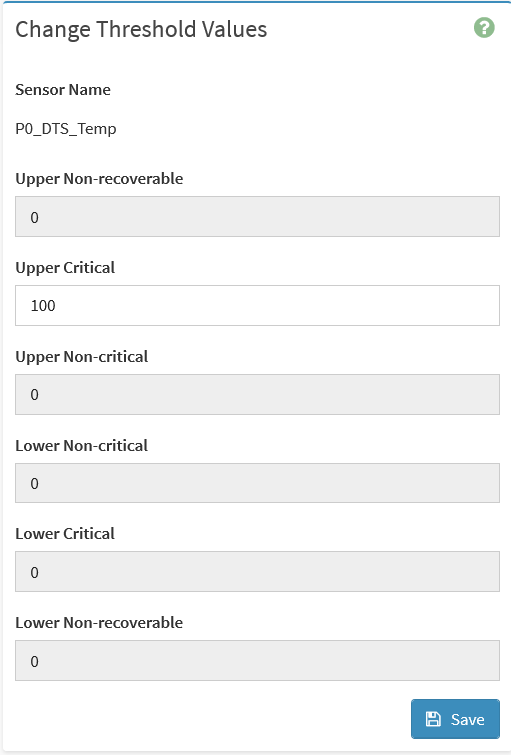
5. Enter the desired threshold values and click Save.
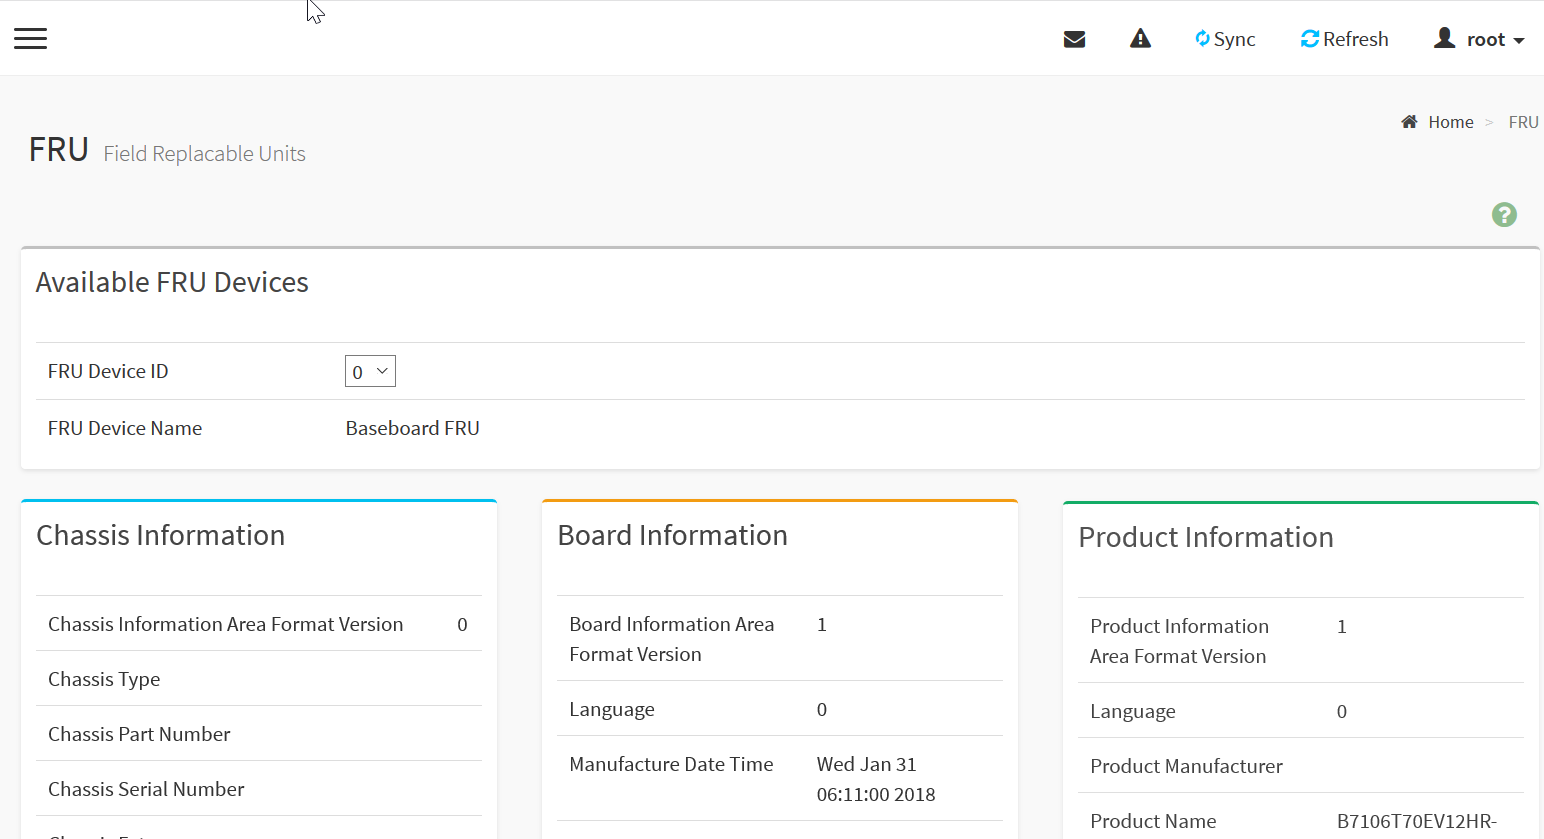
Viewing FRU units
The Field Replaceable Units (FRU) Information page displays:
• Available FRU devices - Select the FRU ID to display detailed information.
• Chassis information - Displays the format version, type, part number, serial number, and add-ons.
• Board information - Displays the format version, language, manufacturer date and time, manufacturer, product name, serial number, part number, FRU ID, and add-ons.
• Product Information - Displays format version, language, manufacturer, name, version, serial number, asset tag, file ID, and add-ons.
FRU Information page
Viewing logs and reports
Choose Logs & Reports > <report name> to view IPMI logs, event logs, and system logs:
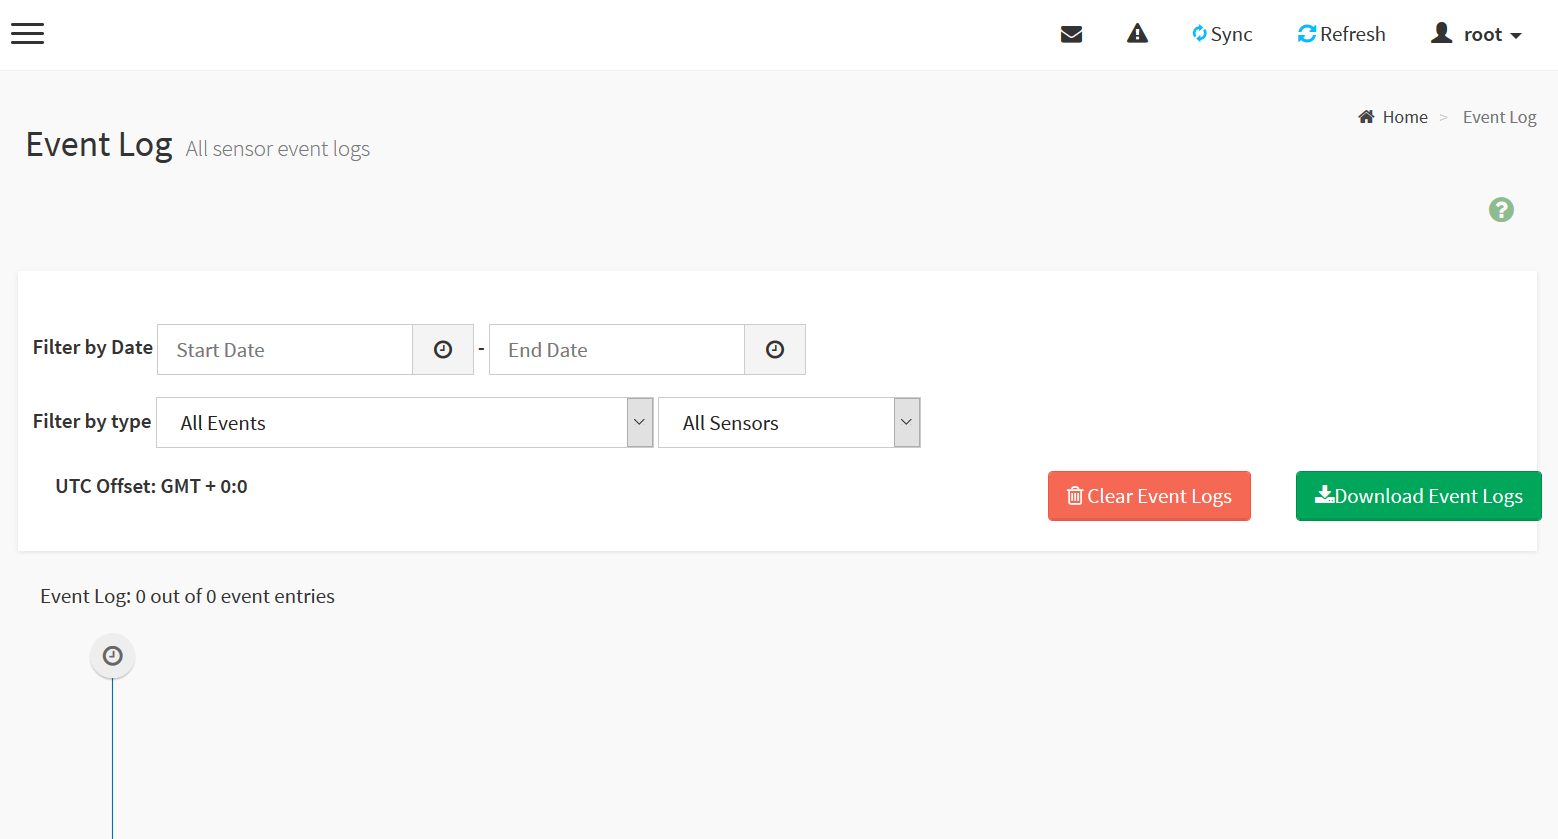
• IPMI Event Log page - Displays a list of events from the sensor event logs for the appliance. You can filter by date, event type and sensor component. You can clear and download an event logs. Hover over the graph to view the number of events by date. You can also select between BMC or Client Time zone. Click a record to see the details of that entry. Clearing a event log deletes all existing records for all sensors.
IPMI Event Log page
Video logs displays logs of available recorded video files (if the options have been configured).
Logs have to be configured under 'Settings > Video Recordings > Auto video Settings > Video Trigger Settings' in order to display entries.
• Click to delete the selected video file. You can also click on toggle header to view video options. To download and save the video file in the client machine. The video will be downloaded in (.avi) format.
• Click to close the selected video file.
If remote video support is enabled, three pre-event videos and maximum configured dump value of post-event videos can be recorded.
• If remote video support is disabled, one pre-event video and two post event videos can be recorded. Videos are allowed to play or download only if file size is less than 40 MB. If the file size is greater than 40 MB, you are notified with a message to use Java player application.
Video logs page

Viewing and modifying settings
You can view and modify these settings on the Settings page:
• Date & Time - Modify date and time settings for the appliance.
• External User Services - Modify LDAP/Edirectory, Active directory, and RADIUS settings.
• KVM Mouse Setting - As administrator, modify the mouse modes: Relative mouse mode, Absolute mouse mode, and Other mouse mode.
• Log Settings - Modify advanced log settings to view all system events and filter entries based on their classification levels.
• Media Redirection Settings - Modify general settings, Vmedia instance settings, and remote session settings.
• Network Settings - Modify network IP settings, network link configuration, DNS configuration, and sideband interface settings.
• PAM Order Settings - Modify the PAM (Pluggable Authentication Modules) order for user authentication into the BMC.
• Platform Event Filter - Modify event filters, alert policies, and LAN destinations.
• Services - Modify web, KVM, CD-media, FD-media, and HD-media settings.
• SMTP Settings - Modify SMTP settings, including the LAN interface and email ID.
• SSL Settings - View the SSL certificate, generate the SSL certificate, and upload the SSL certificate.
• System Firewall - View and modify existing firewall settings and add a firewall.
• User Management - Configure user management settings.
• Video Recording - Configure SDL Settings and JAVA SOL. You must enable Remote Media Support before you configure video recording settings.
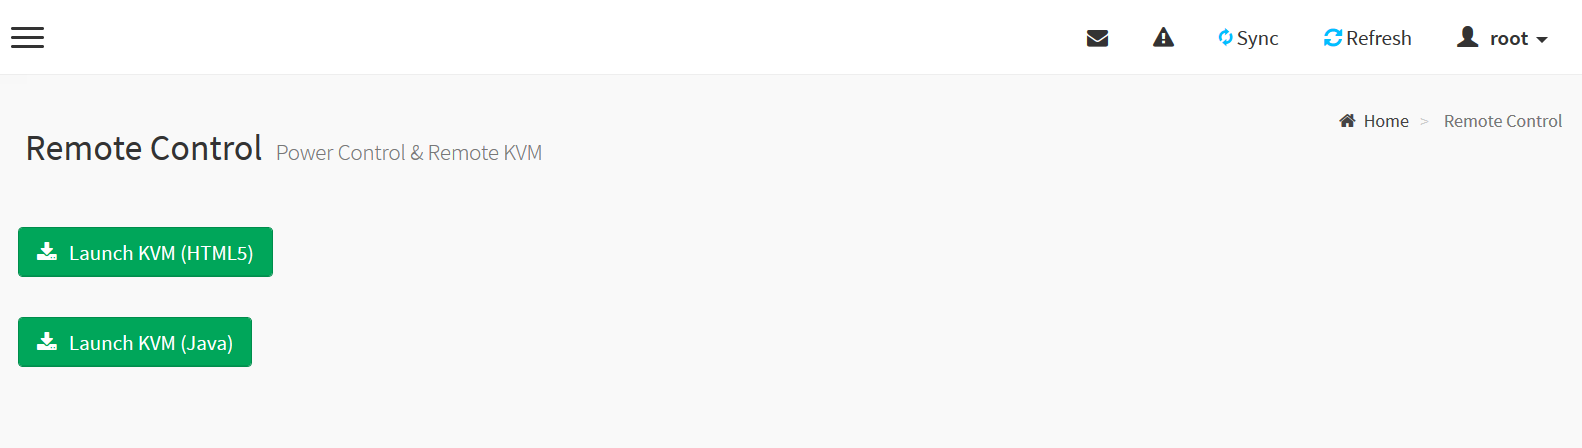
Remotely controlling the appliance
You can launch a remote serial-over-LAN session for the appliance from the Remote Control page.
• Choose Remote Control and click Launch KVM (HTML 5) to launch a remote session via KVM (HTML 5) for the appliance.
• Choose Remote Control and click Launch KVM (Java) to launch a remote session via KVM (Java) for the appliance.
Remote Control page
Controlling the power
You can reboot or restart the appliance from the BMC. The page also shows the current status of the appliance.
To reboot, restart, or power on the appliance
1. Choose Power Control.
2. Select one of the following power control options:
• Power Off - Immediately power off the appliance.
• Power On - Powers off and then reboots the system (cold boot).
• Power Cycle - Reboots the appliance without powering off (warm boot).
• Hard Reset - Initiates operating system shutdown prior to the shutdown.
• ACPI Shutdown - Sends Advanced Configuration and Power Interface (ACPI) shutdown signal to the virtual machine, which has the same effect as if you had pressed the power button.
3. Click Perform Action.
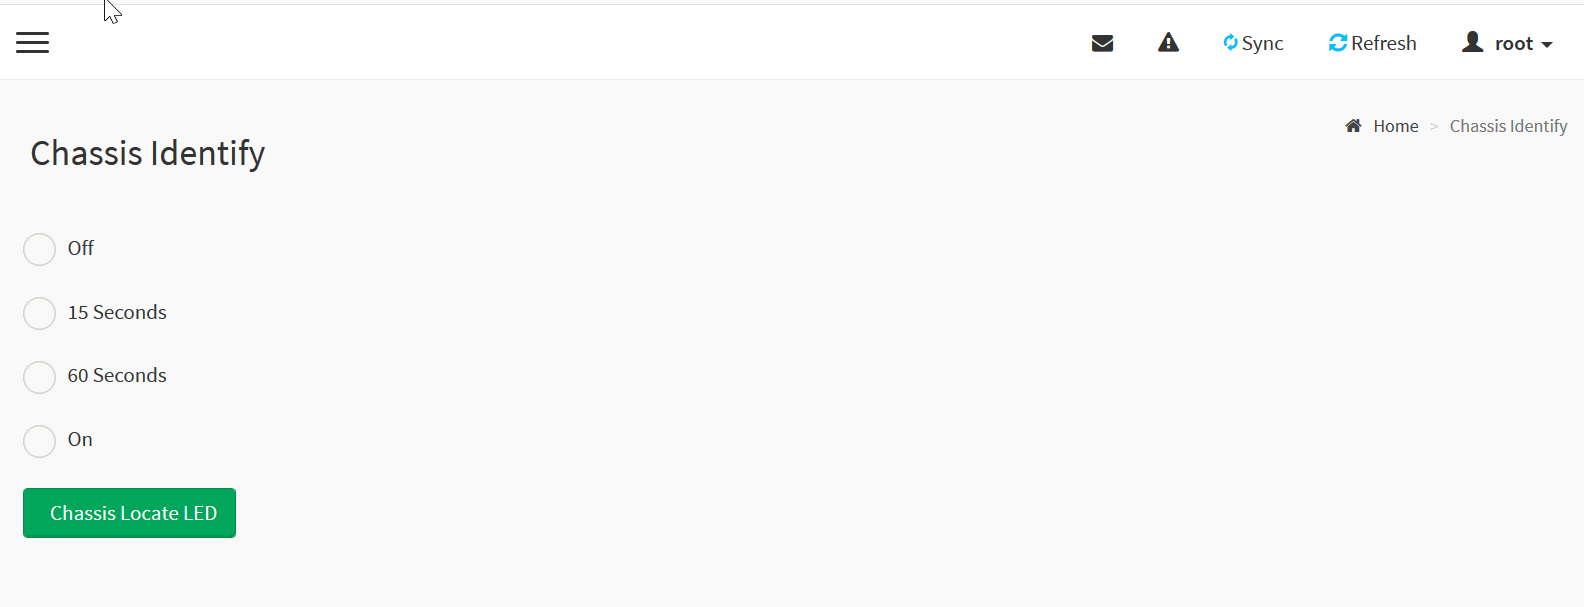
Chassis identify
Select On, Off, 15 seconds, or 60 seconds and click Chassis Locate LED.
Chassis identify
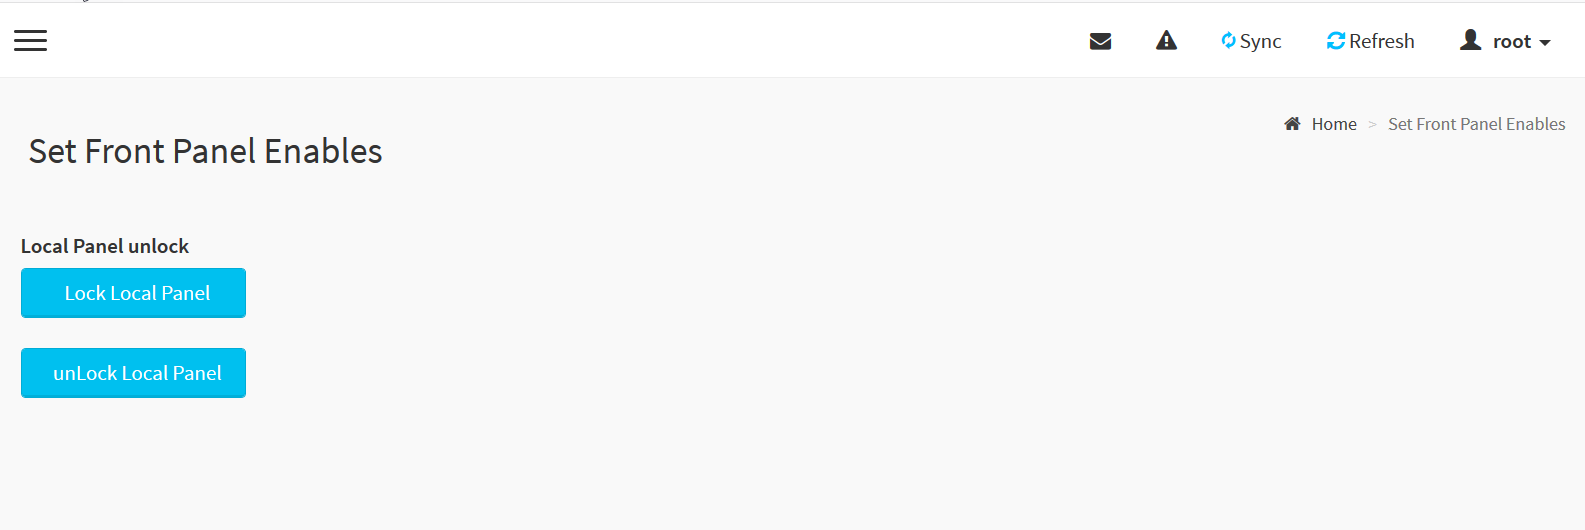
Locking or unlocking the front panel
• To lock the front panel click Lock Local Panel.
• To unlock the front panel, click Unlock Local Panel.
Locking or unlocking the front panel
Maintenance
You can perform these maintenance tasks:
• Backup Configuration - You can check the component before performing a backup. By default, IPMI configurations are selected automatically when you select the Network and Services box. You can save the backup config file to a location of your choice.
• Firmware Image Location - Set the protocol to be used to transfer the firmware image onto the BMC: Web upload during flash or TFTP server.
• Firmware Information - Displays the firmware image date, time, and version.
• BIOS Information - You can view the BIOS firmware version and build date.Firmware Update - Perform a firmware image update.
• HPM Firmware Update - Perform a Hardware Platform Management (HPM) firmware image update.
• Preserve Configuration - Check the configuration settings to be preserved when a restore configuration operation is performed.
• Restore Configuration - Navigate to a previously saved configuration file to be restored.
• Restore Factory Defaults - Set configurations to be preserved during a restore operation.
Signing out of the BMC session
To sign out of the BMC session
1. Choose Sign out to display the confirmation pop up window.
2. Click OK to end the session.