Configuring DHCP Options in Zones on SteelHead SD
This topic describes how to configure DHCP options in zones on SteelHead SD appliances. It includes these sections:
These procedures describe how to configure DHCP options in zones on SteelHead SD 570-SD, 770-SD, and 3070-SD appliances and the SteelConnect SDI-2030 gateway located at the branch. For additional information, see the SteelConnect Manager User Guide.
Configuring DHCP options on SteelHead SD LAN clients
SteelHead SD appliances support the ability to configure these DHCP options in zones:
•Preboot Execution Environment (PXE) boot using the Trivial File Transfer Protocol (TFTP)
•Session Initiation Protocol (SIP) server
•HTTP proxy
To create a zone and DHCP options on SteelHead SD LAN clients
1. Choose Network Design > Zones page and select the appliance.
2. Click New Zone.
3. Select the site from the drop-down list.
4. Type a name to describe the zone.
5. Optionally, specify the IPv4 network using the a.b.c.d/nn format. This IP address can be autoassigned.
6. When multiple SteelHead SD appliances are available, select the default gateway for this appliance. from the list.
7. Optionally, specify the VLAN tag. Every zone has a VLAN tagged assigned to it. If you leave this option blank the system will automatically assign a VLAN tag to the zone.
8. Click Submit.
9. Select the zone from the zones list.
10. Select the DHCP tab.
Configuring PXE boot support
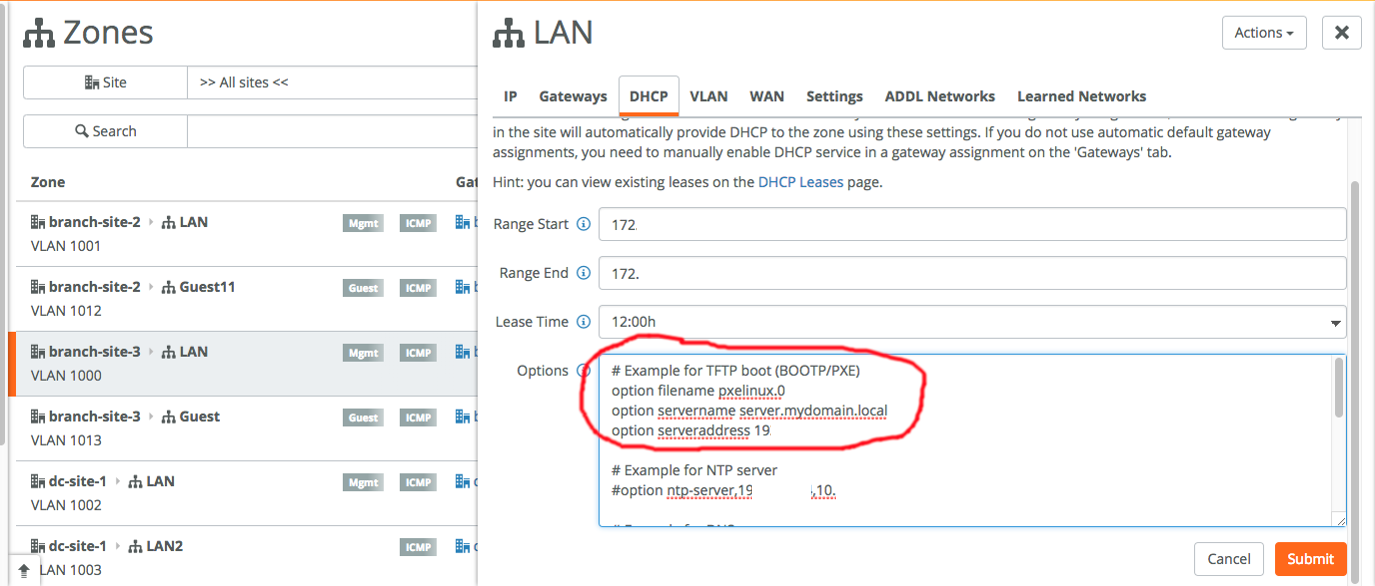
11. To enable PXE boot, in the Options field type:
# Example for TFTP boot (BOOTP/PXE)
option filename pxelinux.0
option servername server.mydomain.local
option serveraddress xxx.xxx.x.x
12. To enable a SIP server, in the Options field type:
# Example for SIP server based on substring match of vendor ID
option vendor:Phone,sip-server,XXX.XXX.XXX.XXX
13. To enable a HTTP proxy, in the Options type:
# Example for HTTP proxy using vendor attributes
option vendor:Riverbed,42,”address:port"
14. Click Submit.
Overriding DNS on guest zones on SteelHead SD
SteelHead SD appliances support the ability to override DNS settings on guest zones in Zones > DHCP tab: DHCP options.
By default, when a zone is created on SteelHead SD appliances, the appliance acts as a DNS server, which can be problematic for guest zones. You can specify a DNS server in DHCP options to avoid this issue.
To create a guest zone and override DNS settings on SteelHead SD appliances
1. Choose Network Design > Zones page and select the appliance.
2. Click New Zone.
3. Select the site from the drop-down list.
4. Type Guest to describe the zone.
5. Under Guest zone, click On.
6. Optionally, specify the IPv4 network using the a.b.c.d/nn format. This IP address can be autoassigned.
7. When multiple SteelHead SD appliances are available, select the default gateway for this appliance from the list.
8. Optionally, specify the VLAN tag. Every zone has a VLAN tagged assigned to it. If you leave this option blank, the system will automatically assign a VLAN tag to the zone.
9. Click Submit.
10. Select the guest zone from the zones list.
11. Select the DHCP tab.
Configuring a DNS server on a guest zone
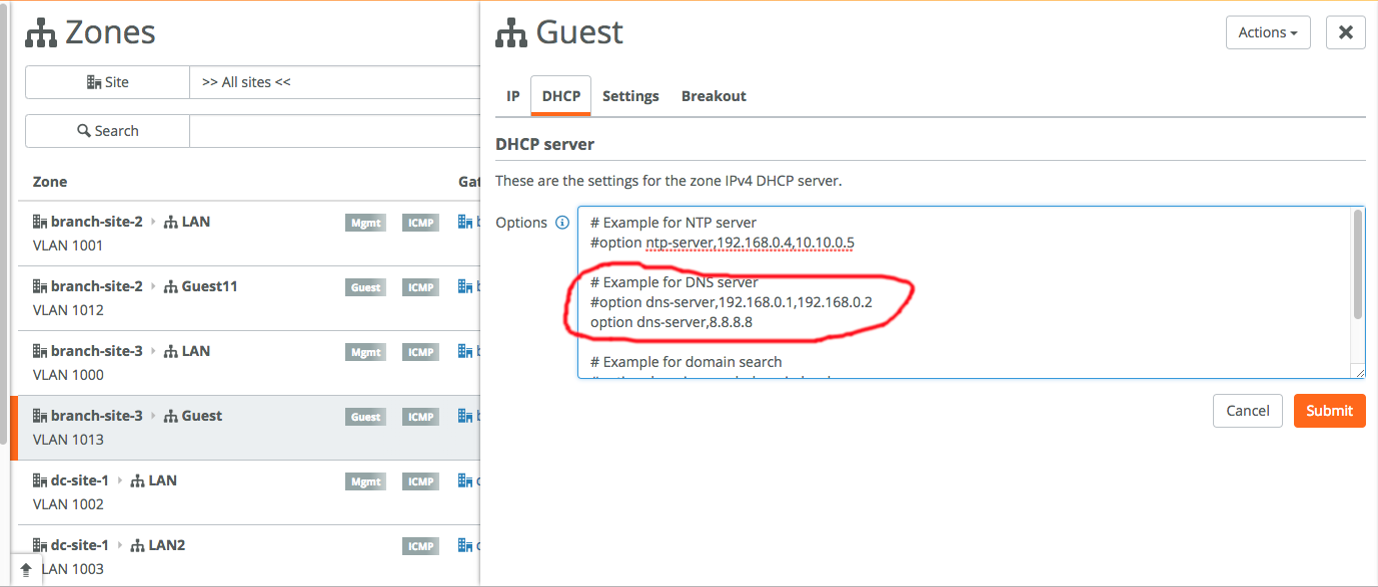
12. In the Options field, enter the public DNS servers and the public DNS server option, for example,
# Example for DNS server
option dns-server,192.168.0.1,192.168.0.2
option dns-server,8.8.8.8
Multiple DNS servers are separated by a comma.
13. Click Submit.