Maintaining Your System
This section describes how to view job status, upgrade your software, and how to shut down and reboot the system. It includes the following sections:
Starting, Stopping, and Restarting the Service
You can start, stop, and restart the Interceptor service in the Administration > Maintenance: Services page. You can also use this page to reset the service alarm after it has been triggered.
The Interceptor service is a daemon that executes in the background, performing operations when required.
Many of the Interceptor service commands are initiated at startup. After you make changes to your configuration, it is important to restart the Interceptor service.
Caution: Restarting the SteelHead Interceptor service disrupts existing network connections that are proxied through the SteelHead Interceptor.
Stopping the SteelHead Interceptor service is not persistent across restarts or reboots of the SteelHead Interceptor. When you stop the SteelHead Interceptor service, all configured in-path IP addresses and ports are disabled, and this causes optimization of SteelHead traffic to stop. However, the SteelHead Interceptor service automatically restarts—and optimization of SteelHead traffic resumes—when you restart or reboot the SteelHead Interceptor.
To start, stop, or restart services
1. Choose Administration > Maintenance: Services to display the Services page.
Figure: Services Page

2. Under Service, click Stop, Start, or Restart.
Stopping the SteelHead Interceptor service is not persistent across restarts or reboots of the SteelHead Interceptor. When you restart or reboot the SteelHead Interceptor, the SteelHead Interceptor service automatically restarts and optimization of SteelHead traffic resumes.
3. Click Save to save your settings permanently.
To reset the service alarm
1. Choose Administration > Maintenance: Services to display the Services page.
The option to reset the service alarm appears only after the service triggers the Reset Service Alarm.
2. Under Reset Service Alarm, click Reset Service Alarm.
3. Click Save to save your settings permanently.
Configuring Scheduled Jobs
You can view completed, pending, and inactive jobs, as well as jobs that were not completed, because of an error in the Scheduled Jobs page.
Jobs are commands that are scheduled to execute at a time you specify.
The only jobs you can schedule by using the SteelHead Interceptor Management Console are software upgrades and configuration pushes; for all other jobs, you must use the CLI.
For details about scheduling jobs using the CLI, see the Riverbed Command-Line Interface Reference Manual.
To configure scheduled jobs
1. Choose Administration > Maintenance: Scheduled Jobs to display the Scheduled Jobs page.
Figure: Scheduled Jobs Page

2. Select Enabled or Disabled from the drop-down list to enable or disable the job.
3. Select the Job ID number to display job details about the job.
4. Optionally, under Details for Job <#>, complete the configuration as described in this table.
Control | Description |
Status | Displays the current status (such as Completed, Error, or Pending) |
Name | Specify a name for the job. |
Comment | Specify a comment. |
Interval (seconds) | Specify how often the job runs. The default value is 1800. |
Executes On | Specify the date on which the job runs. |
Enable/Disable Job | Select to enable the job to run at the specified date or clear to prevent the job from running. |
Apply Changes | Applies the changes to the current configuration. |
Cancel/Remove This Job | Cancels or removes the job. |
Remove Selected Jobs | Select the check box next to the name and click Remove Selected Jobs. |
Execute Now | Runs the job. |
5. Click Save to save your settings permanently.
Managing Licenses
This section describes how to install, update, and remove a license.
You perform all license management in the Licenses page.
To install a license
1. Choose Administration > Maintenance: Licenses to display the Licenses page.
Figure: Licenses Page
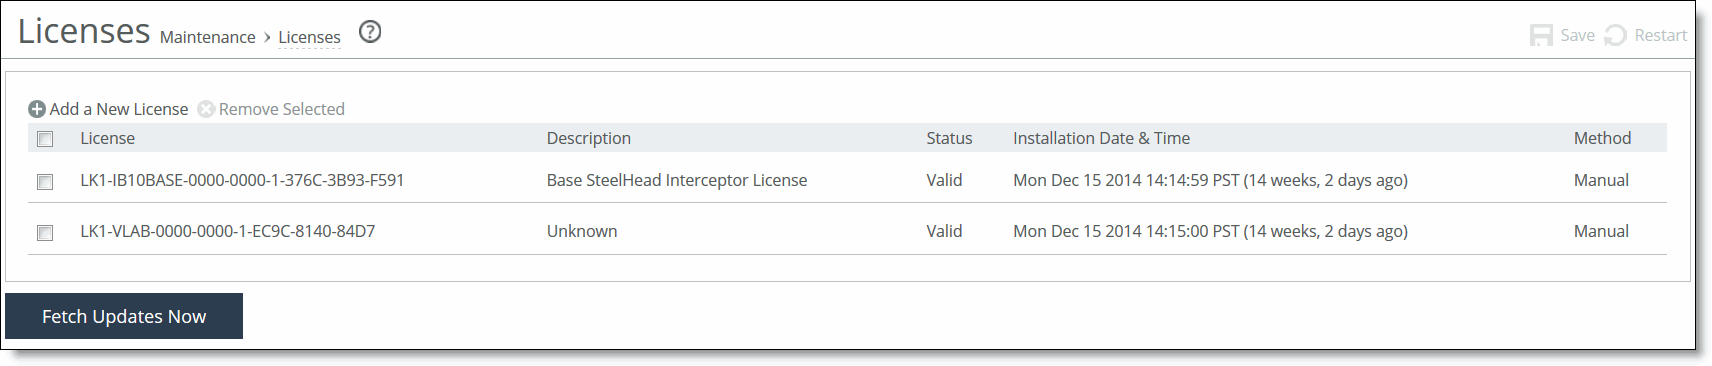
The Licenses page lists the licenses along with a description, the license status, the date and time the license was installed, and the method used to install the license (manually or automatically).
2. Under Licenses, complete the configuration as described in this table.
Control | Description |
Add a New License | Displays the controls to add a new license. |
Licenses Text Box | Copy and paste the license key provided by Riverbed Support or Sales into the text box. Note: Separate multiple license keys with a space, Tab, or Enter. |
Add | Adds the license. |
Fetch Licenses Now | Contacts the Riverbed license portal and downloads all applicable licenses for the SteelHead Interceptor. |
3. Click Save to save your settings permanently.
To fetch a license
1. Choose Configure > Maintenance > Licenses to display the Licenses page.
2. Click Fetch Updates Now.
The Licensing page displays a success message or the alarm Status page reports an actionable error message.
To remove a license
1. Choose Administration > Maintenance: Licenses to display the Licenses page.
2. Select the license you want to delete.
3. Click Remove Selected.
4. Click Save to save your settings permanently.
Upgrading Your Software
You can upgrade or revert to a backup version of the software in the Software Upgrade page.
The bottom of the page displays the software version history of the SteelHead Interceptor, which includes the version number and the software installation date.
For information about the recommended SteelHead Interceptor upgrade path, see the following Riverbed Knowledge Base article on the Riverbed Support Site:
To upgrade software versions
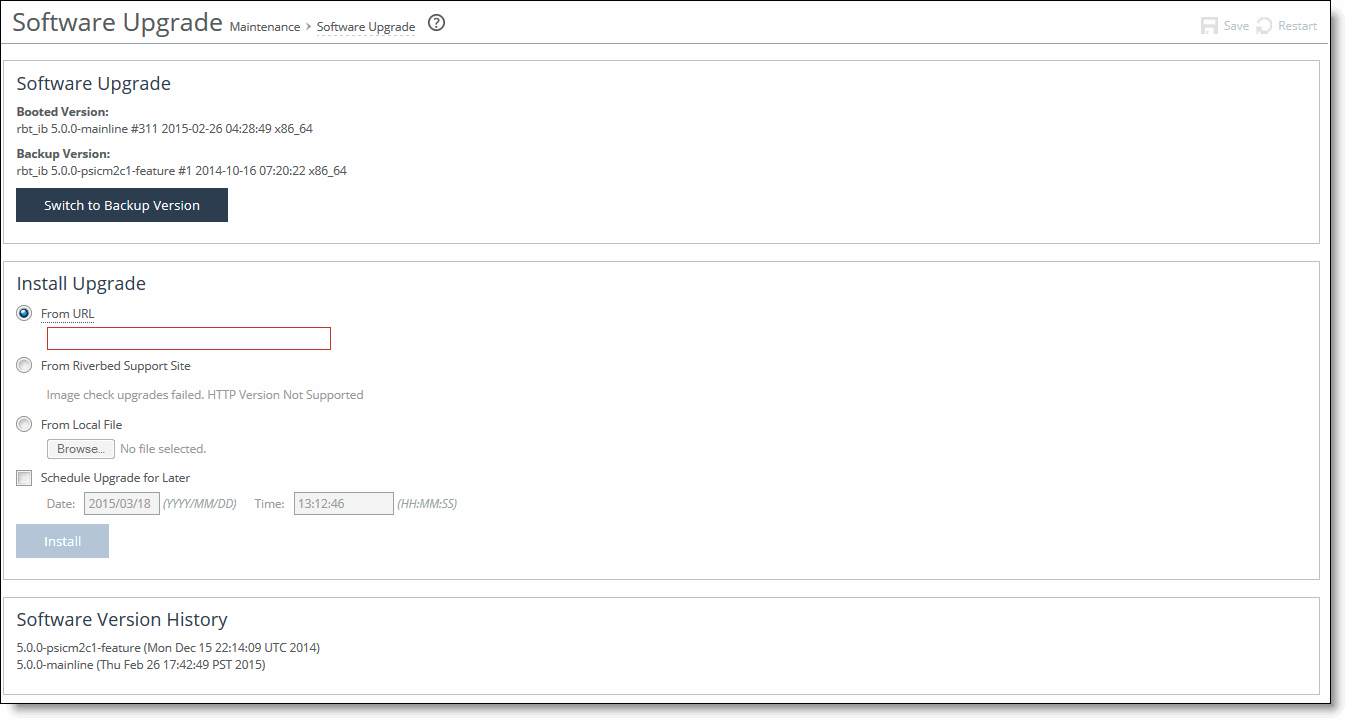
1. Choose Administration > Maintenance: Software Upgrade to display the Software Upgrade page.
Figure: Software Upgrade Page
2. Under Software Upgrade, complete the configuration as described in this table.
Control | Description |
From URL | Select this option and specify the URL. Use one of the following formats: http://host/path/to/file https://host/path/to/file ftp://user:password@host/path/to/file scp://user:password@host/path/to/file |
From Riverbed Support Site | Click this option and select the target release number from the drop-down list. The system uploads and installs the new image immediately after you click Install. To upload and install the image later, schedule another date or time before you click Install. |
From Local File | Select this option and type the path or click Browse to go to the local file directory. If you specify a file to upload in the Local File text box, the image is uploaded immediately, however the image is installed and the system is rebooted at the time you specify. |
Schedule Upgrade for Later | Schedules the upgrade process. Specify the date and time to run the upgrade. Use the following format: yyyy/mm/dd, hh:mm:ss. |
Install | Click to install the software upgrade on your system, unless you schedule it for later. The software image can be quite large; uploading the image to the appliance and installing it can take a few minutes. Downloading a delta image directly from the Riverbed Support site is faster because the downloaded image includes only the incremental changes. As the upgrade progresses, status messages appear. After the installation is complete, the system reminds you to reboot the appliance to switch to the new version of the software. |
Cancel | Cancels your changes. |
3. Choose Administration > Maintenance: Reboot/Shut Down and click Reboot.
The appliance can take a few minutes to reboot. This is normal behavior as the software is configuring the recovery flash device. Do not press Ctrl-C, unplug, or otherwise shut down the system during this first boot. There is no indication displayed during the system boot that the recovery flash device is being configured.
After the reboot, the Dashboard, Software Upgrade, and Help pages of the Interceptor Management Console display the RiOS version upgrade.
To revert the software versions
1. Choose Administration > Maintenance: Software Upgrade to display the Software Upgrade page.
2. Under Software Upgrade, complete the configuration as described in this table.
Control | Description |
Switch to Backup Version | Switches to the backup version on the next reboot. |
Cancel | Cancels the software version switch on the next reboot. |
Rebooting and Shutting Down the Interceptor
You can reboot or shut down the system in the Reboot/Shutdown page.
To restart the system, you must manually turn on the appliance. Rebooting the SteelHead Interceptor does not affect the optimization of the SteelHeads.
To reboot or shut down the system
1. Choose Administration > Maintenance: Reboot/Shutdown to display the Reboot/Shutdown page.
Figure: Reboot/Shutdown Page

2. Click Reboot.
After you click Reboot, you are logged out of the system and it is rebooted.
3. Click Shutdown to shut down the system.
After you click Shutdown, the system is turned off.