Managing SAML
You can enable SAML on a single appliance using the SAML page of that appliance, or you can configure SAML in a policy and then push the policy across multiple appliances.
Before you enable SAML on a single appliance or on multiple appliances, you must configure IdP individually for each appliance because the IdP metadata required to enable SAML is unique for each appliance.
Basic steps to configure SAML as a policy
Task | Reference |
|---|
1. Download the metadata of the appliance from the appliance’s management console. | SteelHead User Guide |
2. Configure the appliance in the IdP website. | SteelHead User Guide |
3. Paste the metadata you received from the IdP website in the SCC Management Console. Optionally, if you want to check whether your IdP configuration is valid or not, paste the metadata in the appliance’s Management Console instead. After you validate the metadata, fetch the appliance-specific configuration from SCC. |
SteelHead User Guide
|
4. Repeat steps 1 through 3 for all the appliances on which you want to perform the policy push. | |
5. Configure SAML in the policy pages and push the policy across all the appliances. | |
For detailed information, see the SteelHead User Guide.
Configuring IdP in SCC
You can configure IdP in the Editing Appliance Configuration: <hostname>, SAML page.
Choose Manage > Topology: Appliances to display the Appliances page. Select the name of the appliance you want to edit to display the Appliance Pages tab. Select the Appliance Pages tab to display the Appliance Configuration Pages list.
Under Appliance Configuration Pages, click SAML to display the Editing Appliance Configuration: <hostname>, SAML page. Click Include to include this configuration from the policy push for the specified appliance. Your changes aren’t applied to the specified appliance until the policy is pushed to the appliance. Under IdP Configuration, paste the IdP metadata you received from the IdP website, and click Apply.
You have completed IdP configuration that is specific to an appliance. You can now create a policy to configure and enable SAML. This policy can be pushed to an appliance of your choice or to a group of appliances.
Creating a SAML authentication policy
Choose Manage > Policies. Click + Add Policy to expand the page. Type a policy name and description and click Add to display the Editing Policy page.
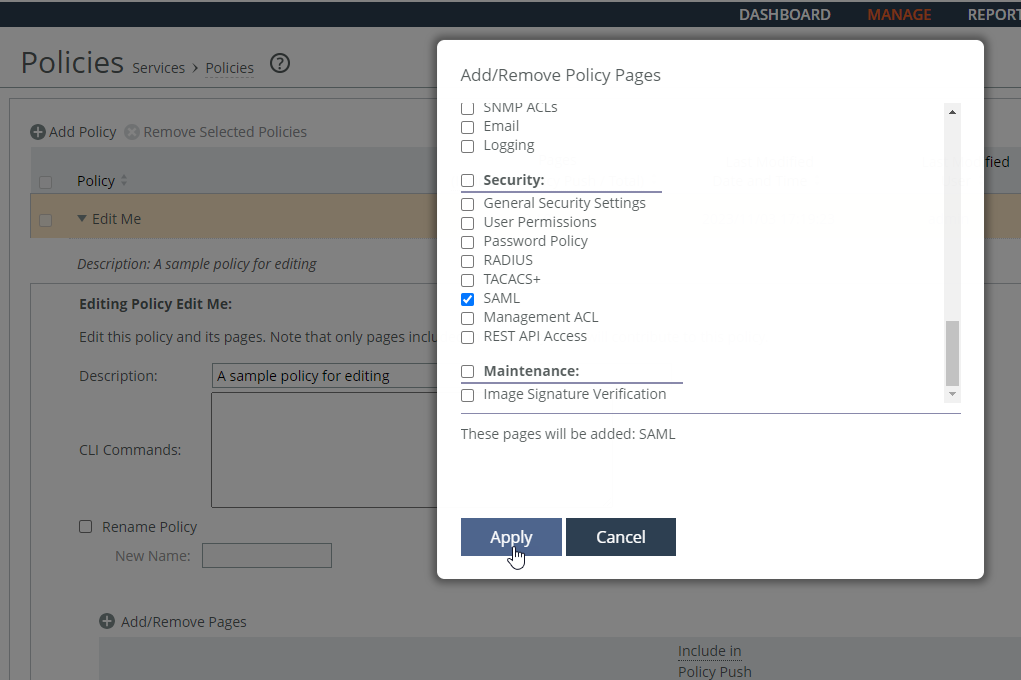
Click + Add/Remove Pages to display the Add/Remove Policy Pages pop-up window. Under Security, select SAML and click Apply to display the Editing Policy page. In the Editing Policy page, click SAML to display Editing <policy-name> page. Click Include to include the policy in the policy push.
Editing the policy
These SAML request and response settings are available under IdP Configuration:
IdP Metadata
Allows you to paste the IdP metadata you copied or received from the IdP website.
Security Settings
• Sign Authentication Request—Select this option to have SCC sign the SAML authentication request sent to the identity provider. Signing the initial login request sent by SCC allows the identity provider to verify that all login requests originate from a trusted service provider.
• Requires Signed Assertions—Select if SAML assertions must be signed. Some SAML configurations require signed assertions to improve security.
• Requires Encrypted Assertions—Select this option to indicate to the SAML identity provider that SCC requires encrypted SAML assertion responses. When this option is selected, the identity provider encrypts the assertion section of the SAML responses. Even though all SAML traffic to and from SCC is already encrypted by the use of HTTPS, this option adds another layer of encryption.
Attribute
• User Name Attribute—Enter the name of the IdP variable that carries the username of the user. The username attribute is mandatory and must be sent by your identify provider in the SAML response to align the login with a configured SteelHead account. The default value is samlNameId.
• Member of Attribute—Enter the name of the IdP variable that carries the role of the user. The default value is memberOf.
Under IdP Configuration, configure the SAML request and response settings:
IdP Metadata
Pastes the IdP metadata you copied or received from the IdP website.
Security Settings
• Sign Authentication Request—Select this option to have SCC sign the SAML authentication request sent to the identity provider. Signing the initial login request sent by SCC allows the identity provider to verify that all login requests originate from a trusted service provider.
• Requires Signed Assertions—Select if SAML assertions must be signed. Some SAML configurations require signed assertions to improve security.
• Requires Encrypted Assertions—Select this option to indicate to the SAML identity provider that SCC requires encrypted SAML assertion responses. When this option is selected, the identity provider encrypts the assertion section of the SAML responses. Even though all SAML traffic to and from SCC is already encrypted by the use of HTTPS, this option adds another layer of encryption.
Attribute
• User Name Attribute—Enter the name of the IdP variable that carries the username of the user. The username attribute is mandatory and must be sent by your identify provider in the SAML response to align the login with a configured SteelHead account. The default value is samlNameId.
• Member of Attribute—Enter the name of the IdP variable that carries the role of the user. The default value is memberOf.
Click Apply to save your configuration settings. Under SAML, to enable SAML, select the Enable SAML check box and click Apply. Click Save to Disk to save you settings permanently.
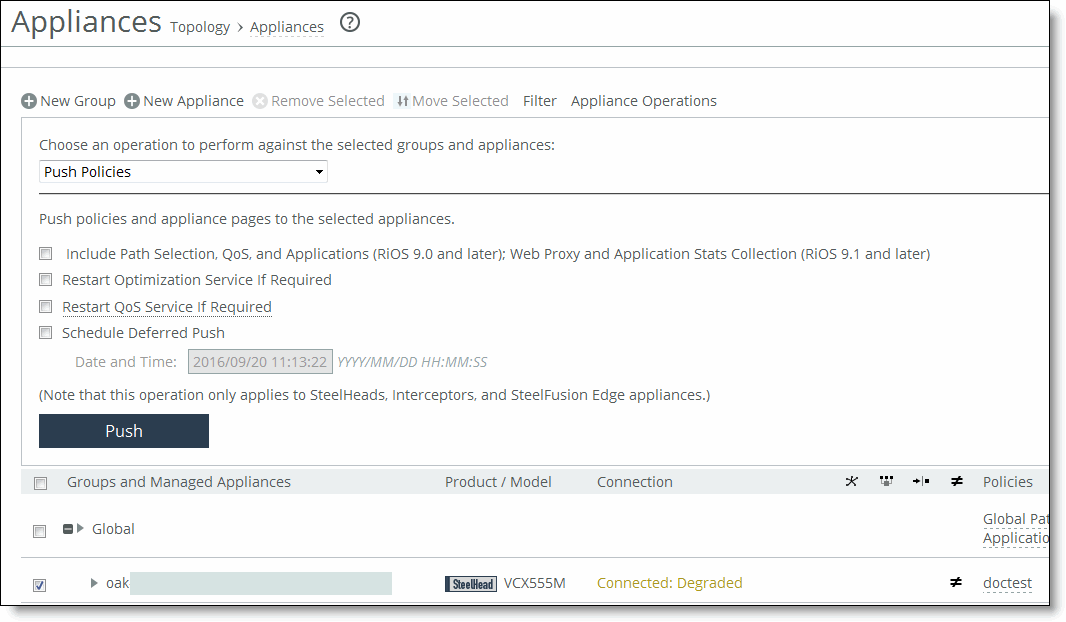
Choose Manage > Topology: Appliances to return to the Appliances page. Click Appliance Operations to expand the page. Select the appliance you want to push, select Push Policies from the drop-down list, and click Push.
Pushing policies to appliances
Choose Manage > Operations: Operations History to verify that the operation was successful.