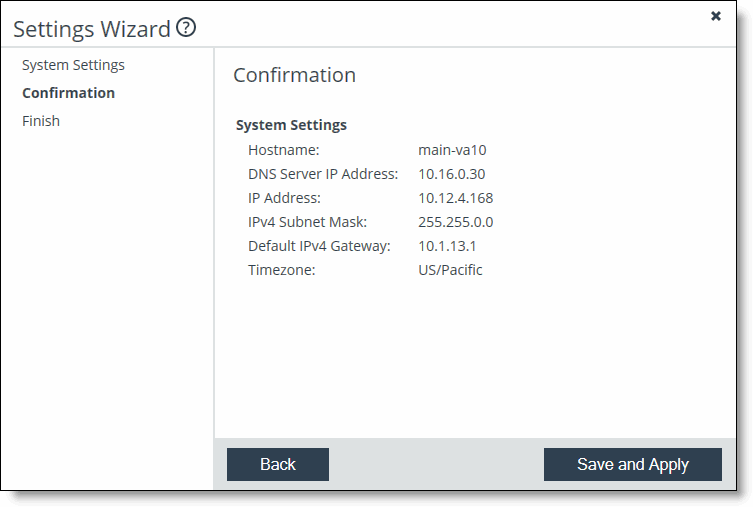
Figure: Settings Wizard - System Settings page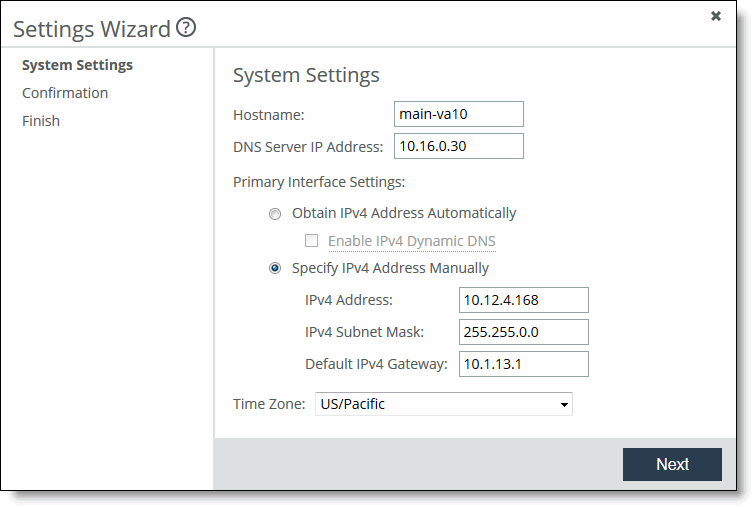
Control | Description |
Hostname | Specify the IP address or hostname of the Core. Note: After initial configuration, this setting can be modified in the Configure > Networking: Host Settings page in the SteelFusion Core Management Console. |
DNS Server IP Address | Specify the IP address for the primary name server. Note: After initial configuration, this setting can be modified in the Configure > Networking: Host Settings page in the SteelFusion Core Management Console. |
Obtain IPv4 Address Automatically | Specify this option to automatically obtain the IPv4 address from a DHCP server. A DHCP server must be available so that the system can request the IP address from it. Note: After initial configuration, this setting can be modified in the Configure > Networking: Host Settings page in the SteelFusion Core Management Console. |
Specify IPv4 Address Manually | Specify this option if you do not use a DHCP server to set the IP address. Specify the following settings: • IPv4 Address - Specify an IPv4 address. • IPv4 Subnet Mask - Specify a subnet mask. • Default IPv4 Gateway - Specify the primary gateway IP address. The primary gateway must be in the same network as the primary interface. Note: After initial configuration, this setting can be modified in the Configure > Networking: Management Interfaces page in the SteelFusion Core Management Console. |
Time Zone | Select the time zone from the drop-down list. Note: After initial configuration, this setting can be modified in the Configure > Networking: Management Interfaces page in the SteelFusion Core Management Console. |