Installing a Virtual Gateway
This chapter provides procedures for installing a virtual gateway into a virtual machine on these virtual platforms:
The procedures in this chapter assume you have obtained a virtual gateway image file, and that you have prepared your networks to receive the gateway into the topology. See
Before you begin and
Building a Virtual Gateway Image.
Installing a virtual gateway in OpenStack
Your KVM gateway image comes in .qcow2 format packaged in a downloadable .zip file. After you build, download, and extract your KVM gateway image, you are ready to install it into a virtual machine instance in your OpenStack environment. The installation process involves these activities:
• Upload the gateway image into your OpenStack environment.
• Launch a virtual machine instance with the gateway image installed into it.
To upload the gateway image file into your OpenStack environment
1. Log in to your OpenStack dashboard.
2. Choose Compute > Images.
3. Click Create Image.
The Create an Image dialog box is displayed.
4. Enter a display name for the image.
5. Optionally enter a description.
6. For Image Source, select Image File.
7. Click Choose File.
8. Navigate to your gateway image .qcow2 file and select it.
9. For Kernel, accept the default setting.
10. For Format, select QCOW2 - QEMU Emulator.
11. For Architecture, accept the default setting.
12. Optionally set Minimum Disk (GB) to 1.
13. Optionally set Minimum RAM (MB) to 512.
14. Click Create Image.
Your gateway image is added to the list and is now available for use within your OpenStack environment.
To launch a KVM virtual machine with your gateway image
1. Click Launch Instance in either of these locations:
– On the Images page in the Actions column for your gateway image’s row.
– On the Instances page.
The Launch Instance dialog box is displayed.
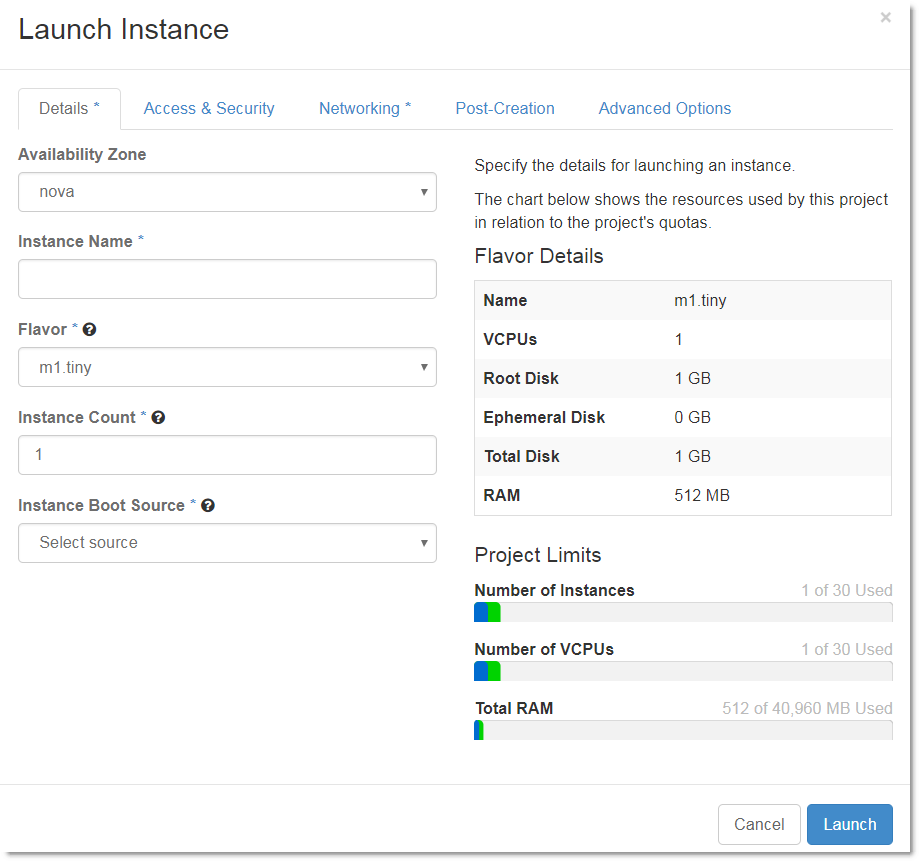
2. Select the Details tab.
3. Select an availability zone.
4. Enter a name for the instance.
5. For Flavor, select an instance size that meets or exceeds the performance needs for your model of gateway.
6. For Instance Count, enter the number of instances you want to launch.
7. For Instance Boot Source, select Boot from image.
The Image Name drop down menu is displayed.
9. Select the Networking tab.
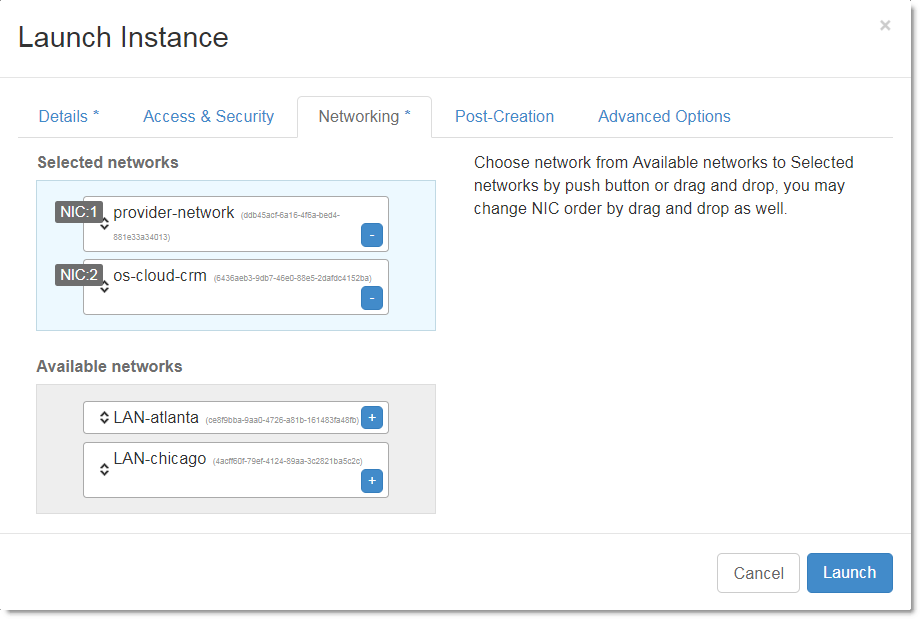
10. Add the provider network first. Order matters because the gateway by default creates an uplink to communicate with SCM on the first network listed. Adding the provider network first ensures that the gateway will communicate with SCM.
11. Add your remaining private networks.
12. Click Launch.
Installing a virtual gateway in VMware
This section includes two procedures: one for using VMware vSphere which requires an .ova file and another for using the ESXi console which requires .vmdk and .vmx files.
To create a virtual gateway on an ESXi host using VMware vSphere
1. Log in to your VMware vSphere client.
2. Choose File > Deploy OVF Template.
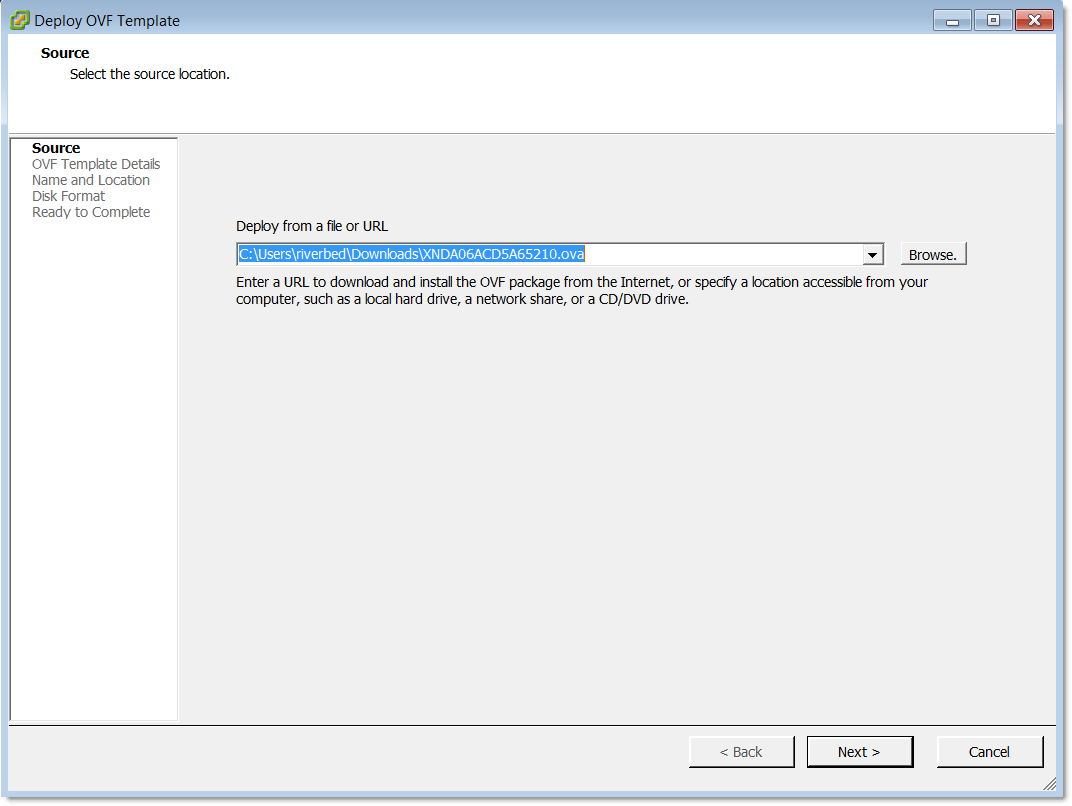
4. Click Next.
5. Review the template details and click
Next.
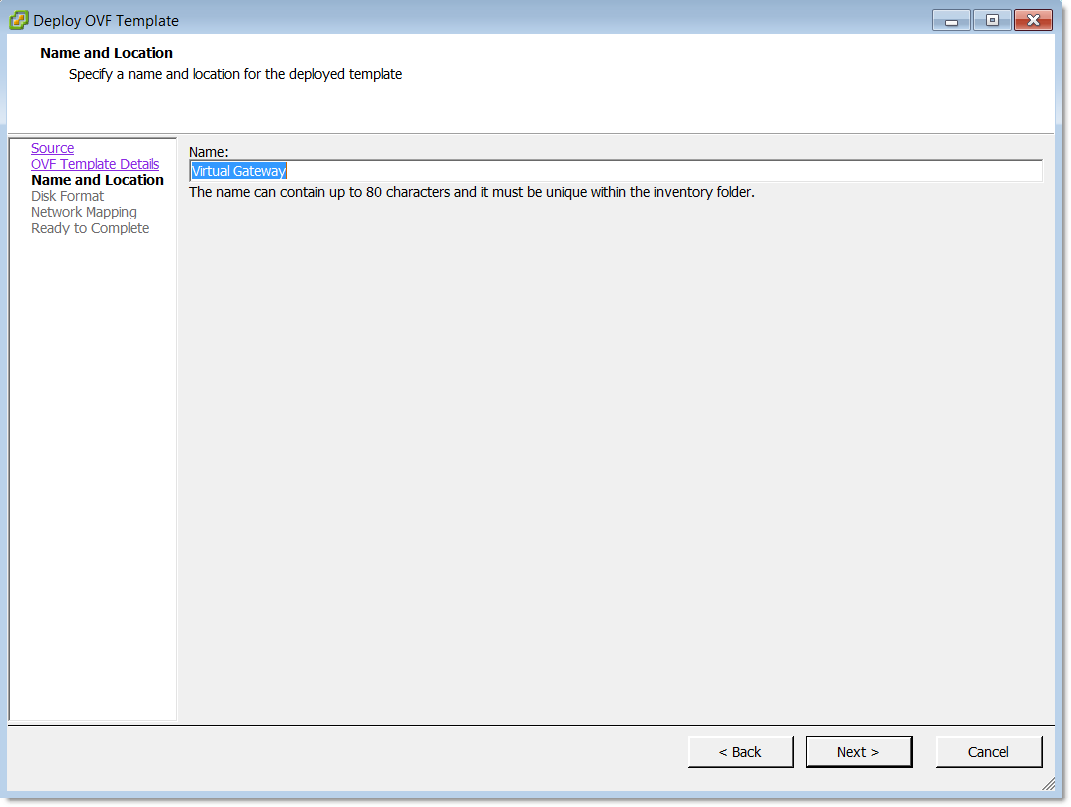
6. Enter a name for the virtual gateway host and click
Next.
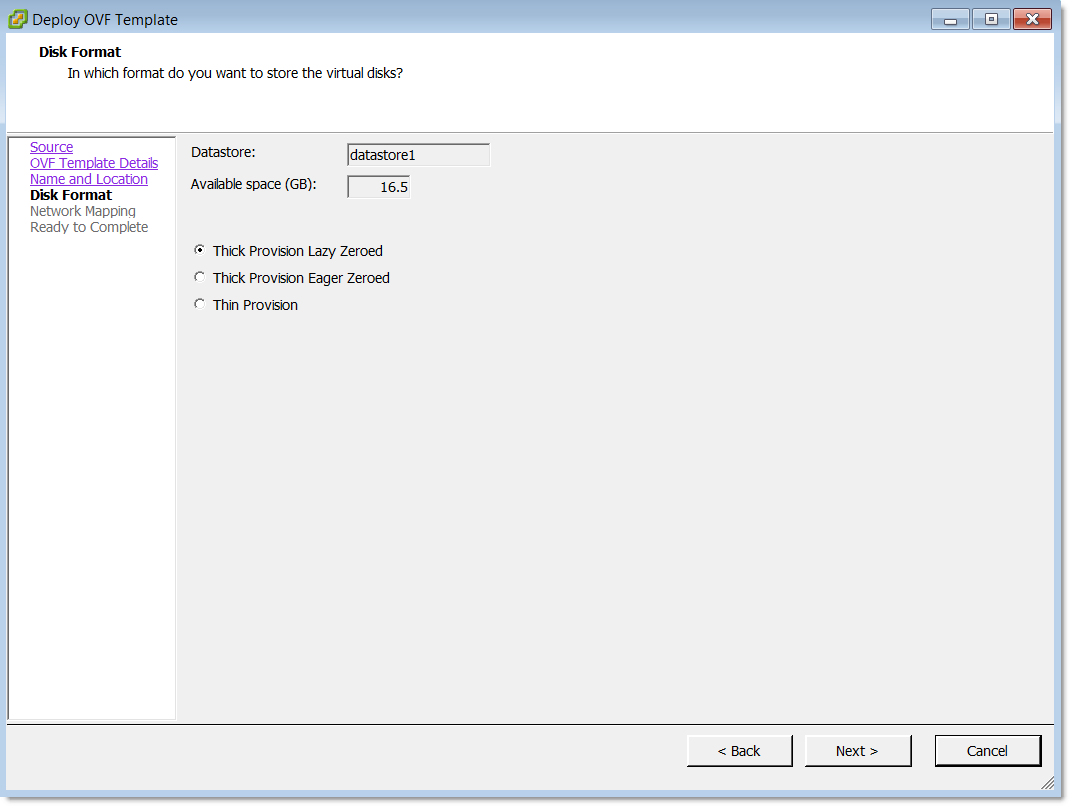
7. Select a disk formate and click
Next.
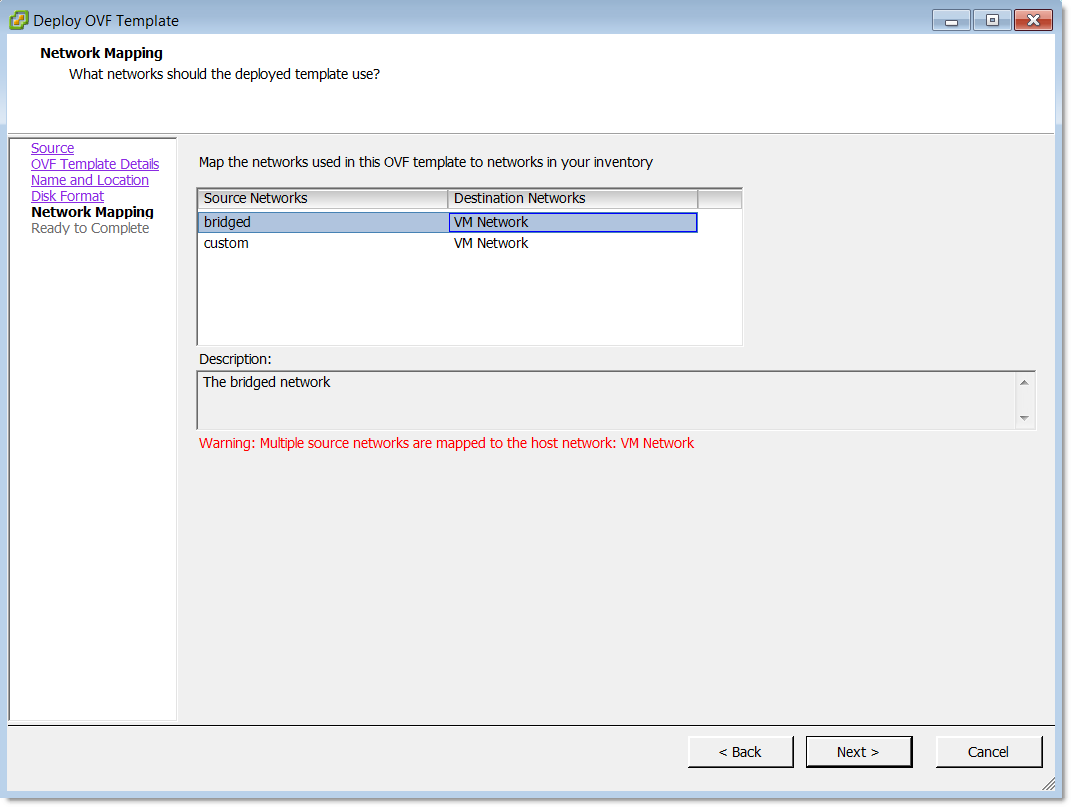
8. Map the networks defined in template (source networks) to networks in your inventory (destination networks). The bridged network must be mapped to a destination network that has access to the internet. The bridged network will be used by the gateway to communicate with SCM. The custom network should be mapped to a private network that will be behind the gateway and does not require internet access.
9. Click Next.
10. Review deployment settings and click Finish.
A virtual machine is created and added to the inventory. The virtual gateway image is installed on the virtual machine host.
11. Power on the virtual machine.
To create an ESXi virtual machine with your .vmx and .vmdk gateway image files
1. Log in to your ESXi console.
2. Select Virtual Machines.
3. Click Create / Register VM.
The New virtual machine wizard is displayed.
4. Select Register an existing virtual machine and click Next.
The Datastore browser is displayed.
5. Select a datastore and select Upload.
A file system browser is displayed.
6. Navigate to your virtual gateway .vmx file and select it.
7. In the Datastore browser, select the .vmx file you uploaded in
Step 6, and then click
Select.
8. Click Next.
9. Click Finish.
10. Select Virtual Machines in the main ESXi console.
11. Select your newly created virtual machine.
12. Choose Actions > Edit Settings.
The Edit Settings dialog box is displayed.
13. Choose Add hard disk > Existing hard disk.
The Datastore browser is displayed.
14. Select Upload.
A file system browser is displayed.
15. Navigate to your gw-vm.vmdk file and select it.
16. In the Datastore browser, select the gw-vm.vmdk file and click Select.
17. In the Edit settings dialog box, click Save.
Installing a virtual gateway in Hyper-V
Your Hyper-V gateway image comes as a virtual disk (.vhd), an XML specification file, and an empty Snapshots folder all packaged in a downloadable .zip file. After you build, download, and extract your Hyper-V gateway image, you are ready to install it into a virtual machine instance in your Hyper-V environment.
Prerequisite: Ensure that your Hyper-V environment includes a virtual switch that is configured to connect to the internet. You can configure virtual switches by using the Virtual Switch Manager in the Hyper-V Manager console. Consult Microsoft documentation for details.
1. Log in to your Hyper-V manager console.
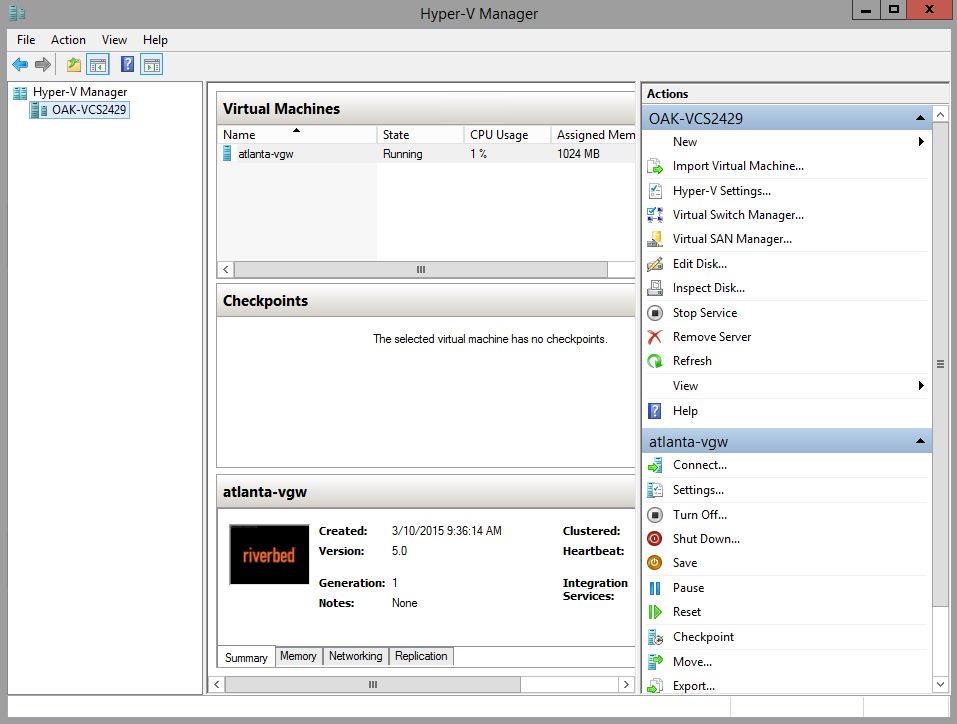
2. In the navigation pane on the left, select a virtual machine instance.
3. Choose Action > Import Virtual Machine.
The Import Virtual Machine wizard is displayed.
4. Click Next.
5. Select the folder containing the extracted Hyper-V gateway image. That folder should contain these three subfolders:
– Virtual Hard Disks
– Snapshots
– Virtual Machines
6. Click Next.
7. Select Virtual Gateway.
8. Click Next.
9. Select Register the virtual machine in place (use the existing unique ID).
10. Click Next.
11. Click Finish.
The virtual gateway is installed.
12. In the Virtual Machines panel, select the virtual machine instance that hosts your virtual gateway.
13. Choose Action > Setting.

14. Select a network adapter.
15. Select a virtual switch that has connectivity to the internet.
16. Click Apply and then click OK.
17. Optionally adjust Memory and Processor settings.
Installing a virtual gateway in VirtualBox
Your VirtualBox gateway image comes in .ova format. After you build and download your image, you are ready to import it as an appliance into your VirtualBox environment.
To import your gateway appliance
1. Launch VirtualBox.
2. Choose File > Import Appliance.
3. Navigate to your gateway .ova image file and select it.
4. Click Import.
Installing a virtual gateway in XenCenter
The XenCenter virtual gateway image comes in .ova format. Ensure that you have added XenServer instances to XenCenter before you begin installing a gateway.
To create a Xen virtual machine with your .ova gateway image file
1. Log in to your XenCenter console.
2. Choose File > Import.
3. Enter the pathname to your .ova file, or click Browse to open a file browser and navigate to it.
4. Verify the pathname is correct and then click Next.
5. Accept the terms of the EULA if this screen is displayed.
6. Select the server pool or standalone server where you want to run the virtual machine and click Next.
7. Select a storage repository and click Next.
8. Map network interfaces cards (NICs) in the virtual machine to NICs on the XenServer instance and click Next.
9. Select an OS fixup setting and click Next.
10. Configure network options for the transfer virtual machine and click Next.
11. Review your settings and click Finish.