Rack Mounting SteelHead CX5080, CX7080 and SteelCentral xx80 Appliances
This chapter describes how to install the SteelHead CX7080 and SteelCentral xx80 appliances in a standard 19-inch four-post rack. It includes these sections:
1U appliances included in this chapter
This chapter describes how to rack mount these 1U products:
• SteelCentral AppResponse 2180
• SteelCentral NetProfiler 4280-DP
• SteelCentral Flow Gateway 2280
2U appliances included in this chapter
This chapter describes how to rack mount these 2U products:
• SteelHead CX5080 and CX7080
• SteelCentral NetProfiler 4280 and 4280-EXP
• SteelCentral AppResponse 4180 and 8180
Before you begin
Before you begin the installation process:
• Unplug the AC power cords.
• Remove all external devices and connectors.
Mounting 1U appliances
This section describes how to mount the 1U xx80 appliances in a standard 19-inch, four-post rack. It includes these sections:
1U sliding rail kit
• 2 sliding rails
• 1 sliding rail screw kit: 8 M5 screws, 8 M5 washers, 4 M4 x M4L screws, 2 M5 x 20L screws
Figure 3‑1. Sliding rail screws

Four M5 screws with washers are included in the rail kit. Do not lose the M5 washers. When you secure the outer rails to a square hole rack, you must use the M5 screws and the washers. The outer rails are installed behind the rail posts with square holes. You must use the provided washers as they have a funnel shape that fits perfectly in the square hole rack.
Mounting 1U appliances
To mount the 1U applianc
Figure 3‑2. Attaching the mounting ears to the appliance

2. Pull out the inner rail from the rail assembly. When the rail comes to a stop, pull the tab to release the latch and completely extend the inner rail to its full length.
Figure 3‑3. Extending the inner rail from the rail assembly

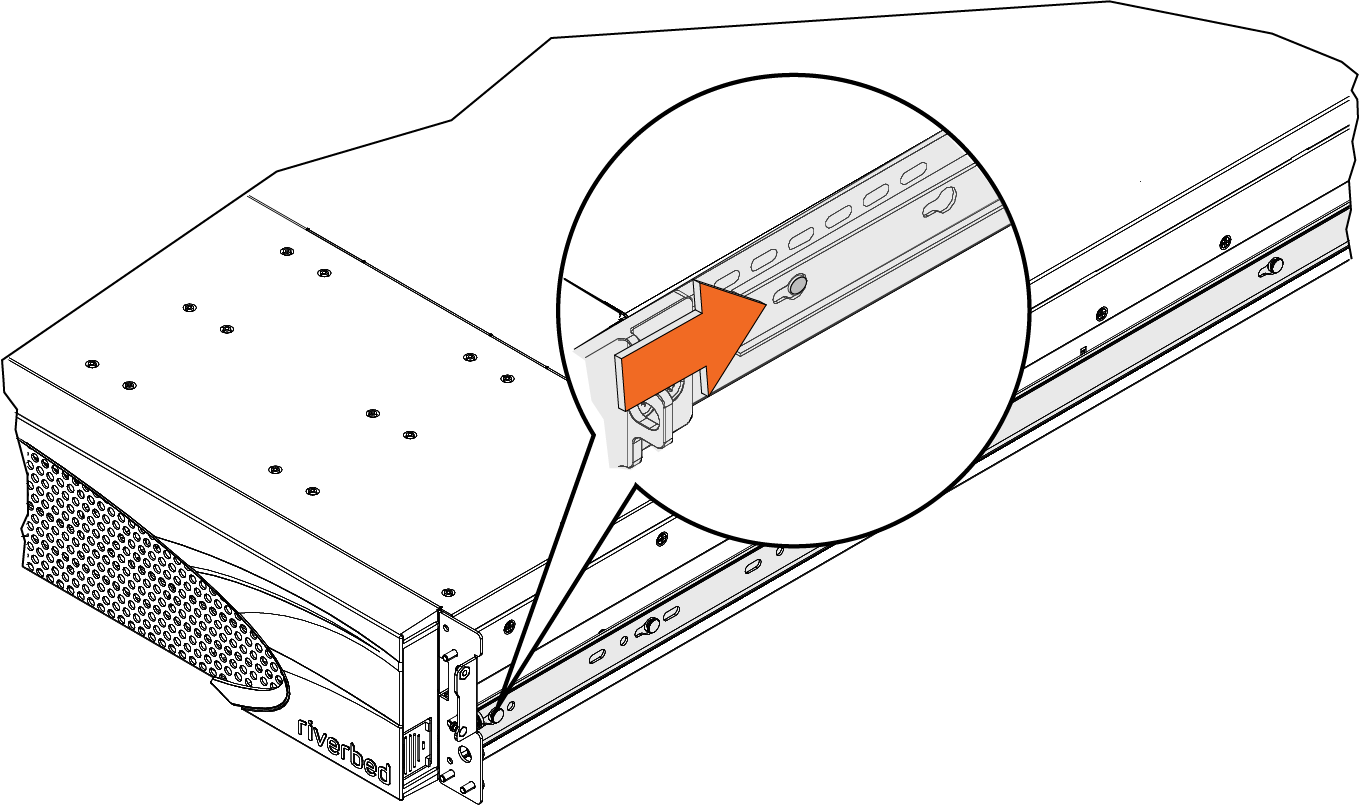
Figure 3‑4. Aligning the inner sliding rail
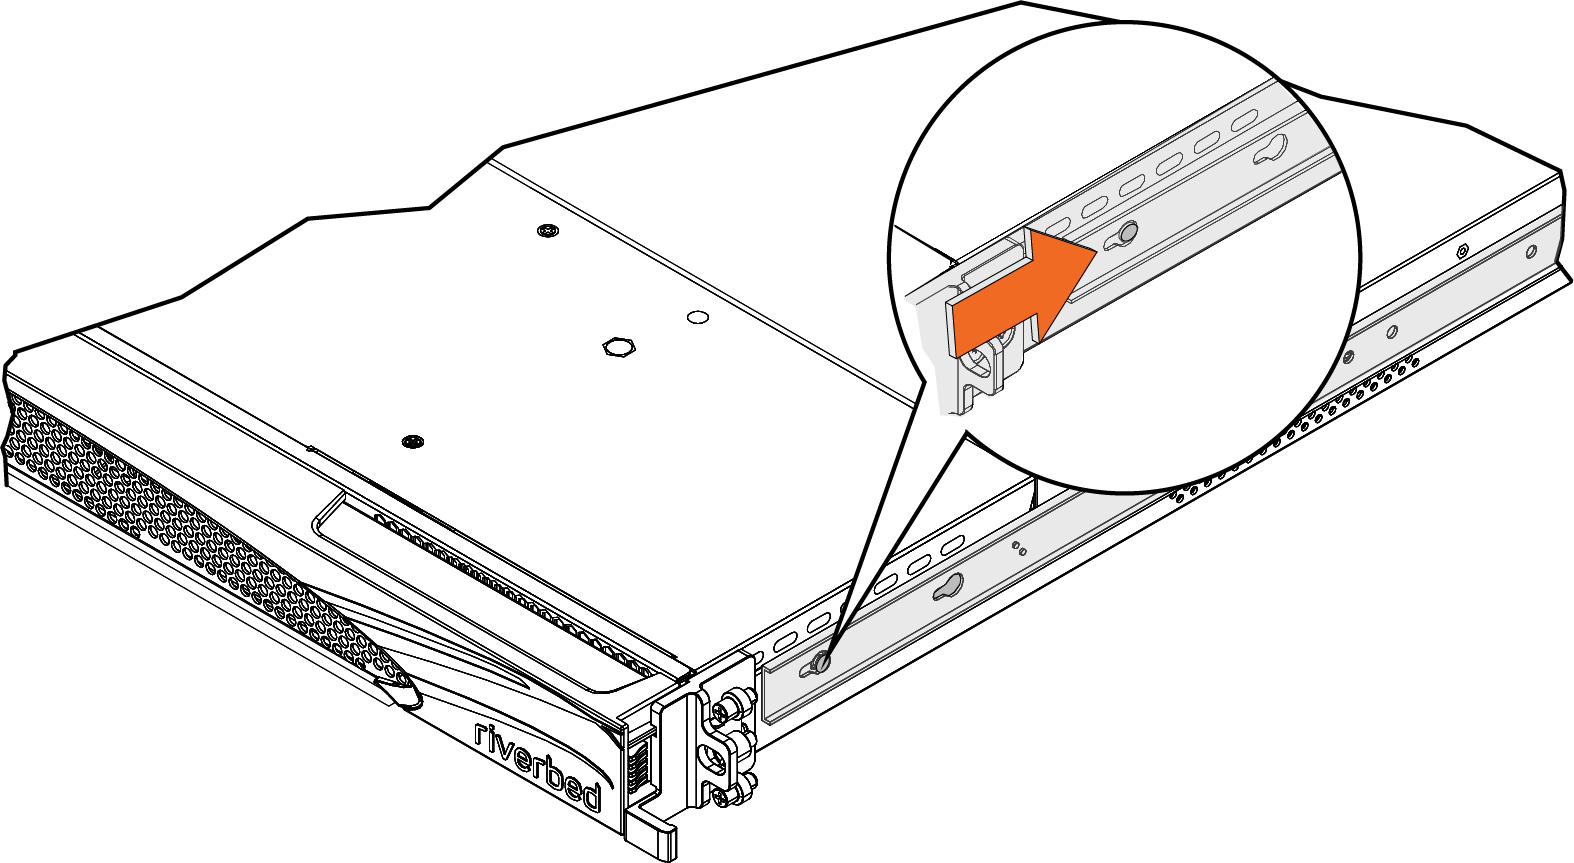
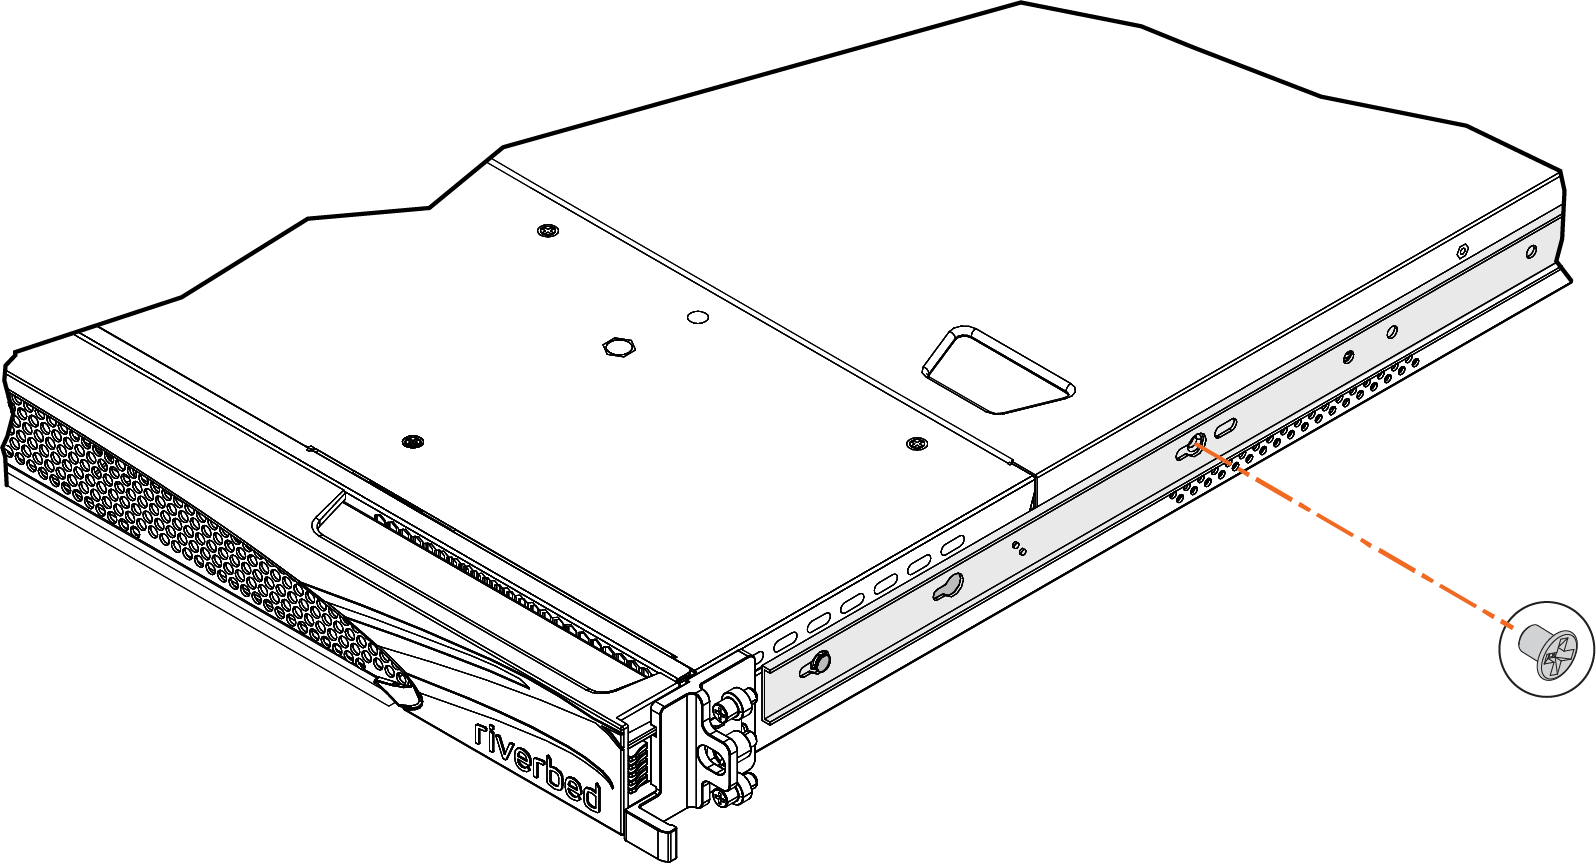
Figure 3‑5. Securing the inner sliding rail
5. Repeat
Step 2 through
Step 4 to secure the sliding rail to the other side of the appliance.
Figure 3‑6. Securing the sliding rail to the other side of the appliance

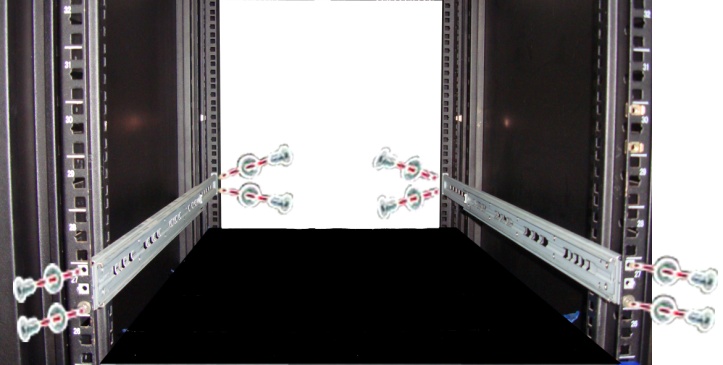
6. Secure the outer rails to the inner side of the rack post using four M5 screws and four washers:
– Install the outer rails from BEHIND the posts with square holes.
– Use the provided washers as they have the shape of a funnel that fits in the square hole.
– The screws are secured to the threaded rails.
Figure 3‑7. Securing the outer rails to the rack
7. Lift the appliance and insert it into the fixed slides.
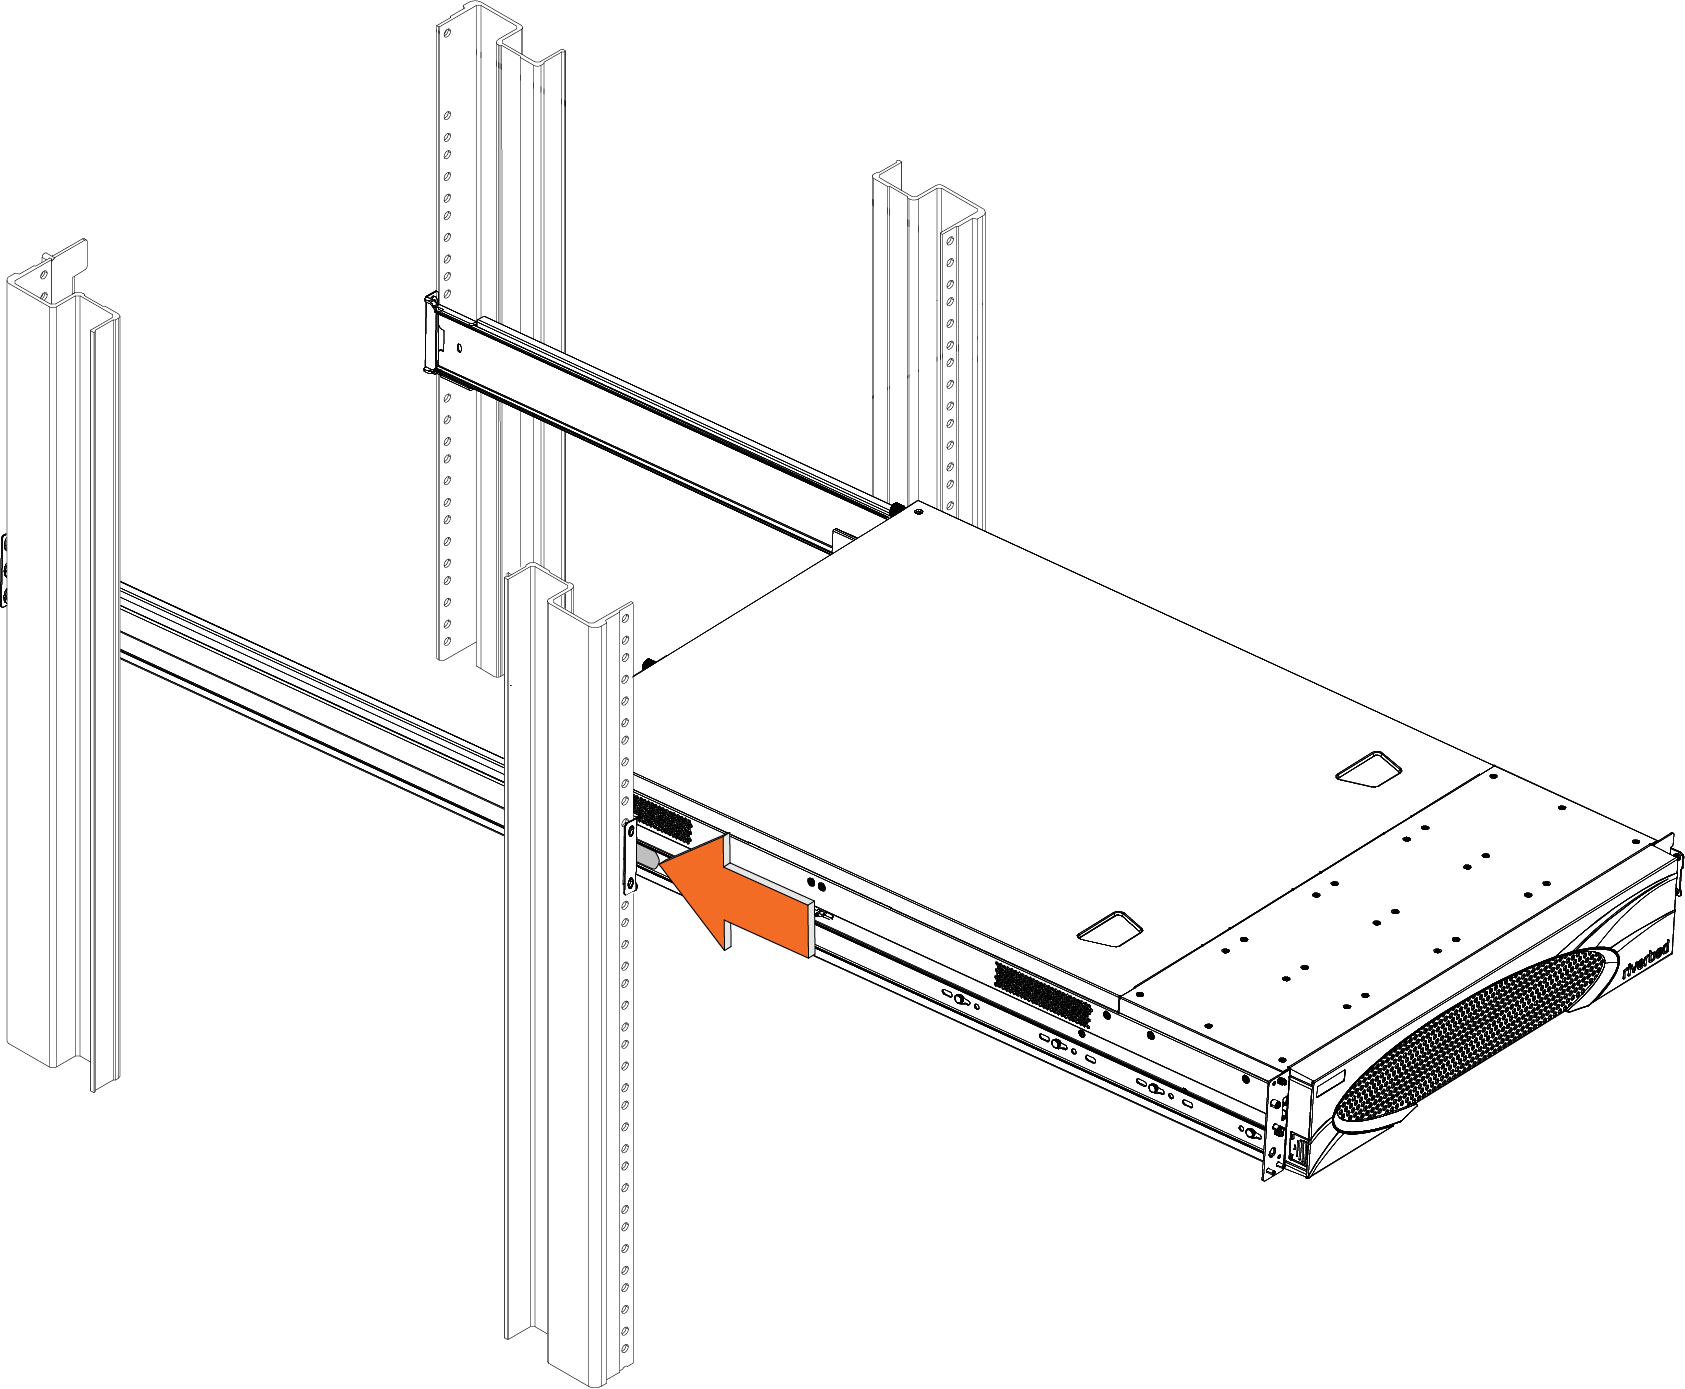
Figure 3‑8. Inserting the appliance into the outer rails

Figure 3‑9. Pulling tab to release latch
9. Insert the appliance into the rack.
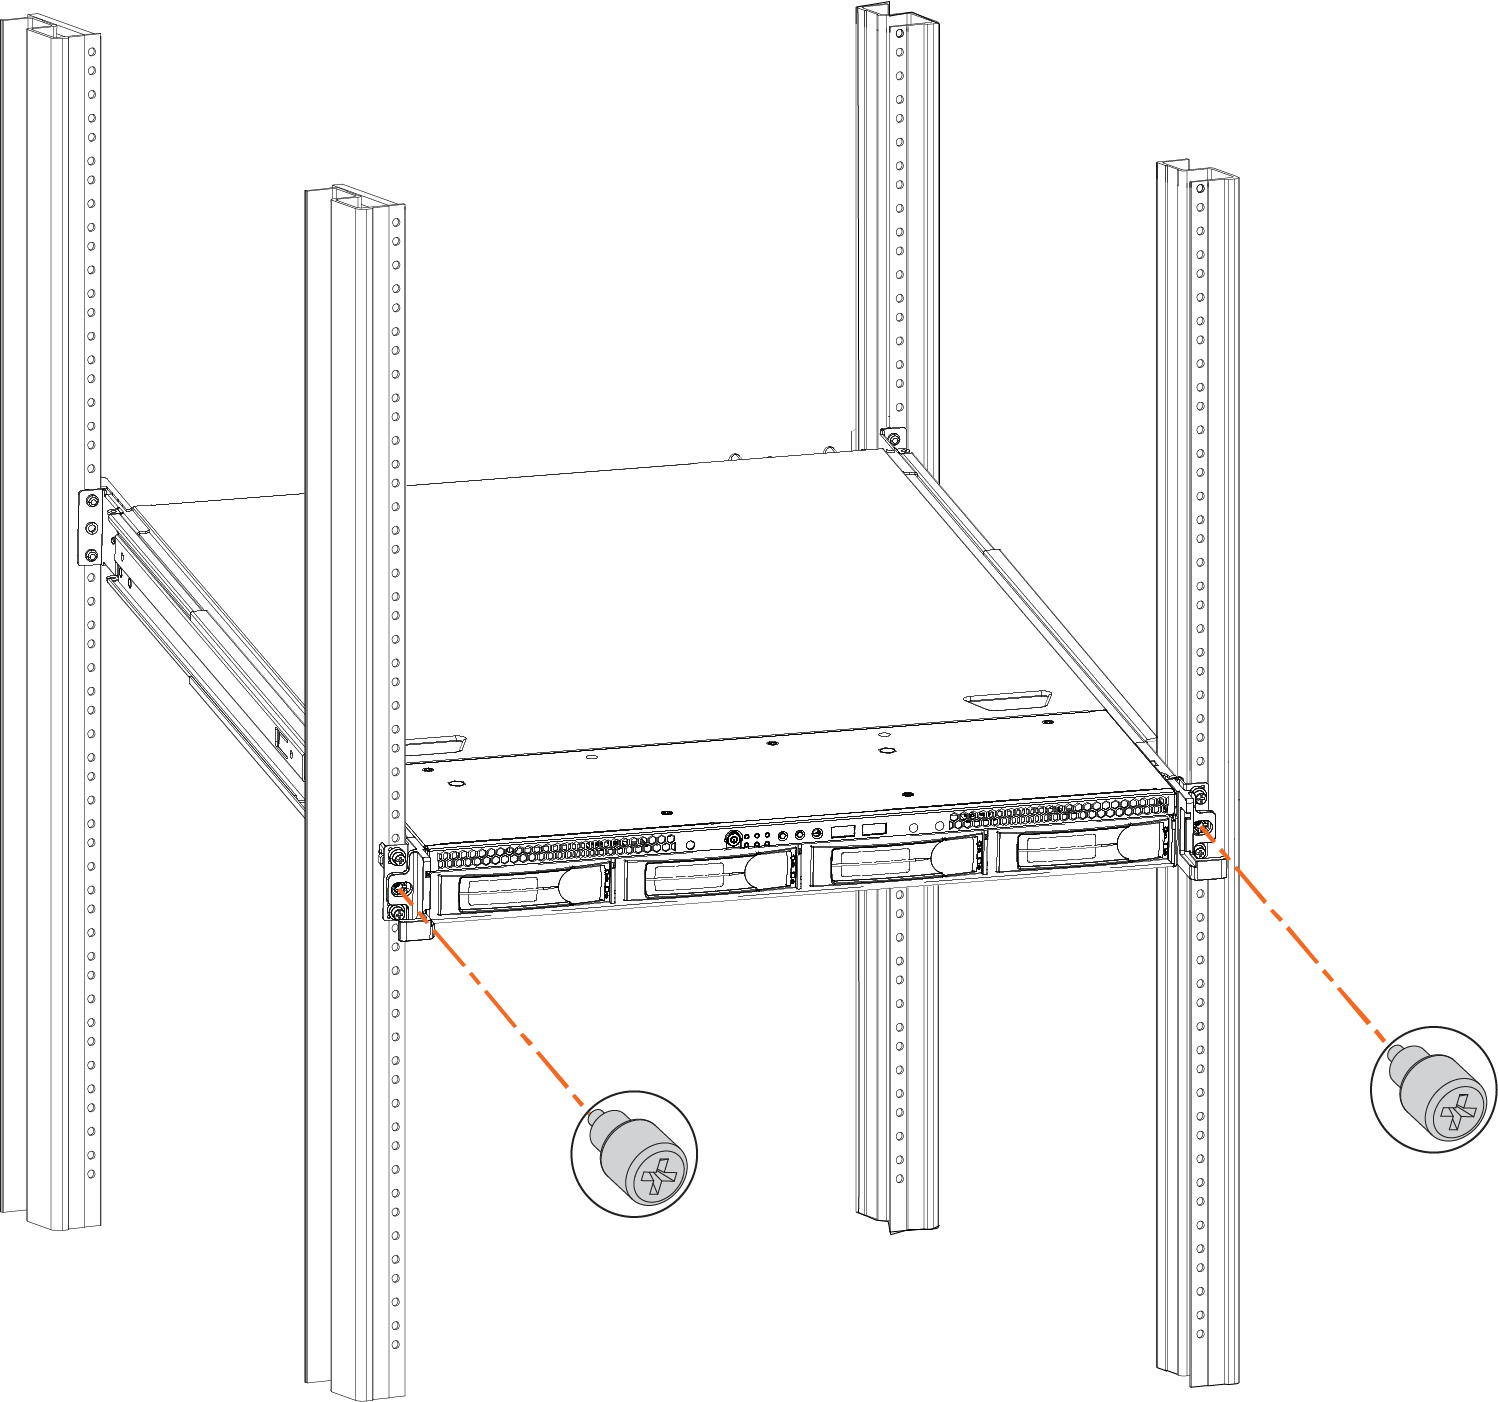
Figure 3‑10. Inserting the appliance into the rack
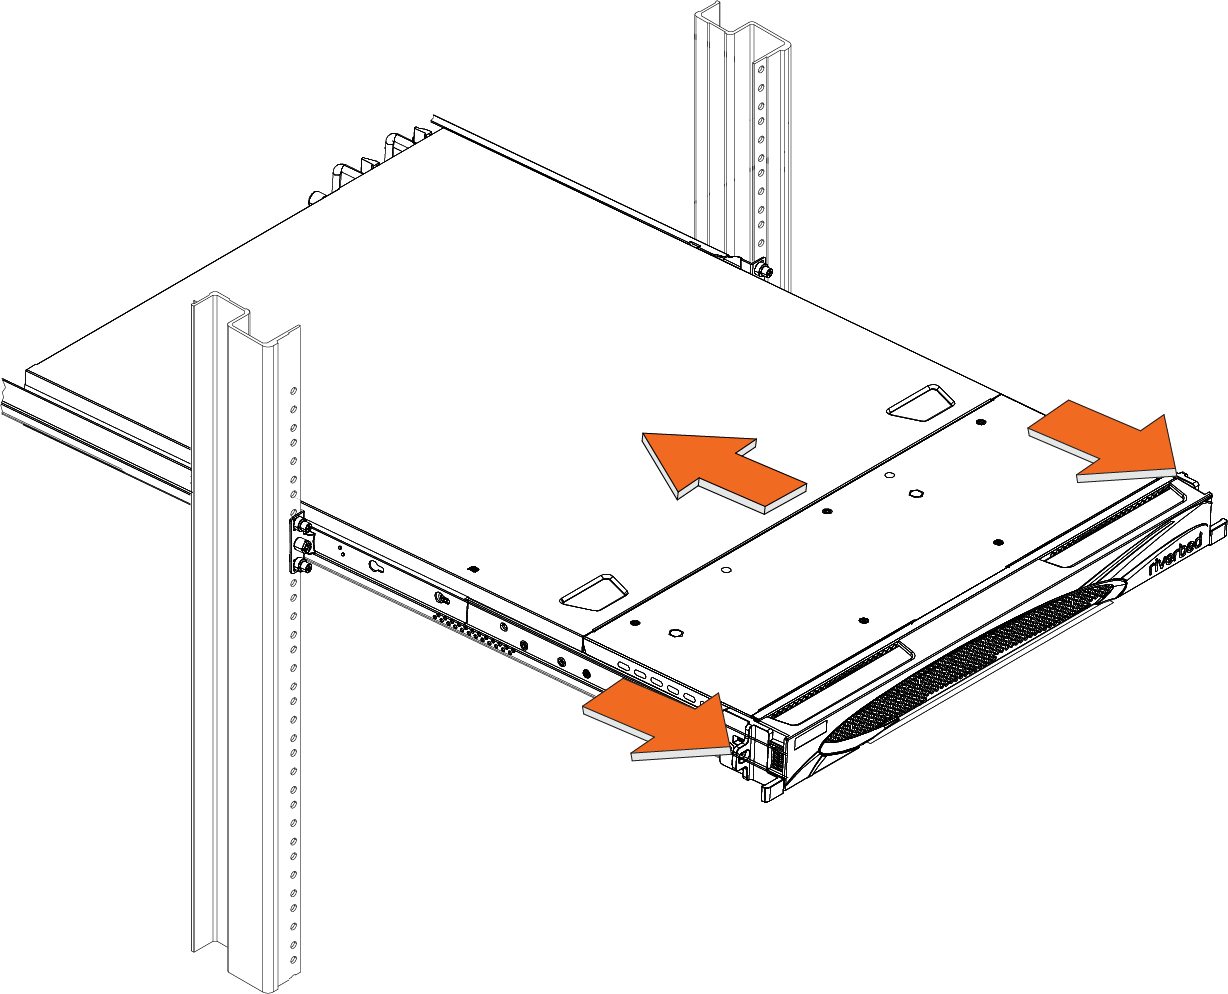
Figure 3‑11. Mounting appliance to rack
Mounting 2U appliances
This section describes how to mount the 2U xx80 appliances in a standard 19-inch, four-post rack. It includes these sections:
2U sliding rail kit
• 2 sliding rails
• 1 sliding rail screw kit: 8 M5 screws, 8 M5 washers, 2 M5 black screws
Figure 3‑12. Sliding rail screws

Four M5 screws with washers are included in the rail kit. Do not lose the M5 washers. When you secure the outer rails to a square hole rack, you must use the M5 screws and the washers. The outer rails are installed behind the rail posts with square holes. You must use the provided washers as they have a funnel shape that fits perfectly in the square hole rack.
Mounting 2U appliances
To mount the 2U appliance
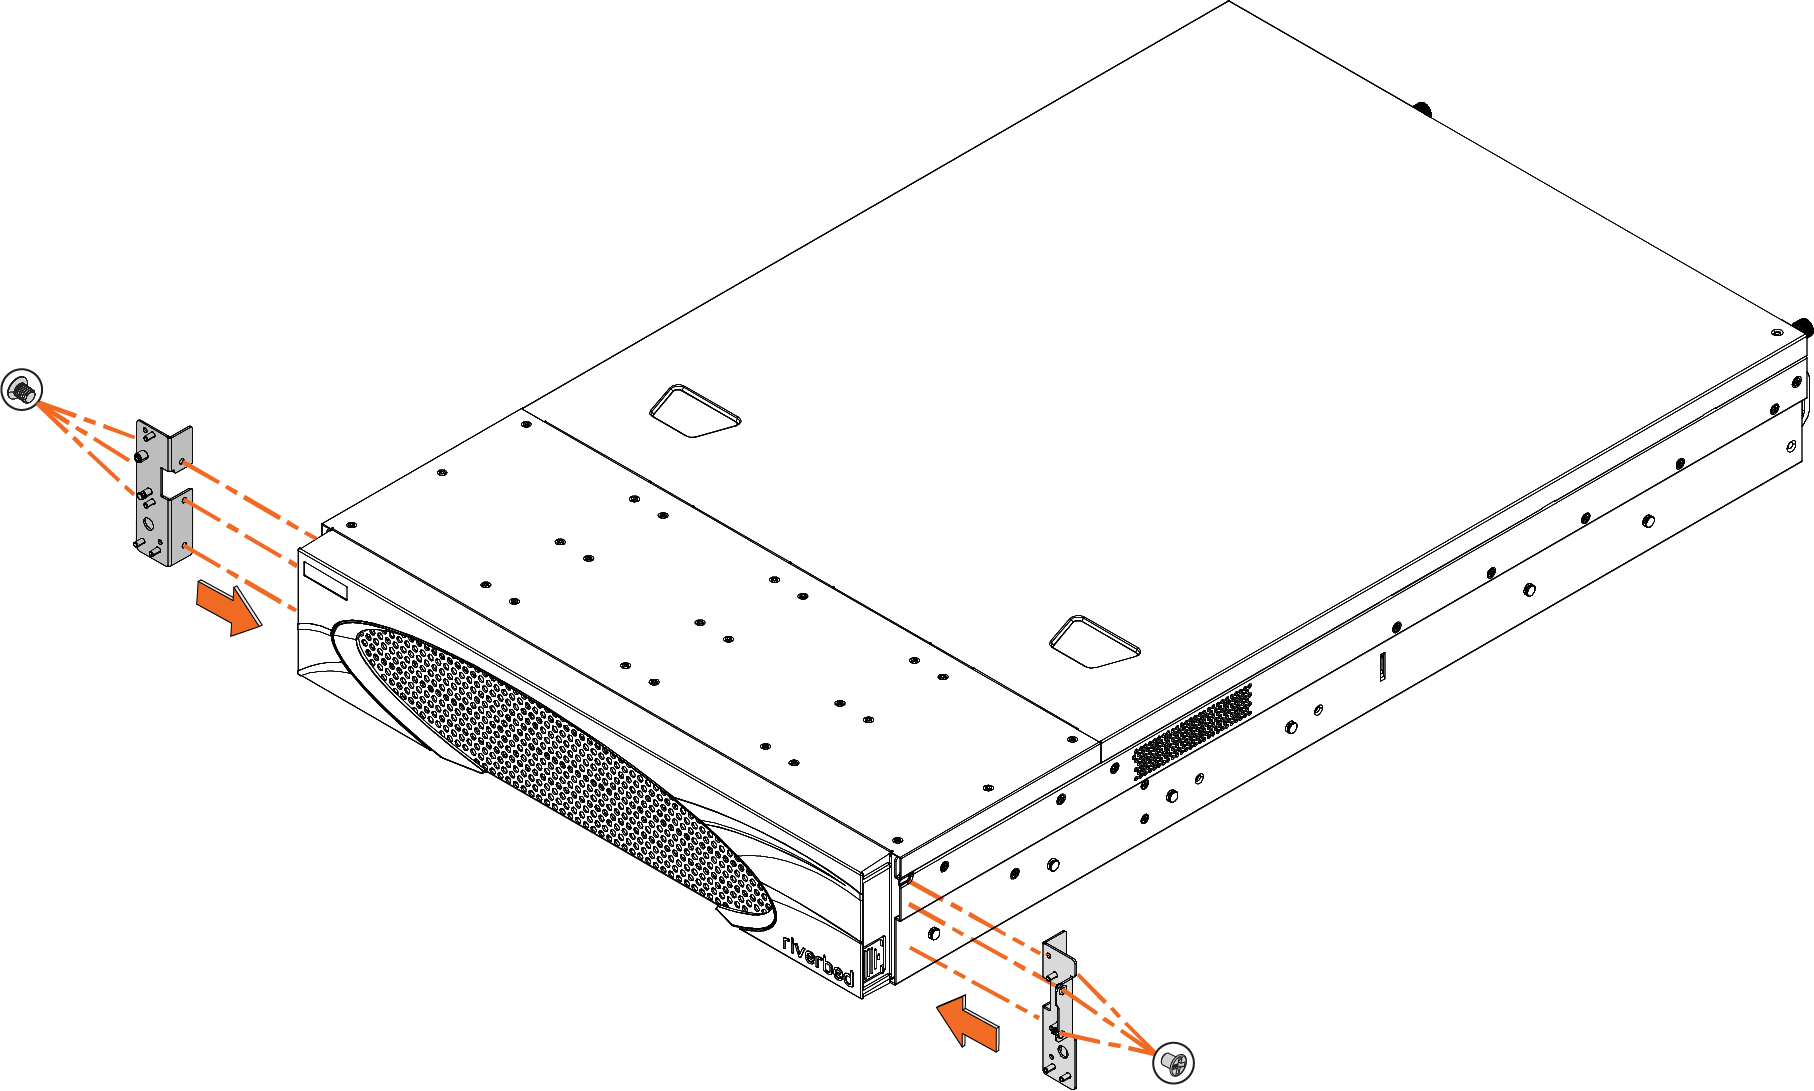
1. Screw the mounting ears to each side of the appliance as shown in
Figure: Sliding rail screws using the four screws from the mounting-ears screw kit.
Figure 3‑13. Attaching the mounting ears to the appliance
2. Pull out the inner rail from the rail assembly. When the rail comes to a stop, pull the tab to release the latch and completely extend the inner rail to its full length.
Figure 3‑14. Extending the inner rail from the rail assembly
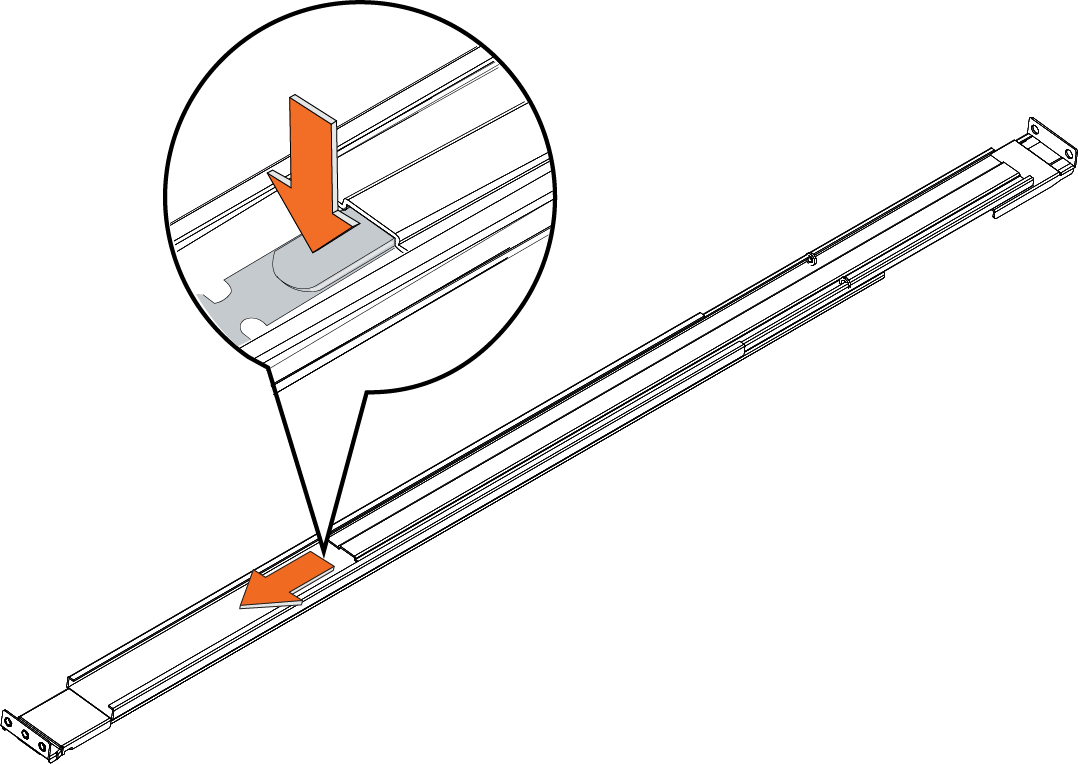
Figure 3‑15. Aligning the inner sliding rail
4. Repeat
Step 2 and
Step 3 to secure the sliding rail to the other side of the appliance.
Figure 3‑16. Securing the sliding rail to the other side of the appliance

5. Secure the outer rails to the inner side of the rack post using four M5 screws and four washers:
– Install the outer rails from BEHIND the posts with square holes.
– Use the provided washers as they have the shape of a funnel that fits in the square hole.
– Secure the screws to the threaded rails.
Figure 3‑17. Securing the outer rails to the rack
Figure 3‑18. Pulling tab to release latch
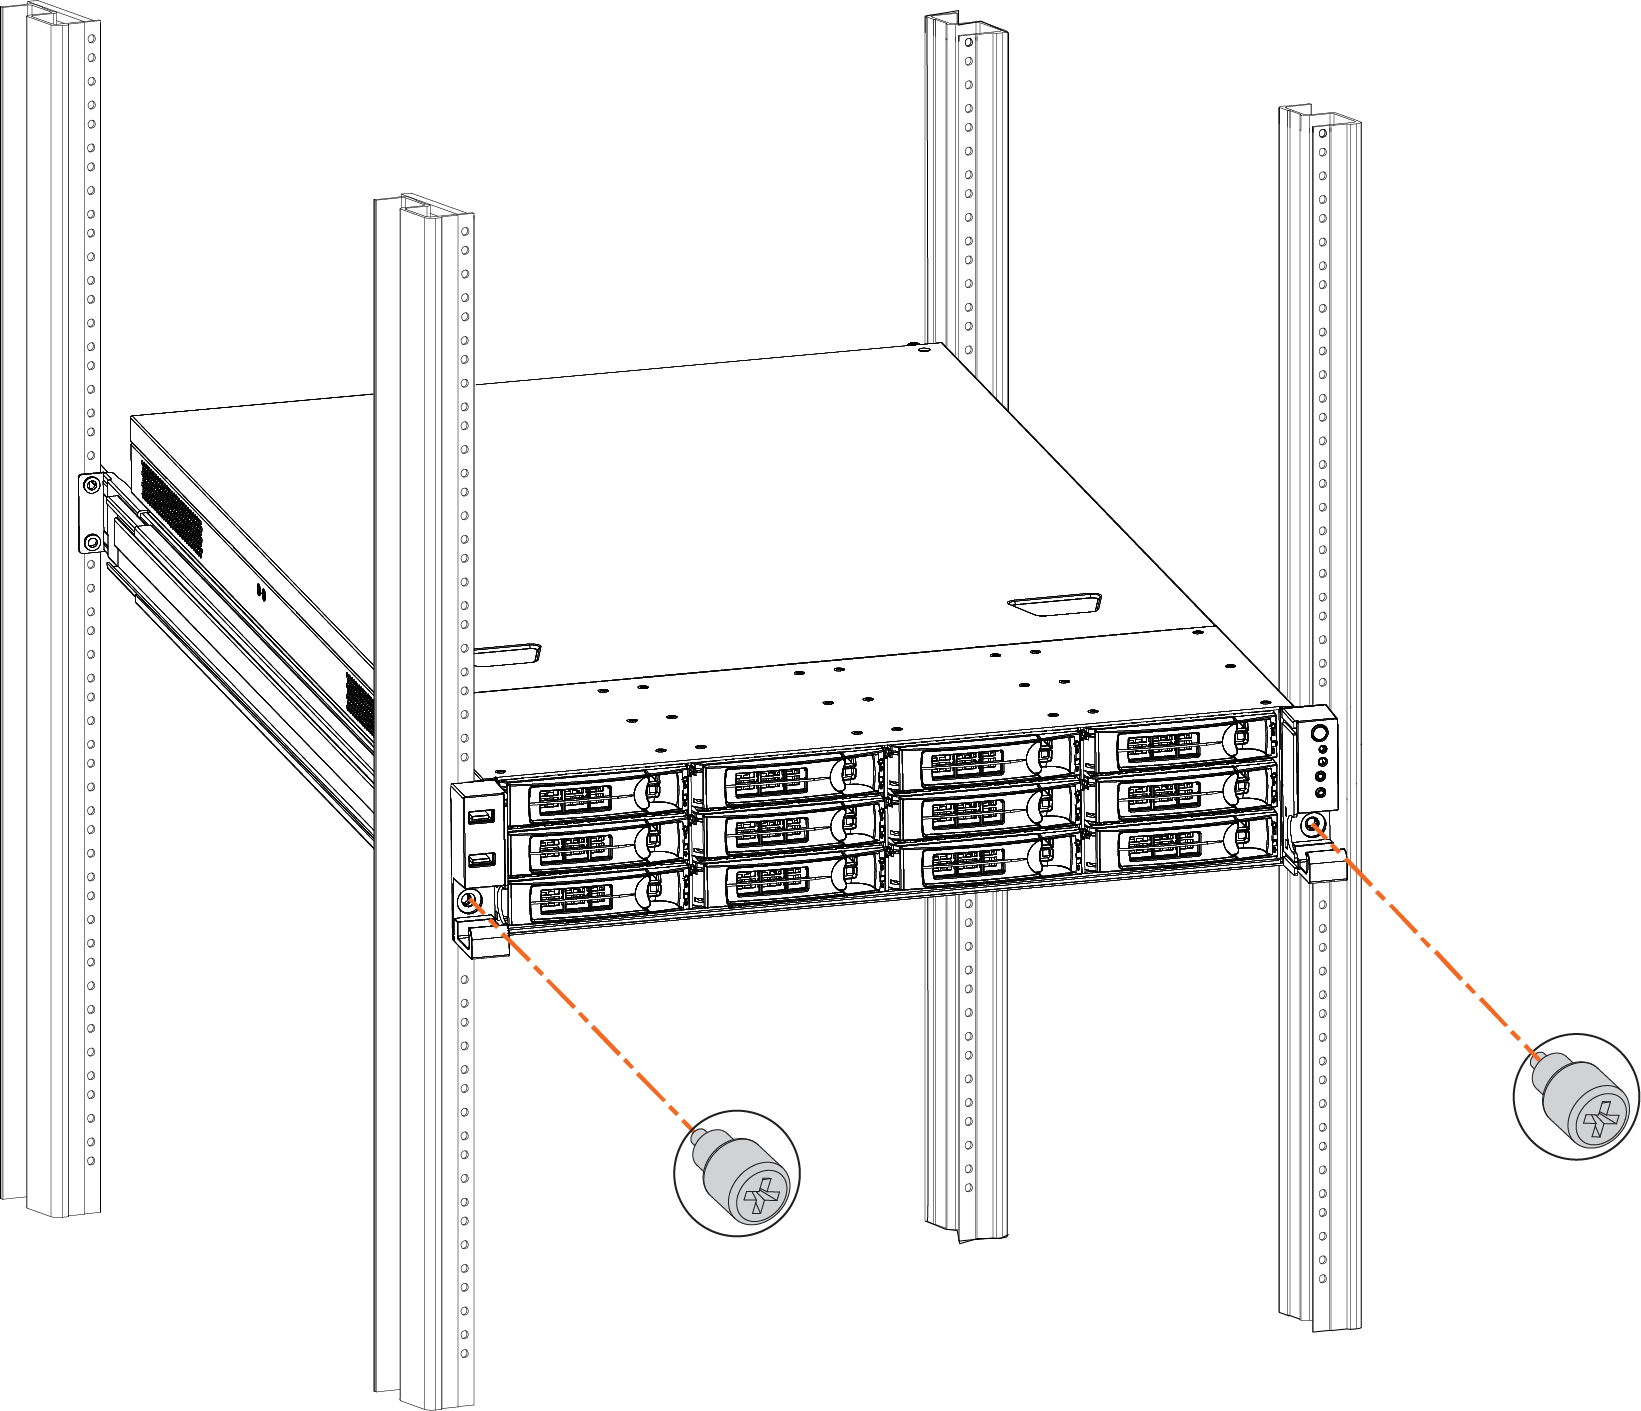
7. Insert the appliance into the rack.
Figure 3‑19. Inserting the appliance into the rack
Figure 3‑20. Securing the mounting ears to the rack