Rack Mounting SteelHead GX and CX xx70, SHSD 3070, SteelCentral xx70, Interceptor 9600, and SteelFusion Core 3500 Appliances
This chapter describes how to install the SteelHead GX10000, SteelHead CX xx70, SteelHead SD xx70, SteelCentral NetProfiler xx70, SteelCentral NetShark xx70, SteelHead Interceptor 9600, and SteelFusion Core 3500 appliances in a rack. It includes the following sections:
Appliances included in this chapter
This chapter describes how to install these appliances in a rack:
• 2U SteelHead GX10000.
• 1U and 2U SteelHead CX xx70 appliances, including models CX3070, CX5070, and CX7070.
• 1U SteelHead SD 7070-SD.
• 1U and 2U SteelCentral NetProfiler xx70 appliances, including models 470, 2270, and 4270.
• 1U and 2U SteelCentral NetShark xx70 appliances, including models 2170, 4170, and 6170, the SteelCentral AppResponse 8170, and the SteelCentral NetShark Storage Units.
• 2U SteelFusion Core 3500 appliances.
For information about SteelFusion Edge appliances, see SteelFusion Edge Hardware and Maintenance Guide.
• 2U SteelHead Interceptor 9600 appliances.
Both 1U and 2U appliances in this chapter follow the same installation instructions.
You can mount the xx70 on a two-post rack in the center-mount position using rail kit AXX2POSTBRCKT. This kit is a fixed mount bracket kit that will only support specific rack types with 3/8” square and 7.1 mm round holes. This kit is available from Intel suppliers.
Before you begin
Before you begin the installation process:
• Unplug the AC power cords.
• Remove all external devices and connectors.
Mounting 1U or 2U appliances
This section describes how to mount the 2U SteelHead GX10000, 1U or 2U SteelHead CX xx70, SteelHead Interceptor 9600, SteelCentral NetProfiler xx70, SteelCentral NetShark xx70, SteelCentral AppResponse 8170, and SteelFusion Core 3500 appliances in a four-post rack. You can use either of these rail kits to rack mount 1U and 2U appliances. These kits are very similar and follow the same installation instructions.
The following rail kits are available:
• RMK-1-VRAIL - This kit is available as a separate item. You can adjust the rails to accommodate a 24-inch to 30-inch deep rack. When installed, the maximum rail extension is 16.7 inches (424. mm). The rails support a maximum device weight of 130 lb (59 kg).
The RMK-1-VRAIL kit that ships with the 1U includes a ball retainer lock on the outer member. The lock provides better lock functionality when the inner member is extended. This version of the rail kit also has an inner member that is 3.93 inches (100mm) longer for easier appliance insertion.
The RMK-1-VRAIL kit may contain extra pieces of hardware that aren’t needed for your appliance installation.
• RMK-1-PRAIL - This kit is available as a separate item. This kit provides a premium version of the rails and doesn’t require the use of tools.
You can adjust the rails to accommodate a 24-inch to 30-inch deep rack. The rails are fully extendable to a maximum of 31.5 inches (800 mm). The rails support a maximum device weight of 54 lb (24 kg).
The RMK-1_VRAIL has the components shown in
Figure: Slide rail kit components.
Figure 5‑1. Slide rail kit components
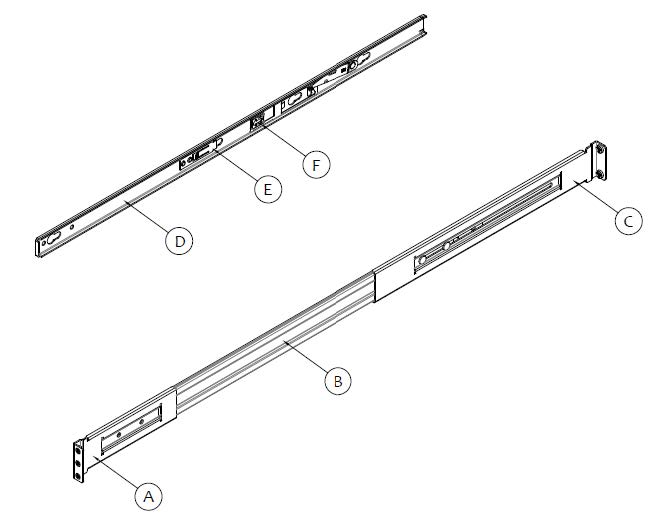
A - Front bracket | D - Inner member |
B - Outer member | E - Safety locking pin |
C - Rear bracket | F - Release button |
Figure 5‑2. Ball Retainer Lock for RMK-1-VRAIL

To mount a 1U or 2U appliance in a four-post rack using the RMK-1-VRAIL kit
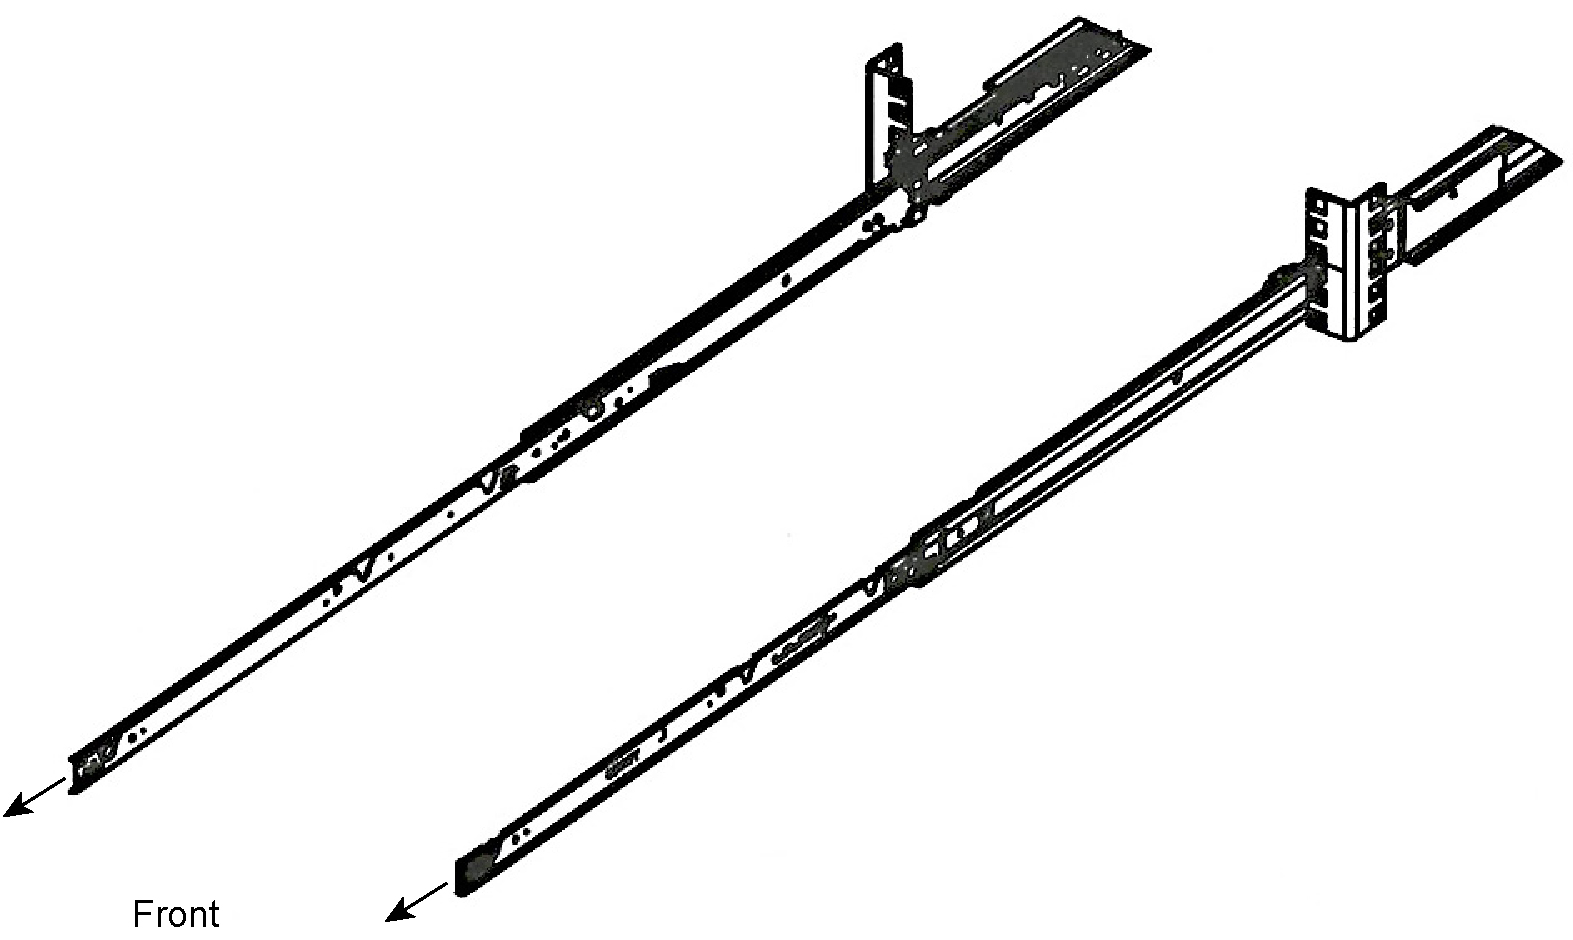
1. Install the outer rails to the rack posts.
Figure 5‑3. Installing the rails to the rack

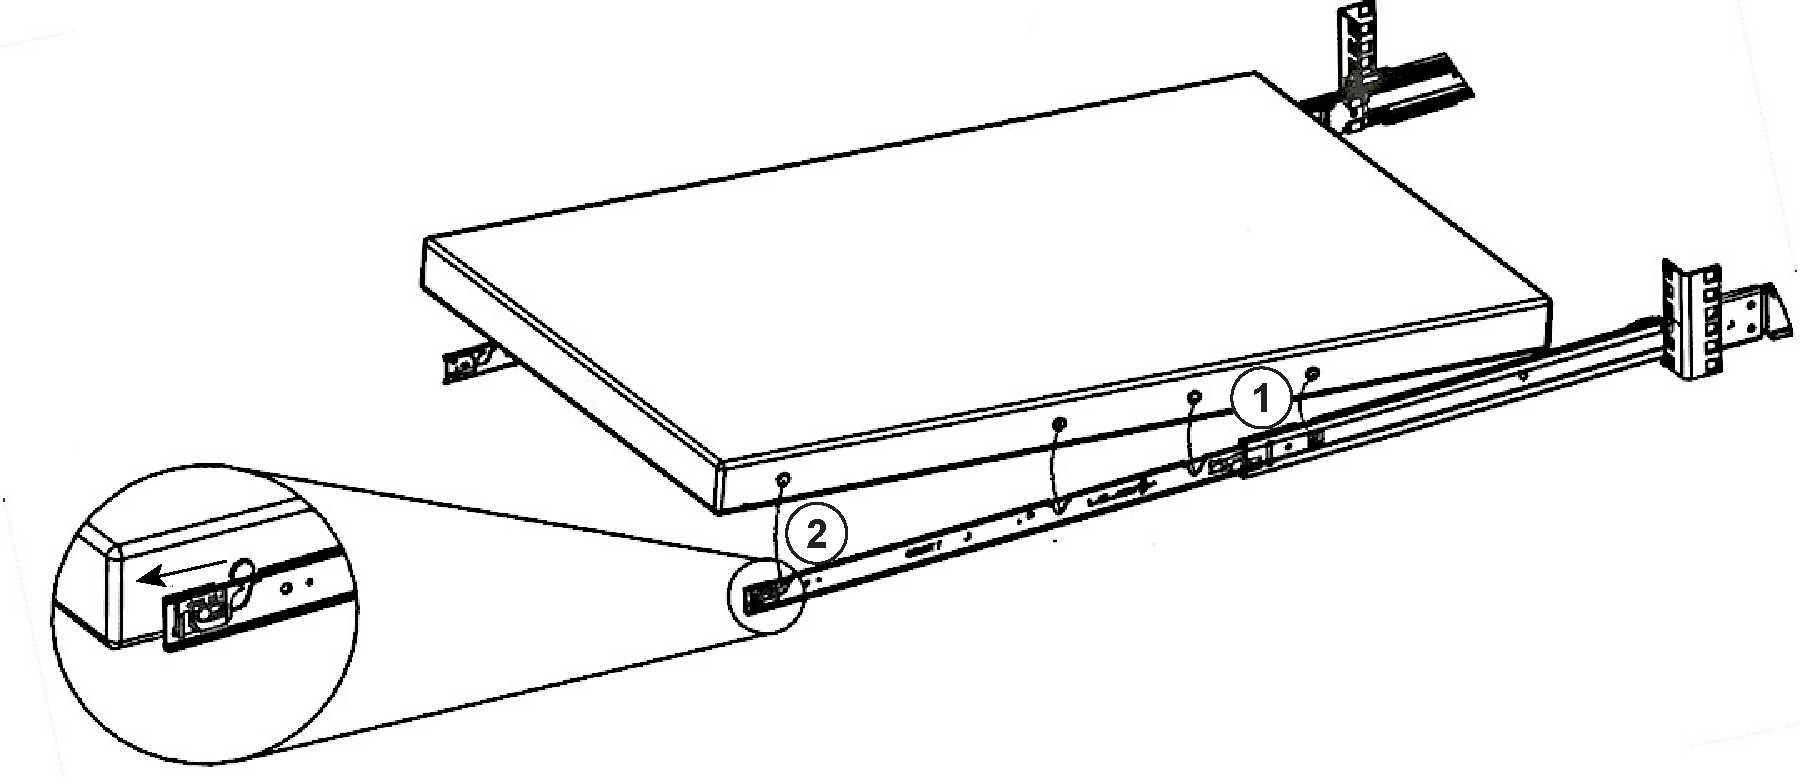
2. Install the inner members to the appliance.
Figure 5‑4. Installing the inner member (1U)

Figure 5‑5. Installing the inner member (2U)

Figure 5‑6. Installing appliance to fixed slides

To remove the appliance
1. Fully extend the slides until they are in the locked position.
Figure 5‑7. Releasing the lock
3. Remove the inner member from the appliance.
Figure 5‑8. Removing the rail

To mount a 1U or 2U appliance in a four-post rack using the RMK-1-PRAIL kit
The RMK-1-PRAIL kit doesn’t require the use of tools; however, there is an option to use a screw for added stability.
1. Install the rails to the rack posts.
Insert the rail into the rack holes. Use the slide to move the bracket inside of the rack. Once the rail is in the correct holes, release the extendable part of the rail and the bracket will snap in place and lock. (See
Figure: Installing the rails to the rack.)
You can use a screw on each rail for added stability.
Figure 5‑9. Installing the rails to the rack

Figure 5‑10. Extending the slides
3. Position the appliance so that the keyed openings on the rails are aligned with the locating pins on the sides of the appliance. (See
Figure: Aligning the appliance.)
Figure 5‑11. Aligning the appliance
4. Start with the back of the appliance and drop the rear spool into the rail and continue until the appliance is fully positioned in the rail.
Figure 5‑12. Pushing the appliance into the rack

To remove the appliance
1. Fully extend the rails.
2. Lift the appliance out of the rails and remove the appliance from rack.