Rack Mounting Desktop SteelHead CX580, CX780, and 1U CX3080 Appliances
This chapter describes how to install SteelHead CX580, CX780, and 1U CX3080 appliances in a standard rack. It includes these sections:
Before you begin
Before you begin the installation process:
• Unplug the AC power cords.
• Remove all external devices and connectors.
• If your rack has square holes, use the included square post-hole adapters.
Desktop appliances are designed for side-to-side airflow. If you install these appliances in a rack, do not place objects on the sides of the appliance; it restricts airflow and can damage the appliance.
Rack mounting desktop SteelHead CX580 and CX780 desktop appliances
This section describes how to rack mount SteelHead CX580, CX780 desktop appliances in a rack. You can mount the desktop appliances in a rack using two ear brackets. The ear brackets are included with the accessory kit for the CX580 CX780 desktop appliances.
To install the 580 and 780 desktop appliance
1. Carefully lift the appliance out of the shipping carton.
Figure 2‑1. Installing ear brackets to the desktop appliance

3. Slide the appliance into the rack and secure the ear brackets using four screws.
Figure 2‑2. Installing the desktop appliance in a rack
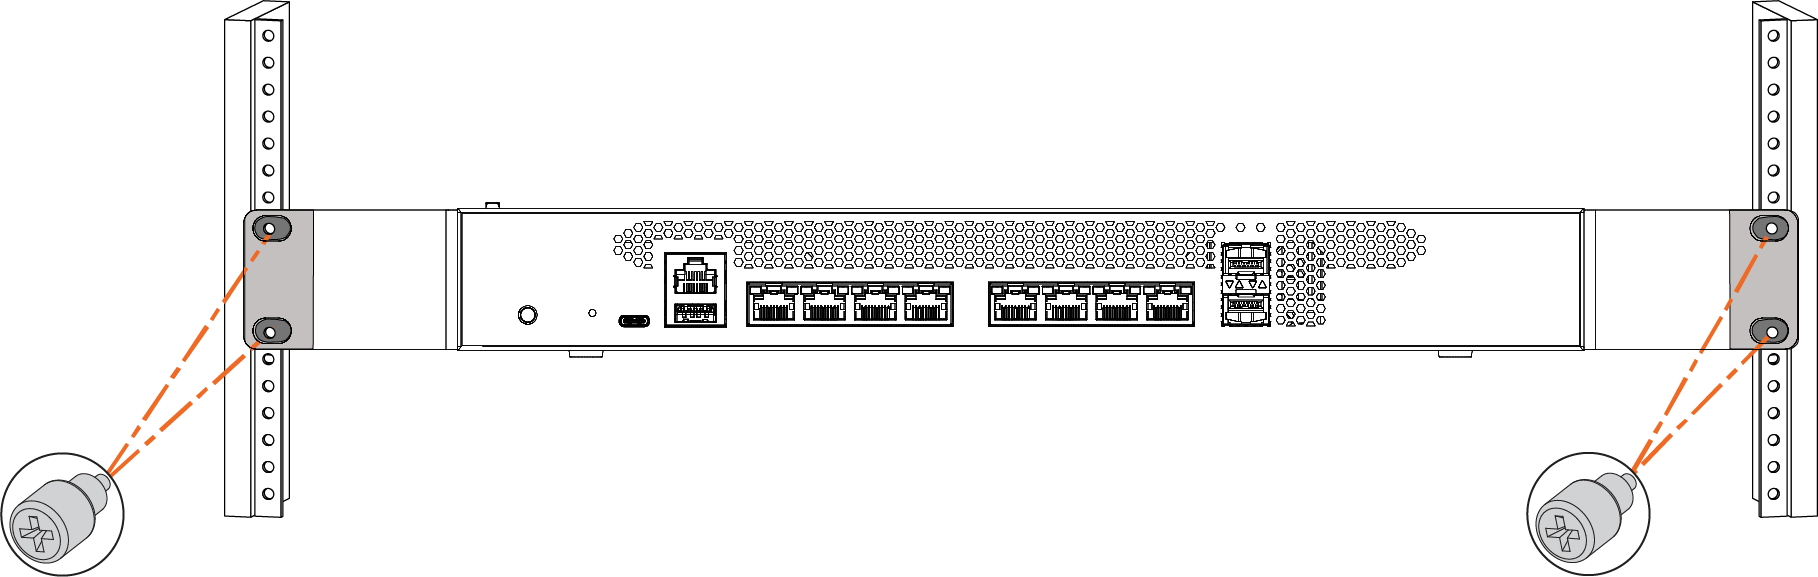
The desktop appliance must be installed in a front mount position.
4. Apply power by connecting the power cord from the AC inlet to the power source.
Rack mounting 1U SteelHead CX3080 appliances
This section describes how to rack mount the 1U SteelHead CX3080 appliances.
To rack mount the 1U 3080 appliance
1. Mount the ear brackets onto each side of the chassis using the screws that are included in the accessory kit. Each ear bracket requires four screws.
Figure 2‑3. Mounting the ear brackets

2. Secure the chassis to the rack with the four screws included in the accessory kit.
Figure 2‑4. Securing the appliance to the rack
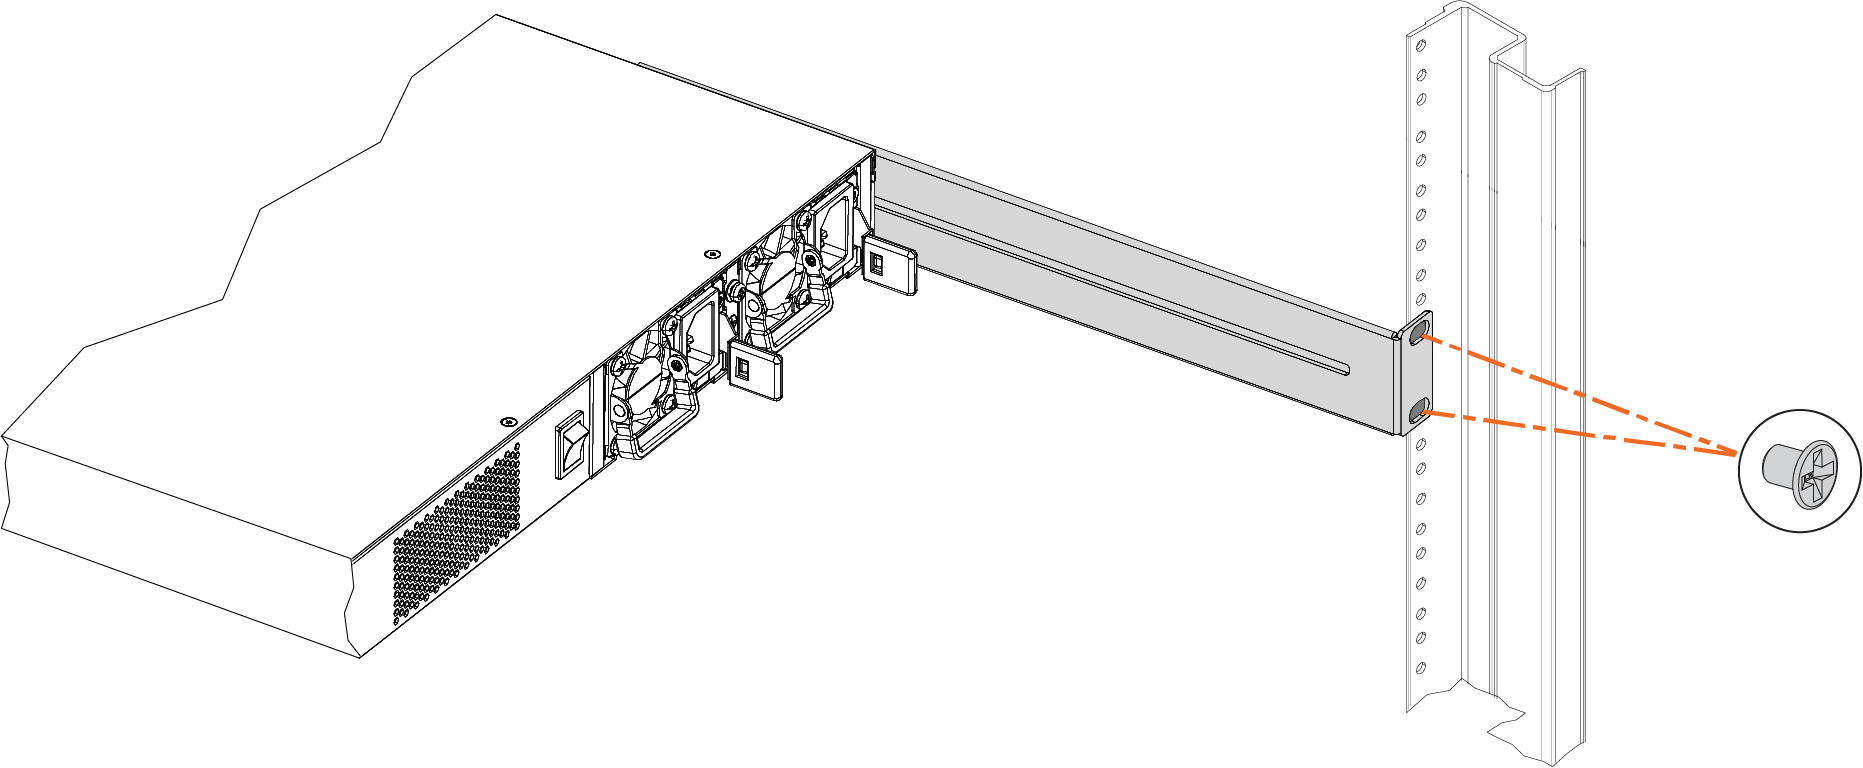
3. From the back of the rack, slide the rail onto the appliance. Make sure the center of the rail aligns with the center-screws on the side of the appliance.
Figure 2‑5. Securing the rails on to the appliance

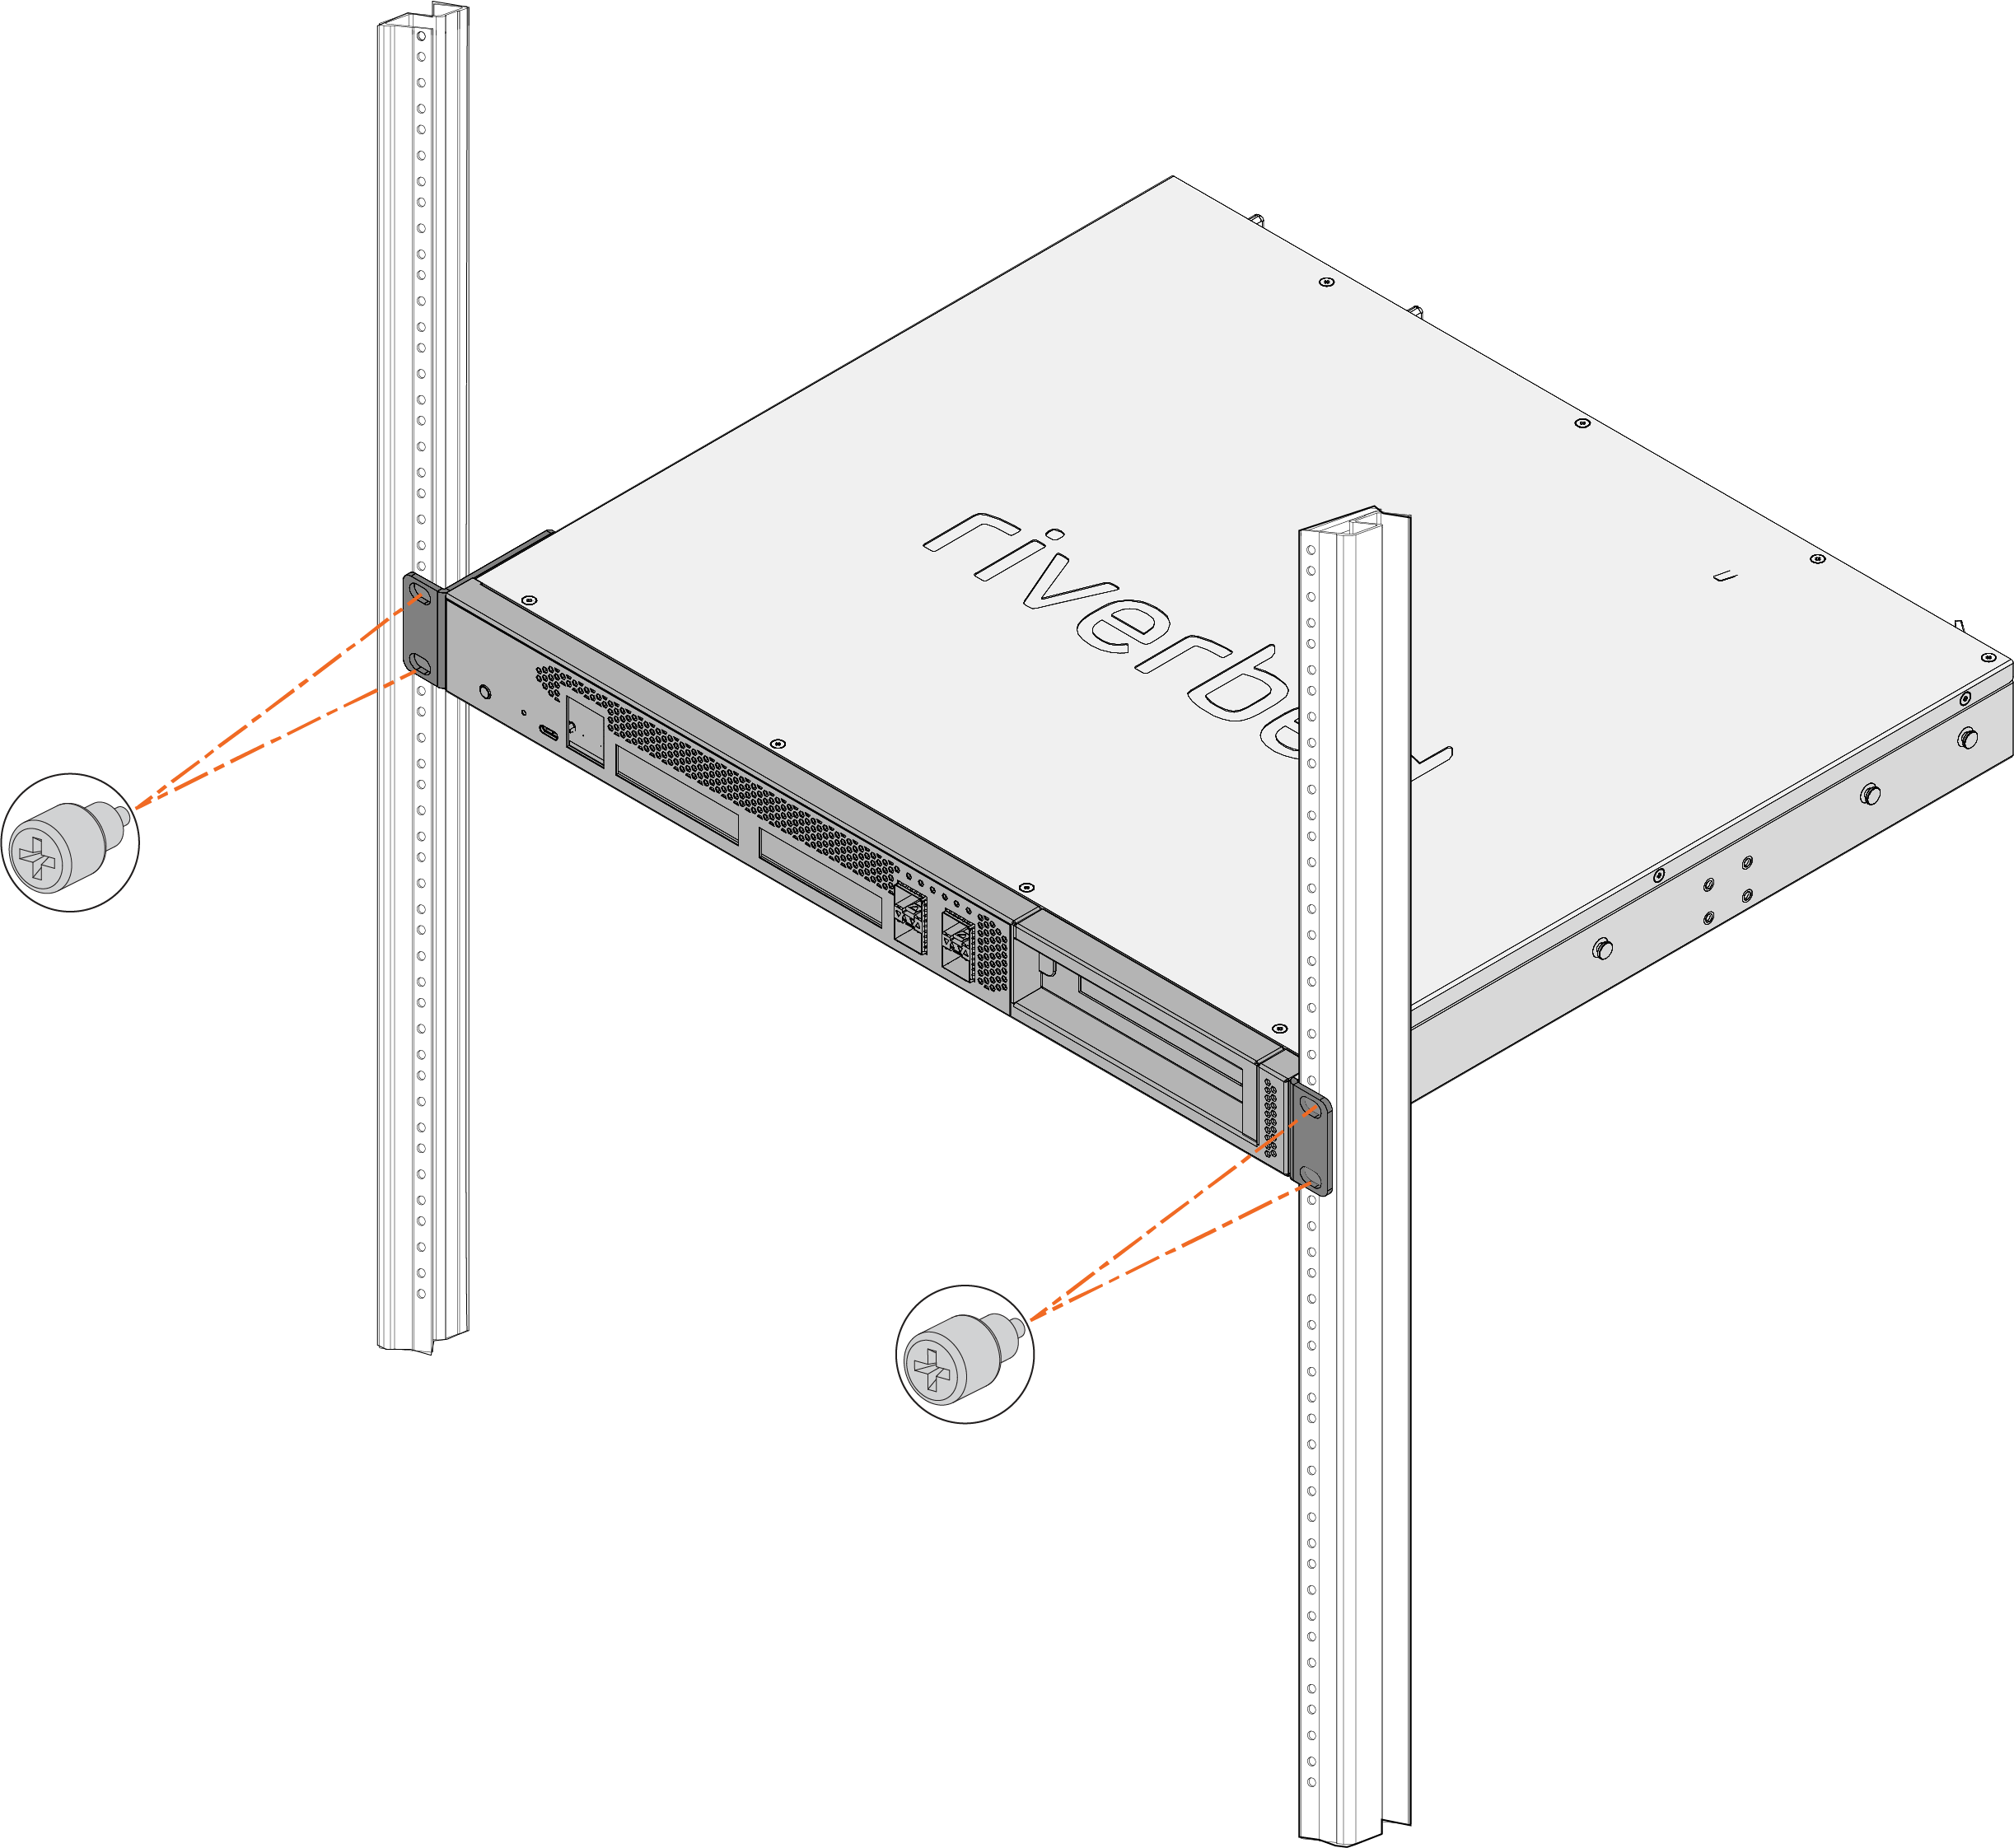
4. Facing the back of the rack, attach the four screws on each side of the appliance to the back of the rack.
Figure 2‑6. Attaching the screws to the back of the rack