Rack Mounting SteelHead CX x55, CX x70, SHSD x70, SMC, and SCC Desktop Appliances
This chapter describes how to install SteelHead CX x55m CX x70, SteelHead SD (SHSD) x70, SMC9000, and SCC desktop appliances in a standard rack. It includes these sections:
Appliances included in this chapter
This chapter describes how to install these models in a rack:
• SteelHead CX desktop models CX255, CX570, CX770, CX555, CX755
• SteelHead SD desktop models 570-SD and 770-SD
• SteelCentral Mobile Controller 9000 (SMC9000)
• SteelCentral Controller 1000 (SCC1000)
Before you begin
Before you begin the installation process:
• Unplug the AC power cords.
• Remove all external devices and connectors.
• If your rack has square holes, use the included square post-hole adapters.
Desktop appliances are designed for side-to-side airflow. If you install these appliances in a rack, do not place objects on the sides of the appliance; it restricts airflow and can damage the appliance.
Mounting CX255, CX570, CX770, SCC1000, and SMC9000 appliances
This section describes how to install CX255, CX570, CX770, SCC1000, and SMC9000 desktop appliances in a rack.
You have two rack installation options for these appliances:
• You can mount these desktop appliances in a rack with mounting brackets.
The mounting brackets are included with the accessory kit for the CX570, CX770, SCC1000, and SMC9000 appliances, as well as CX255 appliances manufactured after April 1, 2014.
For CX255 desktop appliances manufactured before April 1, 2014, the mounting brackets aren’t included. You need to order the RMK-010 installation kit to obtain the mounting brackets.
• You can mount these desktop appliances in a side-by-side configuration in a rack.
For this configuration, you need to order the RMK-016 installation kit.
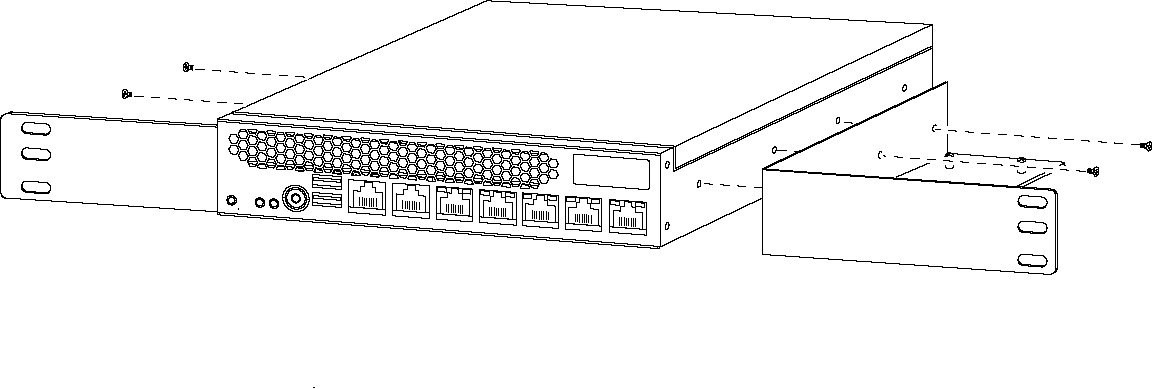
To install a desktop appliance in a rack using the mounting brackets (RMK-010)
1. Carefully lift the appliance out of the shipping carton.
The bracket for the right side of the appliance has a tray attached for the power adapter.
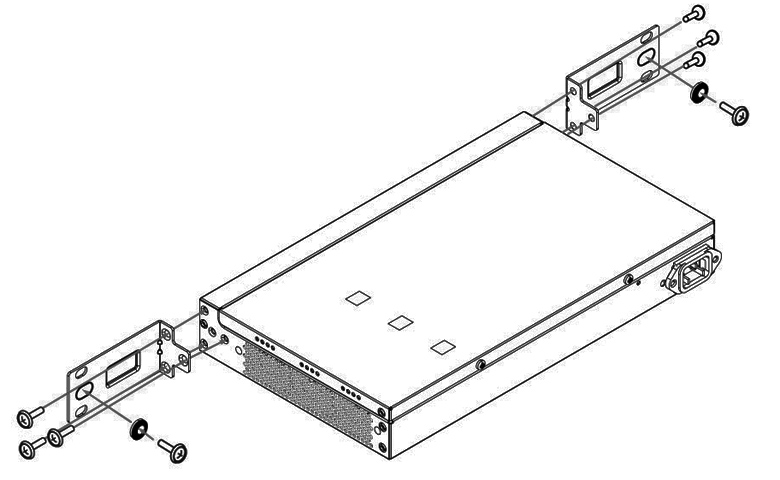
Figure 4‑1. Installing brackets to the desktop appliance
3. Place the power supply on the tray so that the AC inlet is facing the back.
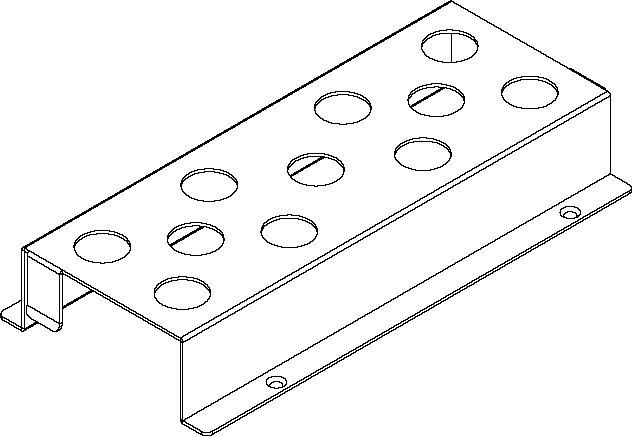
4. Place the cover over the power supply and secure it to the tray using the four screws that ship with the kit. (See
Figure: Power supply cover.)
Figure 4‑2. Power supply cover
5. Connect the power supply cord to the appliance. Tuck the cord down in the middle of the power supply and bracket.
The desktop appliance must be installed in a front mount position.
Figure 4‑3. Installing the CX desktop appliance in a rack

7. Apply power by connecting the power cord from the AC inlet to the power source.
To install a desktop appliance in a rack in a side-by-side configuration (RMK-016)
1. If the appliance is already installed in a rack using the standard mounting brackets, remove the appliance from the rack and remove the mounting brackets.
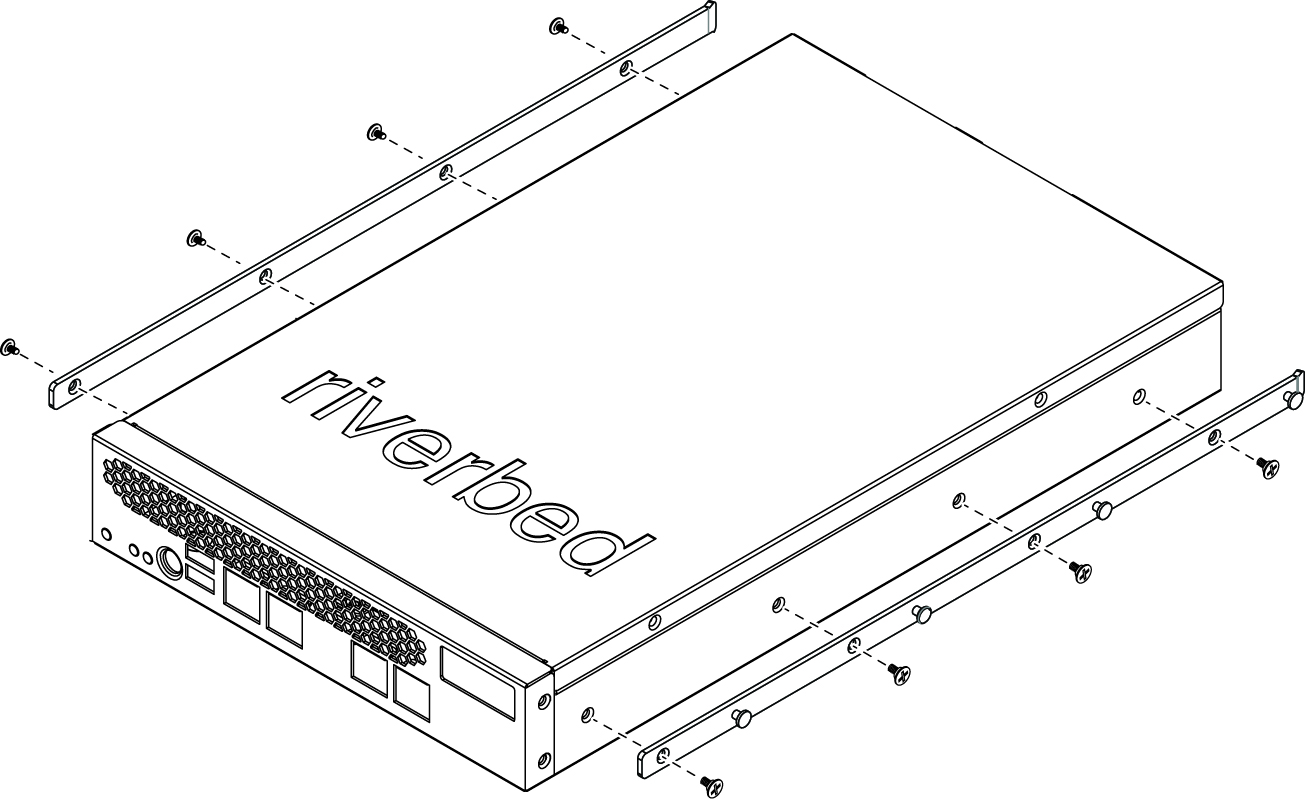
2. Attach the inner rails to each side of the appliance.
Secure each inner rail with four screws.
Figure 4‑4. Attaching inner rails
3. Attach the mounting brackets for the side-by-side rack kit to each side of the appliance.
Each mounting bracket attaches with two screws. Both brackets are the same, but since they attach to opposite sides of the appliance, they are oriented differently when installed.
Figure 4‑5. Attaching mounting brackets
4. Attach the outer rails to the rack and secure each end with two screws.
Figure 4‑6. Attaching the outer rails
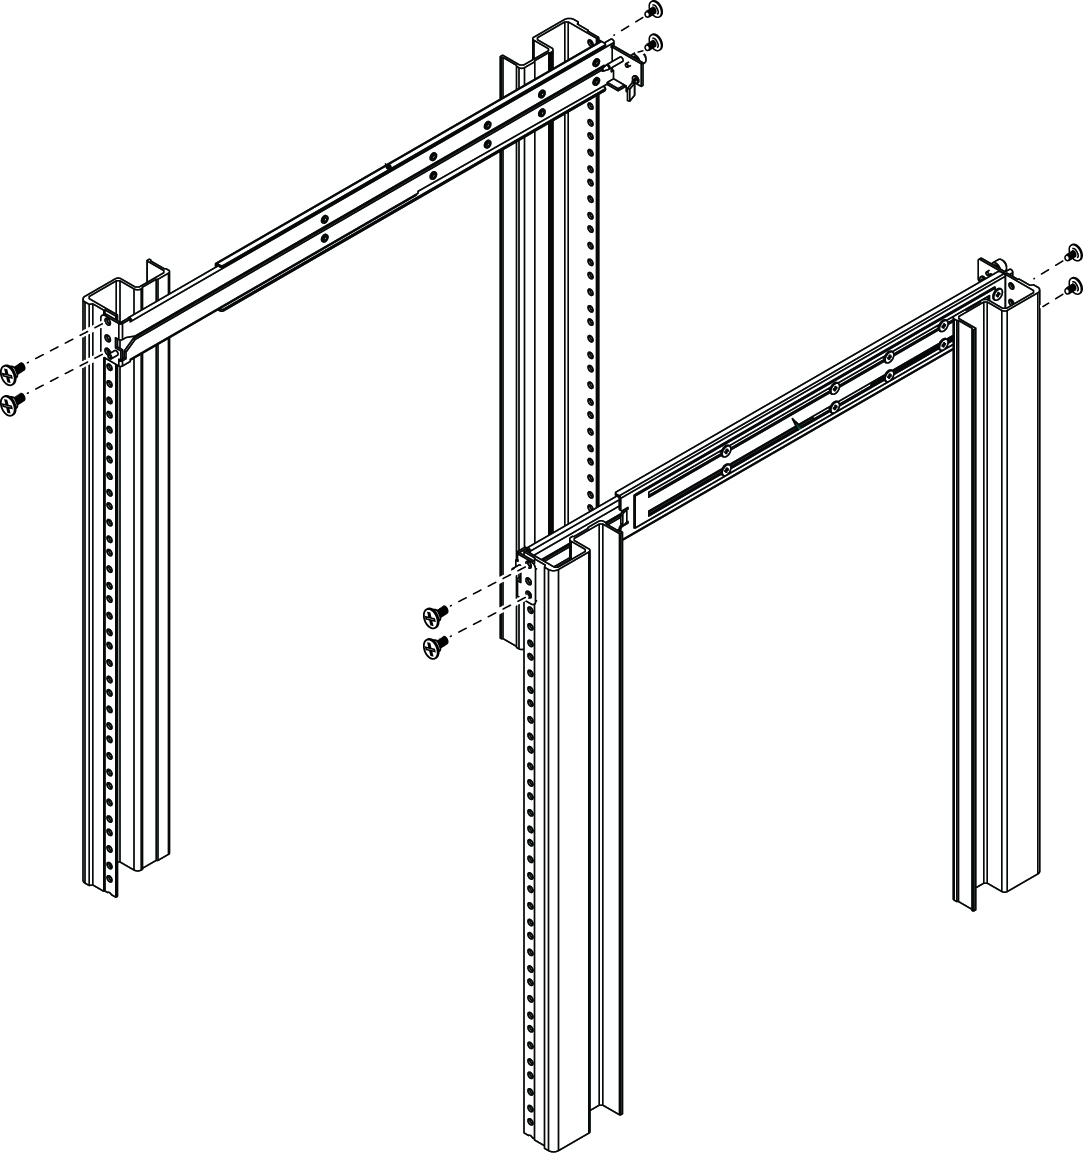
If needed, adjust the rail size to fit your rack. Each rail has six screws that secure the rail components to establish the length. You can loosen the screws and slide the rail components to make small adjustments to the length or move the screws to another position to make larger adjustments.
5. Insert the power supply platform that contains the middle rail. Tighten the two thumb screws in the rear to secure it.
This platform has metal studs on the outside that slide in the channels on the outer rails.
Figure 4‑7. Inserting the power supply platform and middle rail

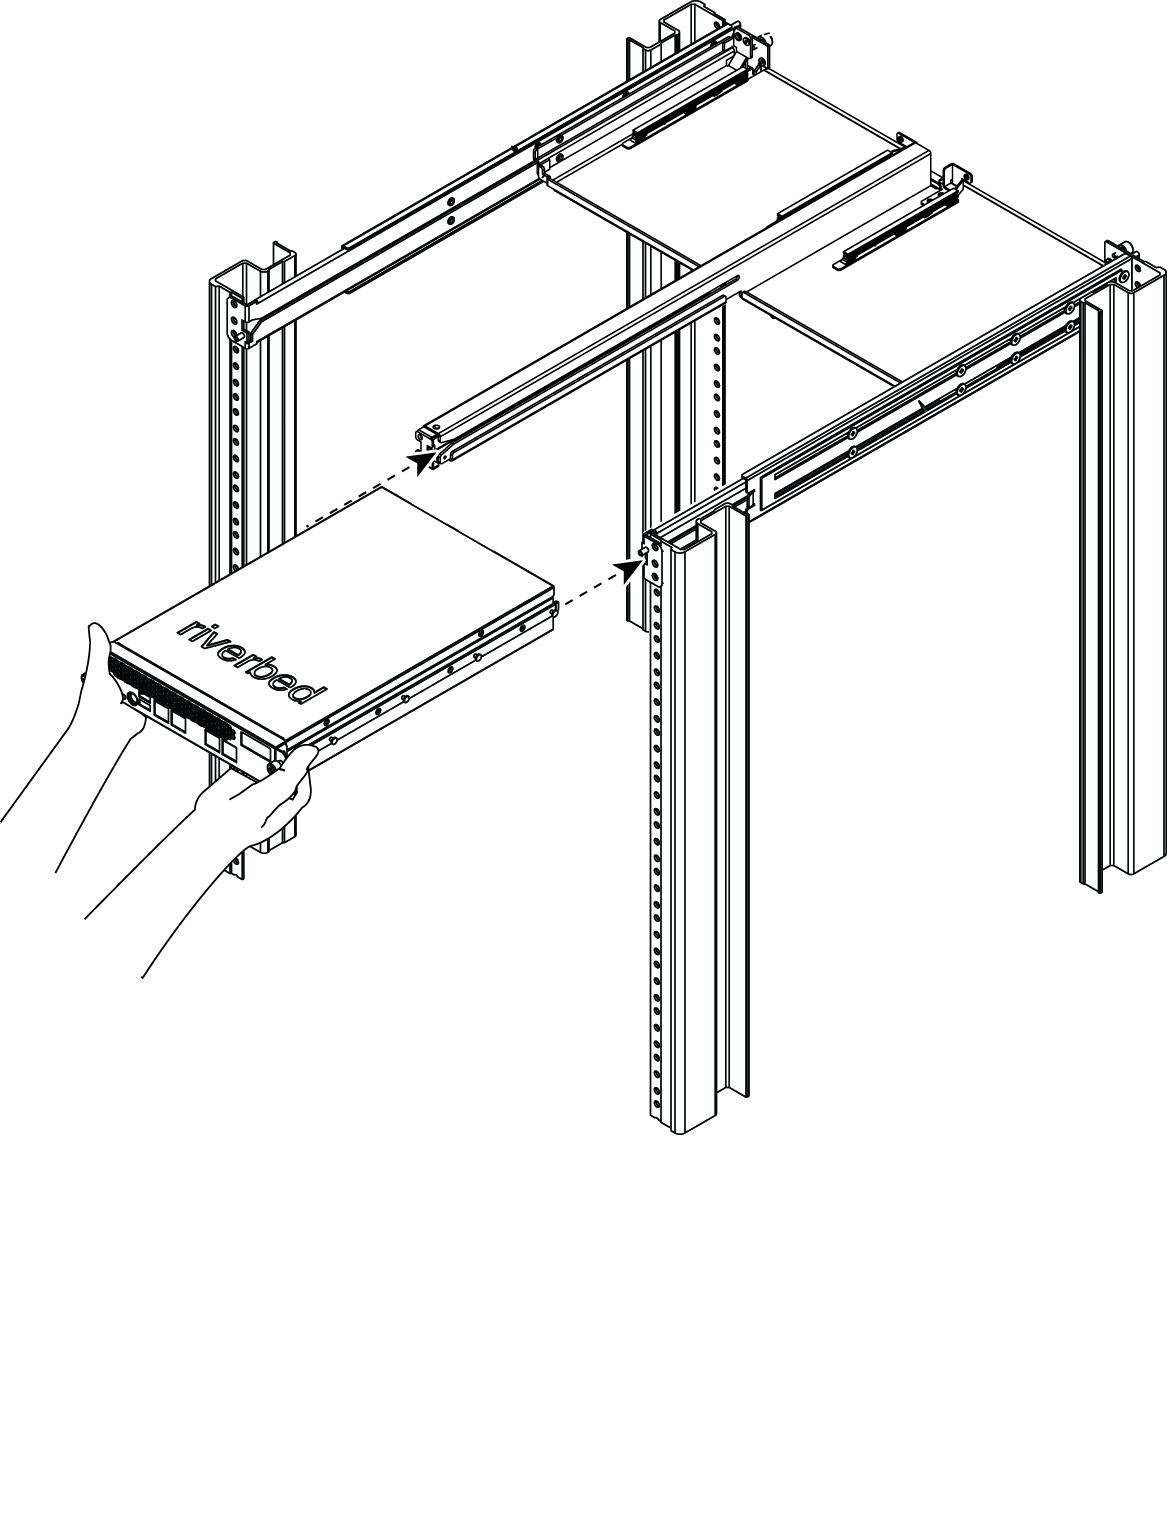
6. Slide each desktop appliance into the rails and tighten the thumb screws.
The metal studs on the inner rails slide into the channels on the outer rails.
Figure 4‑8. Inserting the appliance
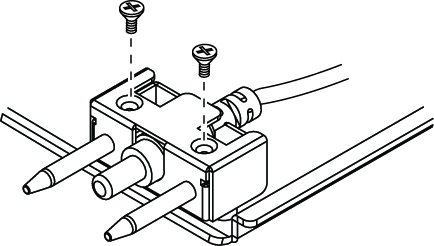
7. Attach the two-prong power cord connector to the tray insert and insert the power cord.
The connector consists of an upper and lower piece. Use two screws to attach the lower piece to the tray insert, insert the power cord into the connector, and use two more screws to secure the upper piece to the lower piece.
Figure 4‑9. Attaching the power cord connector
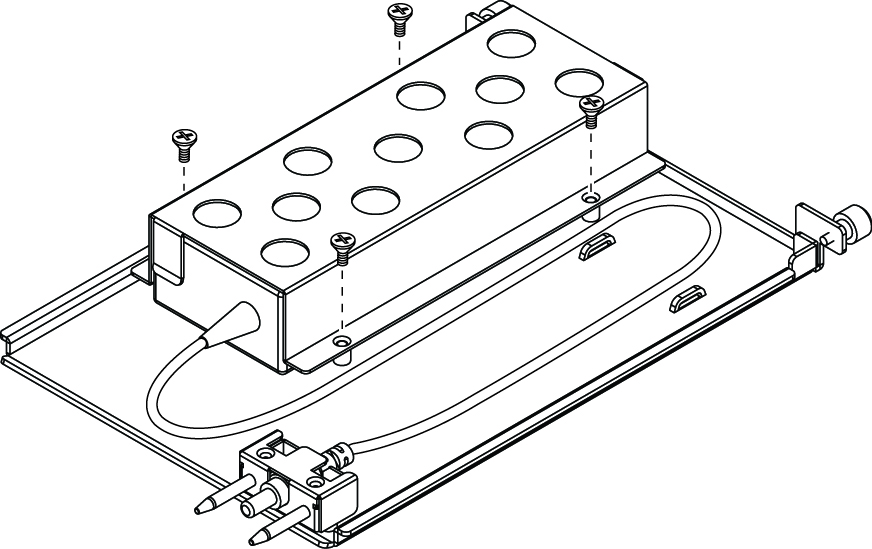
8. Attach the power supply to the tray insert.
It attaches with four screws—two on each side of the power supply.
Figure 4‑10. Attaching a power supply
9. Slide each power supply tray into the power supply platform until the power cord connects with the appliance.
The two prongs serve as guides to align the cord with the appliance and fit into holes on the rear of the appliance.
Figure 4‑11. Inserting power supply trays

10. Tighten the thumb screws.
Once installed, you can individually remove and insert each appliance. (Note, when you remove the appliance, it disconnects the appliance from the power cord.)
Mounting CX555 and CX755 appliances
This section describes how to install CX555 and CX755 appliances in a rack.
To install mounting brackets to the appliance
1. Carefully lift the appliance out of the shipping carton.
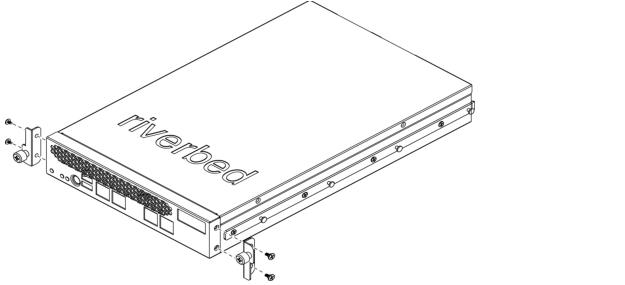
2. To install the mounting brackets, use the included screw kit to secure the brackets onto the sides of the appliance (at the front of the appliance) using three screws on each side.
Figure 4‑12. Installing brackets to the desktop appliance
3. To mount the brackets to the posts, slide the appliance into the rack until the front is flush against the rack posts. Install the included washer and screw in the center hole of the bracket.
The appliance must be installed in a front-mount position.
4. Insert and tighten the rack post screws on each side of the appliance.