Configuring QoS
This section describes how to configure QoS. It contains these topics:
Overview
QoS configuration identifies business applications and classifies traffic according to priorities. The SteelHead uses this information to control the amount of WAN resources that each application can use. QoS ensures that your important applications are prioritized and removes the guesswork from protecting performance of key applications. In addition, QoS can prevent recreational applications from interfering with business applications.
We strongly recommend that you configure QoS on and push QoS policies from a SteelCentral Controller for SteelHead to the SteelHead appliances, particularly with large scale deployments. For details, see the SteelCentral Controller for SteelHead Deployment Guide.
Every SteelHead has predefined classes that categorize network traffic. For more information, see
Viewing and editing the default QoS classes. You can keep the default classes, or modify them by adding subclasses and rules. See
Adding QoS profiles and
Adding and editing QoS rules for more information.
A useful way to configure QoS is to add a subclass or rule and use group applications and application signatures that come predefined with RiOS. For the list of applications, see
Application Signatures for AFE. For the list of application groups, and to create a custom application, see
Defining Applications.
Before configuring QoS, we recommend that you define any applications that are not already defined. See
Defining Applications for more information.
And all in-path interfaces are enabled for inbound and outbound QoS with the same link rate.
Note: If you are migrating from RiOS 8.6.x and earlier to RiOS 9.x, see the SteelHead Installation and Configuration Guide for the migration process.
To enable QoS
1. Choose Networking > Network Services: Quality of Service to display the Quality of Service page.
Figure: Quality of Service page—Enable QoS pane
2. Under Enable QoS, complete the following configuration.
• Enable Outbound QoS Shaping - Enables QoS classification to control the prioritization of different types of network traffic and to ensure that the SteelHead gives certain network traffic (for example, Voice over IP) higher priority than other network traffic. Traffic is not classified until at least one WAN interface is enabled. The system enables inbound and outbound QoS on all in-path interfaces by default.
To disable outbound QoS, clear this check box.
• Enable Inbound QoS Shaping - Enables QoS classification to allocate bandwidth and prioritize traffic flowing into the LAN network behind the SteelHead. Inbound QoS provides the benefits of QoS for environments that can’t meet their QoS requirements with outbound QoS.
To disable inbound QoS, clear this check box.
• Enable Outbound QoS Marking - Identifies outbound traffic using marking values. You can mark traffic using header parameters such as VLAN, DSCP, and protocols. You can also use Layer-7 protocol information through Application Flow Engine (AFE) inspection to apply DSCP marking values to traffic flows.
The DSCP or IP ToS marking only has local significance. You can set the DSCP or IP ToS values on the server-side SteelHead to values different to those set on the client-side SteelHead.
3. Click Save to apply your settings.
4. Click Save to Disk to save your settings permanently.
To manage QoS settings per interface
1. Choose Networking > Network Services: Quality of Service to display the Quality of Service page.
2. Click the arrow to the left of the Manage QoS settings per interface pane to expand it.
Figure: Quality of Service page—Manage QoS Per Interface pane
3. Click the right arrow next to the WAN interface name and then select Outbound or Inbound QoS.
By default, the system enables inbound and outbound QoS on all in-path interfaces except the primary interface. You can only enable outbound QoS on the primary interface.
Inbound QoS supports in-path interfaces only; it doesn’t support primary or auxiliary interfaces.
4. Click Save to apply your settings.
5. Click Save to Disk to save your settings permanently.
To set the uplink bandwidth for local uplinks
1. Choose Networking > Network Services: Quality of Service to display the Quality of Service page.
2. In the Local Site Uplink Bandwidth pane, click the arrow next to an uplink name to expand it.
Figure: Local Site Uplink Bandwidth pane
3. Specify the inbound (Bandwidth Down) and outbound (Bandwidth Up) bandwidth for the uplinks on the local site, in kilobits per second.
RiOS uses the bandwidth to precompute the end-to-end bandwidth for QoS. The SteelHead automatically sets the bandwidth for the default site to this value.
The rate is the bottleneck WAN bandwidth, not the interface speed out of the WAN interface into the router or switch. As an example, if your SteelHead connects to a router with a 100 Mbps link, don’t specify this value—specify the actual WAN bandwidth (for example, T1, T3).
Different WAN interfaces can have different WAN bandwidths; you must enter the bandwidth link rate correctly for QoS to function properly.
Note: You can also access and edit these bandwidth values, in addition to site-specific tasks such as adding an uplink, in the Networking > Topology: Sites & Networks page. For more information, see
Defining a site.
4. Click Save to apply your settings.
5. Click Save to Disk to save your settings permanently.
Viewing and editing the default QoS classes
Starting with RiOS 9.5, there is no default profile in the QoS Profiles pane. Instead, SteelHeads display a set of default QoS classes in the Default QoS Classes pane. These classes take the place of the default QoS profile. To view the classes, choose Networking > Network Services: Quality of Service.
Figure: Default QoS Classes pane
The default classes represent the following types of traffic:
RealTime - Specifies real-time traffic class. Give this value to the highest-priority traffic: for example, VoIP or video conferencing.
Interactive - Specifies an interactive traffic class: for example, Citrix, RDP, telnet, and SSH.
BusinessCritical - Specifies the high-priority traffic class: for example, Thick Client Applications, ERPs, and CRMs.
Normal - Specifies a normal- priority traffic class: for example, internet browsing, file sharing, and email.
LowPriority - Specifies a low-priority traffic class: for example, FTP, backup, replication, other high-throughput data transfers, and recreational applications such as audio file sharing.
BestEffort - Specifies the lowest priority.
The QoS class indicates how delay-sensitive a traffic class is to the QoS scheduler. These are minimum service class guarantees; if better service is available, it’s provided. For example, if a class is specified as low priority and the higher-priority classes aren’t active, then the low-priority class receives the highest possible available priority for the current traffic conditions. This parameter controls the priority of the class relative to the other classes.
Note: The service class describes only the delay sensitivity of a class, not how important the traffic is compared to other classes. Typically you configure low priority for high-throughput, non-packet delay sensitive applications like FTP, backup, and replication.
Classes are organized in a hierarchical tree structure. You can use the default classes in rules as part of a profile by choosing Any (Default Rule) in the QoS Rules pane, which inherits the default classes.
To edit QoS classes
1. Choose Networking > Network Services: Quality of Service to display the Quality of Service page.
2. Under Default QoS Classes, click Edit.
3. Change the class values as shown in this table.
Control | Description |
Class Name | Specify a name for the QoS class. For information about the default classes, see Viewing and editing the default QoS classes. |
Minimum Bandwidth % | Specify the minimum amount of bandwidth (as a percentage) to guarantee to a traffic class when there’s bandwidth contention. All of the classes combined can’t exceed 100 percent. During contention for bandwidth, the class is guaranteed the amount of bandwidth specified. The class receives more bandwidth if there’s unused bandwidth remaining. Excess bandwidth is allocated based on the relative ratios of minimum bandwidth. The total minimum guaranteed bandwidth of all QoS classes must be less than or equal to 100 percent of the parent class. A default class is automatically created with minimum bandwidth of 10 percent. Traffic that doesn’t match any of the rules is put into the default class. We recommend that you change the minimum bandwidth of the default class to the appropriate value. You can adjust the value as low as 0 percent. |
Maximum Bandwidth % | Specify the maximum allowed bandwidth (as a percentage) a class receives as a percentage of the parent class minimum bandwidth. The limit’s applied even if there’s excess bandwidth available. |
Outbound Queue Type | Optionally, select one of these queue methods for the leaf class from the drop-down list (the queue doesn’t apply to the inner class): • SFQ - Shared Fair Queueing (SFQ) is the default queue for all classes. Determines SteelHead behavior when the number of packets in a QoS class outbound queue exceeds the configured queue length. When SFQ is used, packets are dropped from within the queue in a round-robin fashion, among the present traffic flows. SFQ ensures that each flow within the QoS class receives a fair share of output bandwidth relative to each other, preventing bursty flows from starving other flows within the QoS class. • FIFO - Transmits all flows in the order that they’re received (first in, first out). Bursty sources can cause long delays in delivering time-sensitive application traffic and potentially to network control and signaling messages. • MX-TCP - Has very different use cases than the other queue parameters. MX-TCP also has secondary effects that you must understand before configuring: – When optimized traffic is mapped into a QoS class with the MX-TCP queuing parameter, the TCP congestion-control mechanism for that traffic is altered on the SteelHead. The normal TCP behavior of reducing the outbound sending rate when detecting congestion or packet loss is disabled, and the outbound rate is made to match the guaranteed bandwidth configured on the QoS class. – You can use MX-TCP to achieve high-throughput rates even when the physical medium carrying the traffic has high-loss rates. For example,
MX-TCP is commonly used for ensuring high throughput on satellite connections where a lower-layer-loss recovery technique is not in use. RiOS 8.5 and later introduce rate pacing for satellite deployments, which combines MX-TCP with a congestion-control method. – Another use of MX-TCP is to achieve high throughput over high-bandwidth, high-latency links, especially when intermediate routers don’t have properly tuned interface buffers. Improperly tuned router buffers cause TCP to perceive congestion in the network, resulting in unnecessarily dropped packets, even when the network can support high-throughput rates. You must ensure the following when you enable MX-TCP: • The QoS rule for MX-TCP must be at the top of QoS rules list. • Only use MX-TCP for optimized traffic. MX-TCP doesn’t work for unoptimized traffic. • Do not classify a traffic flow as MX-TCP and then subsequently classify it in a different queue. • There is a maximum bandwidth setting for MX-TCP that allows traffic in the MX class to burst to the maximum level if the bandwidth is available. |
Outbound DSCP | Selects the default DSCP mark for the class. QoS rules can then specify Inherit from Class for outbound DSCP to use the class default. Select Preserve or a DSCP value from the drop-down list. This value is required when you enable QoS marking. The default setting is Preserve, which specifies that the DSCP level or IP ToS value found on pass-through and optimized traffic is unchanged when it passes through the SteelHead. The DSCP marking values fall into these classes: • Expedited forwarding (EF) class - In this class, packets are forwarded regardless of link share of other traffic. The class is suitable for preferential services requiring low delay, low packet loss, low jitter, and high bandwidth. • Assured forwarding (AF) class - This class is divided into four subclasses, each containing three drop priorities for more granular classification. The QoS level of the AF class is lower than that of the EF class. 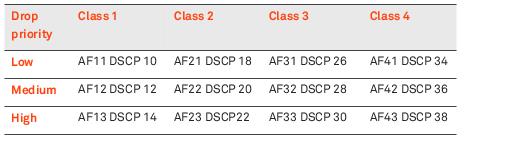 • Class selector (CS) class - This class is derived from the IP ToS field. |
Priority | Select a latency priority from 1 through 6, where 1 is the highest and 6 is the lowest. |
4. Optionally, add a new class and enter the values for the new class.
• To add an additional class as a peer with the existing classes, click add class at the bottom of the tree.
• To add an additional class as a subclass of an existing class, click add class to the right of the existing class.
Use a hierarchical tree structure to:
– divide traffic based on flow source or destination and apply different shaping rules and priorities to each leaf-class.
– effectively manage and support remote sites with different bandwidth characteristics.
The SteelHead Management Console supports the configurations of three hierarchy levels. If you need more levels of hierarchy, you can configure them using the CLI. See the documentation for the qos profile class command in the Riverbed Command-Line Interface Reference Manual.
• To remove the class, click the x at the corner of the window. To remove a parent class, delete all rules for the corresponding child classes first. When a parent class has rules or children, the x for the parent class is unavailable.
5. Click Save to save the changes to the default class.
6. Click Save to Disk to save your settings permanently.
Adding QoS profiles
You can create additional profiles to set QoS classes and rules for multiple sites. For details about sites, see
Defining a site. For details about QoS, see the
SteelHead Deployment Guide and the
QoS on SteelHeads Feature Module.
A QoS profile contains a set of QoS classes and rules.
QoS profiles in RiOS 9.0 and later replace QoS service policies in previous versions.
To add a profile
1. Choose Networking > Network Services: Quality of Service to display the Quality of Service page.
2. Under QoS Profiles, click + Add a QoS Profile.
3. Specify a profile name.
4. In the Copy From: field, select a template or an existing profile on which to base the new profile. The system copies the existing configuration into the new profile. You can then fine-tune the parameters to create a new profile.
5. Click Save.
To edit a profile
1. Choose Networking > Network Services: Quality of Service to display the Quality of Service page.
Figure: Quality of Service page—QoS Profiles pane
2. Under QoS Profiles, click Edit to the right of the profile name.
Adding and editing QoS rules
In RiOS 9.0 and later, QoS rules assign traffic to a particular QoS class. Prior to RiOS 9.0, QoS rules defined an application; however, applications are now defined separately, and you can add application groups, application signatures, or custom applications as part of a rule. For the list of applications, see
Application Signatures for AFE. For the list of application groups, and to create a custom application, see
Defining Applications.
You can create multiple QoS rules for a profile. When multiple QoS rules are created for a profile, the rules are followed in the order in which they’re shown in the QoS Profile page and only the first matching rule is applied to the profile.
SteelHeads support up to 2000 rules and up to 500 sites. When a port label is used to add a QoS rule, the range of ports can’t be more than 2000 ports.
If a QoS rule is based on an application group, it counts as a single rule. Using application groups can significantly reduce the number of rules in a profile.
In RiOS 9.0 and later, QoS rules assign traffic to a particular QoS class. Prior to RiOS 9.0 QoS rules defined an application; now you use application properties. For more information, see
Defining Applications.
Including the QoS rule in the profile prevents the repetitive configuration of QoS rules, because you can assign a QoS profile to multiple sites.
Important: Make sure that you place the more granular QoS rules at the top of the QoS rules list. Rules from this list are applied from top to bottom. As soon as a rule is matched, the list is exited.
For more information about QoS profiles, see
Adding QoS profiles.
To add a QoS rule
1. Choose Networking > Network Services: Quality of Service.
2. Select Add a Rule in the Default QoS Rules pane.
Figure: Adding a new QoS rule
3. Start to type the application or application group name in the text box, then select it from the drop down menu of the available application and application groups.
Figure: Application or Application Group field prepopulation
4. Complete the other fields as described in this table.
Control | Description |
Application or Application Group | Specify the application or application group. We recommend using application groups for the easiest profile configuration and maintenance. |
QoS Class | Select a service class for the application from the drop-down list, or select Inherit from Default Rule. The classes are described in Viewing and editing the default QoS classes. Choose Inherit from Default Rule to use the class that is currently set for the default rule. The default setting is LowPriority. |
Outbound DSCP | Select Inherit from Class, Preserve, or a DSCP value from the drop-down list. This value is required when you enable QoS marking. The default setting is Inherit from Class. Preserve specifies that the DSCP level or IP ToS value found on pass-through and optimized traffic is unchanged when it passes through the SteelHead. When you specify a DSCP marking value in a rule, it either takes precedence over or inherits the value in a class. |
5. Click Save.
The newly created QoS rule displays in the QoS rules table of the QoS profile.
To configure or edit a QoS rule in a profile
1. Choose Networking > Network Services: Quality of Service.
2. In the Default QoS Rules pane, click the arrow next to the rule.
Figure: Editing a QoS rule for the default profile
Note: To edit a rule for a profile that was added, scroll down to the QoS Profiles area, click Edit to the right of the QoS profile name, and then click the arrow next to the rule.
Figure: Editing a QoS rule for an added profile
3. Select Add a Rule at the bottom of the page.
4. Specify the first three or four letters of the application or application group you want to create a rule for and select it from the drop down menu of the available application and application groups.
Figure: Configuring a QoS rule in a profile
5. Edit the application or application group name, the QoS class, or the DSCP value in the rule.
6. Click Save.
Verifying and Saving a QoS Configuration
After you apply your settings, you can verify whether the traffic is categorized in the correct class by choosing Reports > Networking: Outbound QoS and viewing the report. For example, if you have configured VoIP traffic as real-time, check the real-time class and verify that existing classes aren’t receiving VoIP traffic.
You can verify whether the configuration is honoring the bandwidth allocations by reviewing the Outbound QoS and Inbound QoS reports.
When you have verified appropriate changes, you can write the active configuration that is stored in memory to the active configuration file (or you can save it as any filename you choose). For details about saving configurations, see
Managing configuration files.
Related topics
Enabling MX-TCP queue policies
When you define a QoS class, you can enable a maximum speed TCP (MX-TCP) queue policy, which prioritizes TCP/IP traffic to provide more throughput for high loss links or links that have large bandwidth and high latency LFNs. Some use case examples are:
• Data-Intensive Applications - Many large, data-intensive applications running across the WAN can negatively impact performance due to latency, packet loss, and jitter. MX-TCP enables you to maximize your TCP throughput for data intensive applications.
• High Loss Links - TCP doesn’t work well on misconfigured links (for example, an under-sized bottleneck queue) or links with even a small amount of loss, which leads to link under-utilization. If you have dedicated point-to-point links and want those links to function at predefined rates, configure the SteelHead to prioritize TCP traffic.
• Privately Owned Links - If your network includes privately owned links dedicated to rate-based TCP, configure the SteelHead to prioritize TCP traffic.
After enabling the MX-TCP queue to forward TCP traffic regardless of congestion or packet loss, you can assign QoS rules that incorporate this policy only to links where TCP is of exclusive importance.
These exceptions to QoS classes apply to MX-TCP queues:
• In RiOS 7.x and later, the Link Share Weight parameter doesn’t apply to MX-TCP queues. When you select the MX-TCP queue, the Link Share Weight parameter doesn’t appear. In RiOS 8.x and later, there’s a maximum bandwidth setting for MX-TCP that allows traffic to burst to the maximum level if the bandwidth is available.
• MX-TCP queues apply only to optimized traffic (that is, no pass-through traffic).
• MX-TCP queues can’t be configured to contain more bandwidth than the license limit.
When enabling MX-TCP, ensure that the QoS rule is at the top of QoS rules list.
Basic steps for MX-TCP
This table describes the basic steps to configure MX-TCP. Enabling this feature is optional.
Task | Reference |
1. Select each WAN interface and define the bandwidth link rate for each interface. | |
2. Add an MX-TCP class for the traffic flow. Make sure you specify MX-TCP as your queue. | |
3. Define QoS rules to point to the MX-TCP class. | |
4. Select the Enable Inbound or Outbound QoS Shaping check box and click Save. Your changes take effect immediately. | |
5. Optionally, to test a single connection, change the WAN socket buffer size (to at least the BDP). You must set this parameter on both the client-side and the server-side SteelHead. | |
6. Check and locate the inner connection. | |
7. Check the throughput. | |


