Trace Clip Dialog Controls
Clicking Add Trace Clip displays the Trace Clip dialog (
Figure: Trace Clip dialog). The Trace Clip dialog provides controls that enable you to define a trace clip as a very specific subset of the data contained in the original job trace. Most of the Trace Clip dialog controls enable you to isolate a specific time interval within the job trace, but there are filter controls present, also, enabling you to isolate packets that match specific criteria. The most prominent components of the Trace Clip dialog are the two time scroll bars. The top time scroll bar defaults to showing the complete span of time encompassed by the job trace. The bottom time scroll bar enables you to examine in detail the selected portion of the complete time span. The other time-related controls in the dialog assist you in selecting the portion of the job trace that you want to use for the trace clip.
Trace Clip dialog
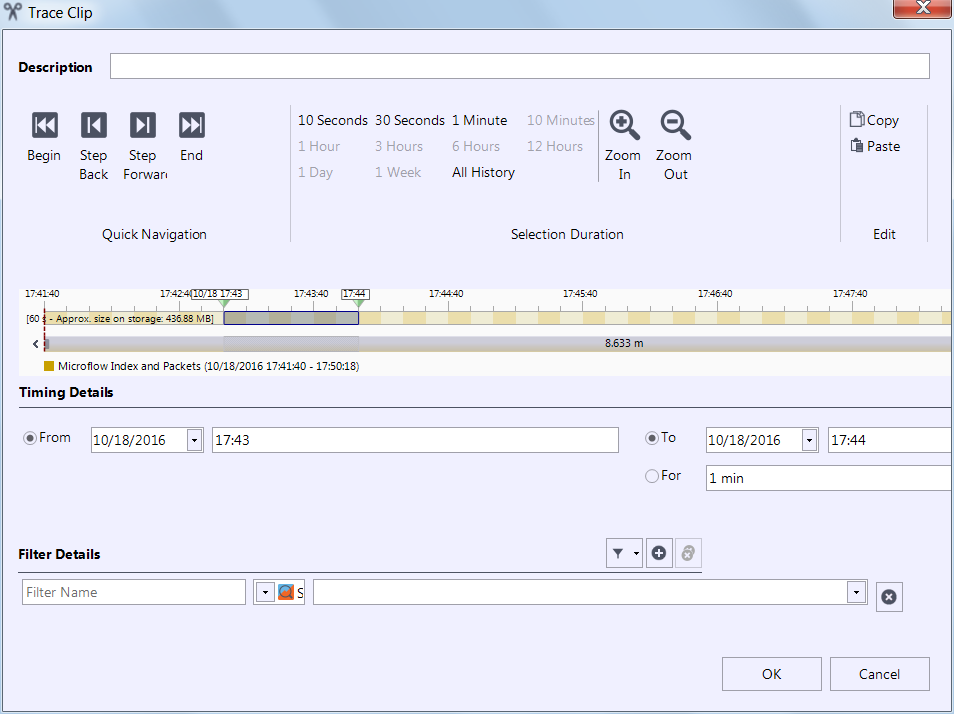
The Trace Clip dialog provides these controls:
◼ Description – Type explanatory text that will appear with the trace clip’s information in the Jobs Repository.
◼ Quick Navigation controls – Begin, Step Back, Step Forward, End. These controls enable you to position the selection box along the time scroll.
◼ Selection Duration controls – Select a time increment to use with the Step Back and Step Forward controls. For example, selecting 30 seconds will cause the selection box to advance by 30 seconds when you click Step Forward.
◼ Zoom In, Zoom Out – Change the portion of the job trace that is displayed in the time scroll section.
◼ Available Packets – Click this to zoom in the time interval to the time range in which packets are available.
◼ Copy, Paste – Use these when creating trace clips for the same time interval from multiple job traces captured over the same time period. Select the time interval in the Trace Clip dialog for the first trace clip. Before pressing OK, press Copy to place the selected time interval on the clipboard. Go to the next job trace and right click on it, then select Paste from the context menu to create a trace file for the same time interval used in the first job trace.
◼ Time Scroll Bars – These provide a visual guide for selecting a time interval within the original job trace. A selection box shows the portion of the job trace that will be included in the trace clip. These scroll bars show gaps both in packets and in the index; the colors indicate the type of traffic (packets or index), and a gray portion indicates a gap.
◼ Timing Details controls – Specify the start time of the trace clip, along with an end time or a duration. These parameters determine the size of the selection box in the time scroll bar.
◼ Filter Details controls – These enable you to apply filters to the trace clip. Refer to the Filters chapter for detailed instructions for using filters. A filter applied to a trace clip is listed under the trace clip name in the Files panel.