Installing On-Premise SCM
Use the procedures in this chapter to install On-Premise SCM. After installation is complete, use SCM to manage your SD-WAN gateways, WiFi access points, and Ethernet switches with the same functionality as the web-based SCM. For details, see the SteelConnect Manager User Guide and the SteelConnect SD-WAN Deployment Guide.
Before you begin
Here’s what you need to install On-Premise SCM.
Riverbed-provided links and files
•Link to the On-Premise SCM Open Virtualization Appliance (OVA) image - Use the link to download and install the OVA image.
•Riverbed-supplied license token - Use the token to license SteelConnect.
Virtual machine
•VMware ESXi virtualization (hypervisor) software - Use this software to import the On-Premise SCM virtual appliance (OVA) file. This software must be already downloaded, installed, and ready to use.
On-Premise SCM has been tested with ESXi version 6.0.
Security certificates
•SSL certificates and keys (in PEM format) - Required for the fully qualified domain name (FQDN) you are using for SCM (for example, scm.example.com).
Use your certificate authority to generate the certificate and key, or create them by following the procedures in
Generating a certificate and key. When you create the certificate, be sure to match the FQDN of the SCM in the DNS with the common name in the certificate.
Network access and device requirements
•Internet connectivity - On-Premise SCM uses the internet to communicate with the web-based ZTP services.
•DHCP - to provide DNS, gateway, and IP address information to SCM and the SteelConnect appliance, DHCP is required when you install SCM and any time you reboot SCM.
•DNS server - A server to which you can add A-record and SRV record entries and that is accessible to SCM and all SteelConnect appliances is required. See
DNS setup for details.
Provisioning the On-Premise SCM image
To provision the On-Premise SCM image, you import the On-Premise SCM virtual appliance (OVA) file, which starts the On-Premises SCM Launcher (SCM Launcher). You then add the required values to provision and start SCM for the first time.
To import the OVA file
VMware ESXi virtualization (hypervisor) software is required.
If this installation is for demonstration purposes only, you can use Oracle VirtualBox or VMware Fusion; however, functionality of the On-Premise SCM can’t be guaranteed.
1. Open VMware ESXi.
2. Right-click Host in the VMware Host Client inventory and select Create/Register VM.
The New Virtual Machine opens.
3. In the Select creation type page, select Deploy a virtual machine from an OVF or OVA file and click Next.
4. In the Select OVF and VMDK files page, enter a name for the virtual machine.
5. Click the blue pane, select Riverbed-supplied OVA file, click Open, and then click Next.
Select OVF and VMDK files page
6. In the Select Storage page, select a datastore from the list of available datastores and click Next.
Select Storage page
7. In the Deployment Options page, select the following options.
•In the Network mappings field, specify a port group associated with a connected Network Interface Card (NIC).
Be sure that the port group has access to all the inbound and outbound ports that are required for On-Premise SCM to function. See
Ports required for operation for details.
•In the Disk provisioning field, select either Thin or Thick.
This figure shows Thin being selected, however selecting Thick can give better performance and reduce datastore over-subscription issues.
•Click Next.
Deployment Options page
8. In the Ready to complete page, review your options and click Finish.
The On-Premise SCM instance is created on the virtual machine.
Ready to complete page
9. Click the Console tab in the virtual machine and make a note of the IP address that is displayed. You use this address to log in to the SCM Launcher.
The address is blurred out in this figure.
Console tab and IP address in the VM
To provision SCM for the first time
1. Using a browser, log on to the SCM Launcher at http://<
IP_address>:3899, using the IP address that you received in
Step 9 of the previous procedure.
2. When the Provision SteelConnect Manager page displays, click OK to change the default password, and then change the password from the default.
Provision SteelConnect Manager page
3. In the Token value field, enter the Riverbed-supplied token value.
4. Click Upload Certificate, then navigate to and upload your certificate file. If you generated this file, it is named gui-cert.pem. This file must be in .pem format.
5. Click
Upload Key, then navigate to and upload the file that contains the license keys for the certificate file you uploaded in
Step 4. If you generated this file, it is named gui-key.pem. The license key must not require a password.
6. Enter these values in the Provision SteelConnect Manager page:
•In the Fully Qualified Domain name field, enter the FQDN for SCM.
•In the Time zone field, enter the time zone for SCM.
7. Optional: To set a static IP address for SCM and the DNS server, complete these steps. If you are using DHCP to get the IP address, these steps are not required.
•In the IP address field, click the Static tab.
•In the IP Address field, enter the IP address of the DNS server, Gateway, the IP address to use for SCM, and the subnet mask.
8. In the Set Login information fields, enter a username and password for the SCM Launcher.
Make a note of this information; it can’t be retrieved and is required to log in to the SCM Launcher.
9. Click Provision.
It might take up to 45 minutes to provision the SCM.
After you provision SCM for the first time, the SCM Launcher changes appearance. To view or edit any of this information after provisioning, click Settings in the left navigation pane.
Logging in to the SCM Launcher and SCM
1. Using a browser, log on to the On-Premises SCM Launcher at http://<IP_address>:3899. This is the same IP address you used in the previous procedure.
For user name and password, use the credentials you created in the Provision SteelConnect Manager page.
SCM Launcher login page
2. Click Visit your SteelConnect Manager on the top right of the SCM Launcher page to go to SCM.
The default user name is admin and the default password is pppp.
Visit SteelConnect Manager

If SCM does not start, see
SCM does not start for troubleshooting tips.
Upgrading SCM
When you start the SCM Launcher for the first time, it connects to the ZTP services using SSL (x509) certificates and the latest image is retrieved. Verify that you have the latest image by performing the steps in this procedure.
Use this procedure if you are running an existing On-Premise SCM; this procedure upgrades your SCM version from 2.7 to 2.10.1.
Schedule a maintenance window for this upgrade; the Launcher and the SCM versions are both updated during this procedure, which can take up to 8 hours.
We strongly recommend that you upgrade the firmware on any gateways immediately after upgrading SCM. If the gateway firmware is running SCM version 2.7, existing VPN tunnels between gateways will have a service impact after SCM upgrade. For more information about upgrading gateway firmware, see
Step 3 of the upgrade procedure.
To upgrade On-Premise SCM
1. Back up the system by completing the following steps:
•Take a snapshot of your VM using the ESXi snapshot utility. Refer to the VMware ESXi documentation for details.
2. From the SCM Launcher, check the software version by clicking Visit your SteelConnect Manager on the top right of the page. The default username for SCM is admin and the default password is pppp.
•Earlier versions display the software version on the lower left of the page in the left navigation bar. If the version displayed is 2.7, the SCM requires an upgrade.
Version number on SCM page—earlier software versions

•Later versions of SCM display the version by clicking the Help button. The version is shown in the What’s New area. On-Premise SCM supports a software version of 2.10.1.
Version number on SCM page—later software versions
3. Make sure that the SCM upgrades its gateway firmware immediately after the SCM upgrade by choosing Realm, then clicking the Maintenance tab, and then making sure that Apply firmware upgrades immediately is set to On.
Setting firmware updates to On

4. Return to the SCM Launcher page and click Upgrade.
If the version on the SCM matches the version listed in the Upgrade page, no update is required.
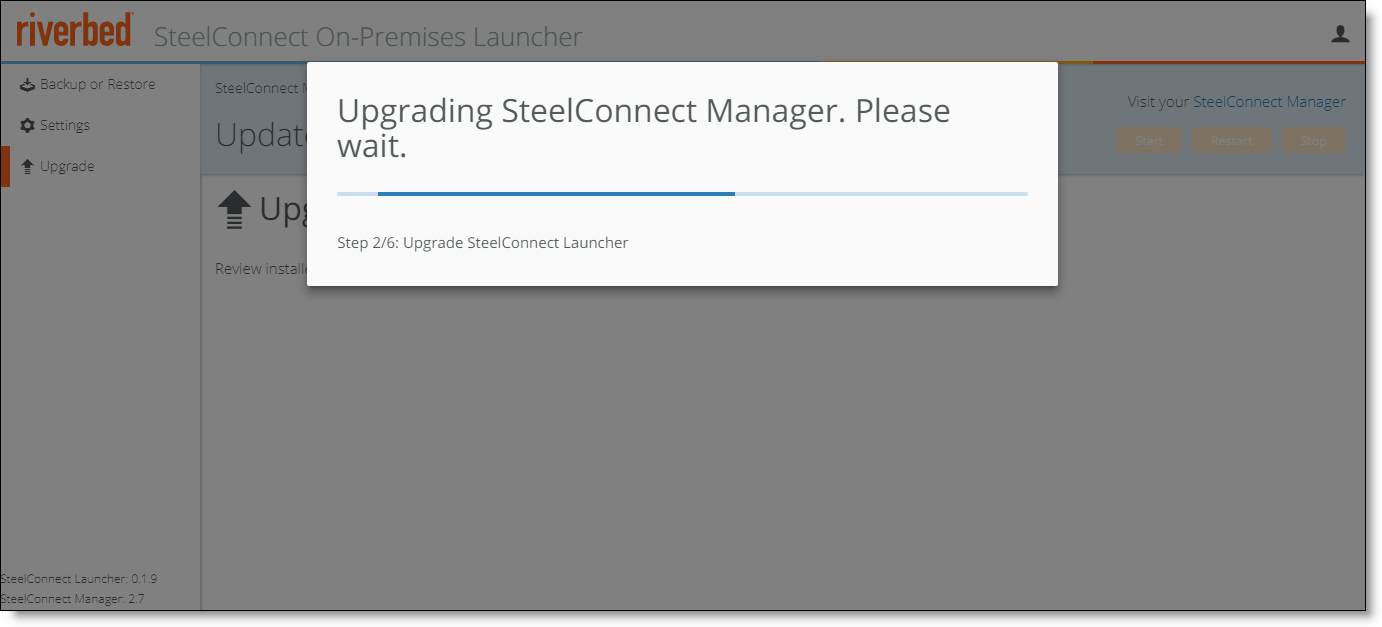
5. Click the Update button to upgrade SCM and the SCM Launcher to the latest version.
Upgrading the SCM software
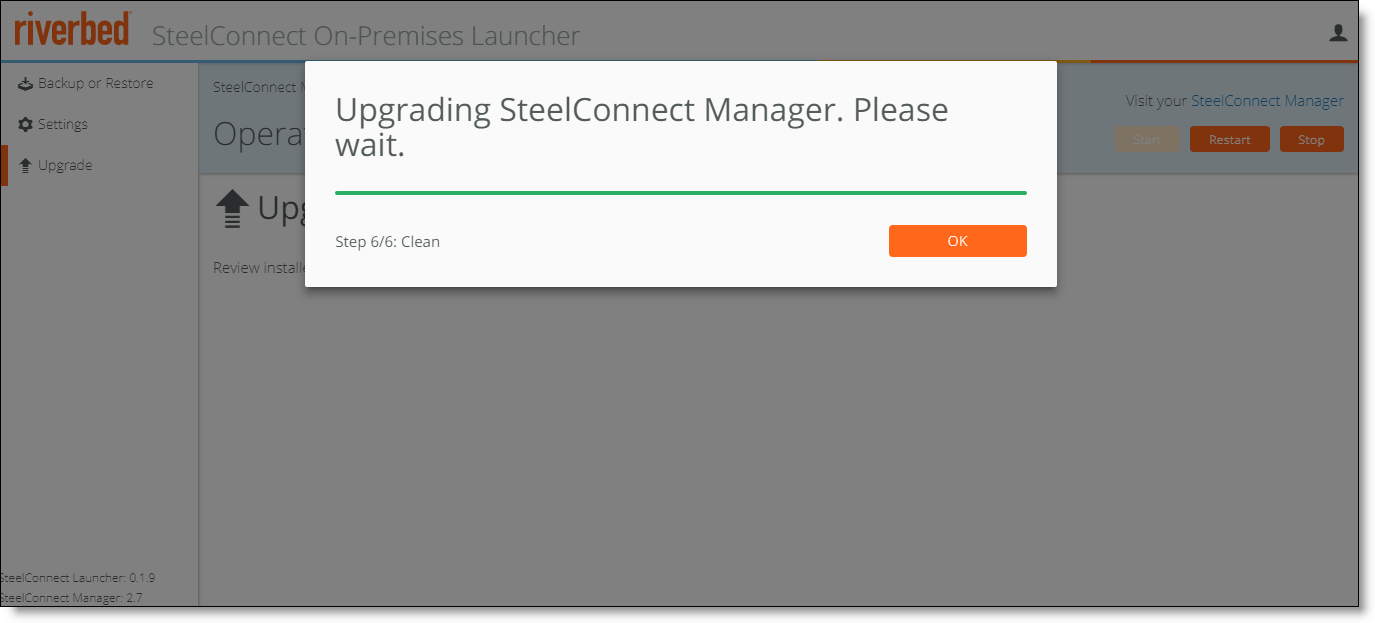
These screens display during the upgrade.
Upgrade beginning
Upgrade complete
6. Log in to the SCM Launcher and SCM and check the Launcher and SCM versions.
The SCM Launcher version should be 0.1.14 and the SCM version should be 2.10.1.
7. Make sure that the firmware SCM upgrades its firmware immediately by choosing Realm, then clicking the Maintenance tab, and making sure that Apply firmware upgrades immediately is set to On.
Setting firmware updates to On
If the upgrade failed, see
System does not update to troubleshoot update issues.
DNS setup
Make these DNS changes to allow your network to run On-Premise SCM:
Modifying the A-record and SRV records for static DNS
Add or modify the following settings in the DNS A-record. If you do not have access to DNS records, ask your network administrator to configure these settings. Configuration depends on the type of server software that is used (for example, BIND or Microsoft DNS).
The A-record uses the IP address of the VM where the On-Premise SCM is hosted and the FQDN uses the SCM name.
A-Record example for Windows Server
This figure shows an A-record in Windows Server. The FQDN is the SCM name (scm.example.com) and the IP address is 10.1.1.1.
Sample A-record in Windows Server
The SRV record must have these settings:
Field | Setting |
Service | cc |
Proto | tcp |
Host | A_record |
Priority | 10 |
Weight | 10 |
Port | 3900 |
TTL | 60 seconds |
SRV record example for Windows Server
This figure shows an SRV record in Windows Server, using the SCM FQDN of scm.example.com. Note the use of _cc and _tcp for service and protocol.
Sample SRV record in Windows Server

Configuring DNS to ensure SCM and SteelConnect appliance connectivity
On-Premise SCM deployments require additional configuration to make sure that SteelConnect appliances use the DNS server with the modified A-record and SRV record. This configuration ensures that the SCM domain name can be resolved for all SteelConnect appliances, and prevents the SteelConnect appliance from using public Google DNS servers if the default DHCP-assigned DNS server fails. See
Registering an appliance for more information about appliance registration.
There are two methods to configure DNS. Choose one that is best for the network:
To change the DNS settings for all DNS queries
1. Log in to SCM and choose Network Design > Sites.
2. Select a site from the list.
3. Select the DNS tab.
4. After Site DNS Server, specify the IPv4 or IPv6 DNS server primary IP address and click Submit.
To resolve DNS labels using specific internal servers
1. Choose Network Design > Sites.
2. Select a site from the list.
3. Select the DNS tab and click New DNS route.
DNS tab
4. In the Domain field, specify the domain name of the SCM.
For example, if your SCM FQDN is scm.example.com, add scm.example.com to the list of domains.
New DNS route
5. Specify the IPv4 or IPv6 address of the target server to use to route the domain.
Separate multiple IP addresses with a space.
Verifying DNS setup
To confirm that the DNS service is set up properly, you can run one of these commands:
nslookup -q=srv _cc._tcp.<domain.com>
or
dig srv _cc._tcp.<domain.com>
The response should return the On-Premise SCM's hostname.
Registering an appliance
After SCM is running in your enterprise network, register appliances to it. These sections describe how SteelConnect registers appliances and the steps you perform to register them.
Appliance registration overview
For a SteelConnect hardware (non-virtual) appliance, you enter the serial number of the appliance, which facilitates the pairing of the SCM and appliance.
SteelConnect appliances find their assigned SCM using the registration process shown in this figure.
SCM registration process

These steps describe the hardware registration process. The numbers correspond to the callouts shown in the figure.
| The SteelConnect appliance boots and gets an IP address from DHCP or another network service. The DNS must have a record of the URL used for the ZTP services or the gateway can’t perform the next steps.Most enterprise DNS servers can resolve external host names. To configure DNS for On-Premise SCM, see DNS setup. |
| The appliance contacts the server used for ZTP services, which replies with the SRV record of the assigned SCM. |
| The appliance sends its serial number and DNS information to the ZTP services located in the cloud. Once received, the ZTP services confirm the received information with the information found in its database. |
| The appliance queries a DNS server to resolve the SRV record, which results in the appliance receiving a domain address and port from the assigned SCM. |
| The gateway registers itself to its assigned On-Premise SCM and downloads its configuration. |
Registering an appliance
Complete this procedure to register a hardware appliance.
To register a hardware SteelConnect appliance
1. Choose Organization.
2. Choose Appliances.
3. Click Register hardware appliance.
4. Enter the serial number of the appliance and click Submit.
Adding a hardware (non-virtual) gateway
SCM will inform ZTP of the pairing.
After the appliance is powered on, it contacts ZTP, which pairs SCM with the appliance.
Registering a SteelConnect virtual gateway
An internet connection is required to register a virtual gateway. After you download the image and bring up the virtual machine, the virtual gateway contacts the ZTP services using the internet connection to pair SCM with the virtual gateway.
To register a SteelConnect virtual gateway
1. Choose Organization.
2. Choose Appliances.
3. Click Add appliances.
4. Select the OVA image associated with the virtual appliance.
Adding a virtual gateway
5. Optionally, override the default DNS for the virtual gateway by navigating to Network > Sites > DNS and entering the IP address for the DNS server that is used to connect to the ZTP services.
This information is saved in the OVA file and is used for the gateway to connect to ZTP, as well as to pair the gateway with SCM.
Migrating from SCM to On-Premise SCM
If you have an existing SCM setup, you can migrate an organization to On-Premise SCM. Use the guidelines and procedures in the following sections to migrate from SCM to On-Premise SCM.
What to know before migrating from SCM to On-Premise SCM
•On-Premise SCM must have a connection to the Internet to function. See
Appliance registration overview for an overview of the registration process for On-Premise SCM.
•High availability is managed by the customer using the capabilities in ESX; Riverbed does not manage HA for On-Premise SCM.
•Service-level agreements (SLAs) are managed by the customer.
To migrate from SCM to On-Premise SCM
1. Refer to the instructions in the email you received to download the On-Premise SCM software.
3. Make sure that the On-Premise SCM and the non-On-Premise SCM versions are at versions 2.10.1.
To export and download data for an organization from SCM
1. Log in to your current SCM and click Realm to enter Realm Admin mode.
2. Click Organizations in the left navigation bar.
3. Click the name of an organization in the Organizations area.
4. Click the Import/Export tab.
5. Click (Re-) Generate export package to generate an export package.
Exporting an organization file
6. Make a note of the download location.
7. Perform this procedure for each organization in your realm.
To import data for an organization to On-Premise SCM
1. Log in to On-Premise SCM and click Realm to enter Realm Admin mode.
2. Click Organizations.
3. Click New > Import.
Importing a new organization

5. After the organization is imported, select the name of the organization and click the Import/Export tab.
6. Click Migrate Organization to this controller.
7. Perform this procedure for each organization in your realm.
Backing up and restoring an On-Premise SCM
We recommend taking advantage of VMware features when you deploy On-Premise SCM. VM features include fault tolerance, high availability, Distributed Resource Scheduler (DRS), and the ability to back up without interference with the VM that is running. Backups should be performed on a regular schedule as with all other production applications.
In addition to VMware backups, you can download and back up the current configuration for backup purposes.
There is no need to backup the gateways, access points, or switches. Configurations of the devices are stored in SCM and pushed to the devices when connected to the network, along with any firmware.
To back up an On-Premise SCM
1. Log in to the SCM Launcher and click Backup or Restore.
Backup or Restore
2. Click Backup SCM Now.
The file is saved to the browser’s configured download location.
3. Click OK when the backup is complete.
To restore an On-Premise SCM from a previous image
1. Log in to SCM.
2. Click Backup or Restore.
3. Select Restore from Saved File.
4. Select the file from which to restore.
5. Reboot the system.
If you set static values for the SCM or DNS server, specify those values after the backup.
Generating a certificate and key
All communication between the appliances and ZTP, as well as all interoperating services inside of ZTP, are authenticated through SSL (x509) certificate validation, which can either be generated by the certificate authority being used by the enterprise or by using this procedure.
To generate the SSL certificate and key without using a certificate service
1. Open a command-line interface (CLI) window with a machine that is running the OpenSSL toolkit.
2. Using OpenSSL, create the key and certificate request by running these commands:
openssl genrsa -des3 -passout pass:x -out server.pass.key 2048
openssl rsa -passin pass:x -in server.pass.key -out server.key
openssl req -new -key server.key -out server.csr
A series of questions are asked when you run this script. When asked for the Common Name, use the FQDN of the SCM.
3. Download the server.csr file.
4. Send the server.csr file to your Certificate Authority to be signed, or use OpenSSL to sign it by running these commands:
openssl x509 -req -sha256 -days 365 -in server.csr -signkey server.key -out server.crt
openssl x509 -inform PEM -in server.crt > gui-cert.pem
openssl rsa -in server.key -text > gui-key.pem
5. If you generated the certificate (gui-cert.pem) and key (gui-key.pem) files with OpenSSL, save those files.
What’s next
For more information about using SCM, see the SteelConnect Manager User Guide. For more information about deploying SteelConnect, see the SteelConnect SD-WAN Deployment Guide.


