Configuring SteelHead-v
This chapter describes how to configure SteelHead-v after deploying it on a hypervisor. It includes the following sections:
The information in this chapter applies to both Hyper-V and ESX/ESXi hypervisors, except where otherwise noted.
Basic Steps for Configuring SteelHead-v
This section provides an overview of the basic steps to configure SteelHead-v. Detailed procedures are provided in the sections that follow.
Task | Reference |
1. Complete the initial configuration. | |
2. Exit the configuration wizard. | |
3. Purchase a token from Riverbed Sales. | |
4. Go to Administration > Maintenance: Licenses and enter the token, which generates a license request string. | |
| |
6. Add the licenses. | |
7. Select the new SteelHead-v model in the form below the license table and submit the form. | |
8. Save the configuration and restart. | |
9. Power on the VM and log in to SteelHead-v. | |
10. Verify your configuration—the Management Console appears, and SteelHead-v is healthy. | |
11. Refer to the Riverbed product documentation for more information. Note: In the Riverbed product documentation, the term “SteelHead” refers to the physical SteelHead as well as SteelHead-v unless otherwise stated. | Getting Started Guide SteelHead Management Console User’s Guide Riverbed Command-Line Interface Reference Manual SteelHead Deployment Guide |
Completing the Initial Configuration
This section describes how to complete the initial configuration of SteelHead-v.
To configure SteelHead-v
1. After you log in to SteelHead-v as administrator, the system prompts you to start the configuration wizard.
Enter yes at the system prompt. For example:
Configuration wizard.
Do you want to use the wizard for initial configuration? yes
Note: Press Enter to accept the default value. If you mistakenly answer no, you can start the configuration wizard by specifying configuration jump-start at the system prompt.
Note: Press ? for help. Press Ctrl+B to go back to the previous step.
2. Complete the configuration wizard steps on the client-side SteelHead-v as described in the following table.
Wizard Prompt | Description | Example |
Step 1: Host name? | Enter the hostname for SteelHead-v. | Step 1: hostname? amnesiac |
Step 2: Use DHCP on the primary interface? | You are given the option to enable the DHCP to automatically assign an IP address to the primary interface for SteelHead-v. Riverbed recommends that you do not set DHCP. The default value is no. | Step 2: Use DHCP? no |
Step 3: Primary IP address? | Enter the IP address for SteelHead-v. | Step 3: Primary IP address? 10.10.10.6 |
Step 4: Netmask? | Enter the netmask address. | Step 4: Netmask? 255.255.0.0 |
Step 5: Default gateway? | Enter the default gateway for the SteelHead. | Step 5: Default gateway? 10.0.0.1 |
Step 6: Primary DNS server? | Enter the primary DNS server IP address. | Step 6: Primary DNS server? 10.0.0.2 |
Step 7: Domain name? | Enter the domain name for the network where SteelHead-v is to reside. If you set a domain name, you can enter hostnames in the system without the domain name. | Step 7: Domain name? example.com |
Step 8: Admin password? | Riverbed strongly recommends that you change the default administrator password at this time. The password must be a minimum of six characters. The default administrator password is password. | Step 8: Admin password? xxxyyy |
Step 9: SMTP server? | Enter the SMTP server. External DNS and external access for SMTP traffic is required for email notification of events and failures to function. Note: Make sure that you provide a valid SMTP server to ensure email notifications for events and failures. | Step 9: SMTP server? natoma |
Step 10: Notification email address? | Enter a valid email address to which notification of events and failures are to be sent. | Step 10: Notification email address? example@xample.com |
Step 11: Set the primary interface speed? | Enter the speed on the primary interface (that is, SteelHead-v). Make sure this value matches the settings on your router or switch. The default value is auto and Riverbed recommends this setting for SteelHead-v. | Step 11: Set the primary interface speed? [auto] auto |
Step 12: Set the primary interface duplex? | Enter the duplex mode on the primary interface. Make sure this value matches the settings on your router or switch. The default value is auto and Riverbed recommends this setting for SteelHead-v. | Step 12: Set the primary interface duplex? [auto] auto |
Step 13: Would you like to activate the in-path configuration? | Enter yes at the system prompt to configure in-path support. An in-path configuration is a configuration in which the SteelHead is in the direct path of the client and server. For detailed information about in-path configurations, see the SteelHead Deployment Guide. | Step 13: Would you like to activate the in-path configuration? yes |
Step 14: In-Path IP address? | Enter the in-path IP address for SteelHead-v. | Step 14: In-Path IP address? 10.11.11.6 |
Step 15: In-Path Netmask? | Enter the in-path netmask address. | Step 15: In-Path Netmask? 255.255.0.0 |
Step 16: In-Path Default gateway? | Enter the in-path default gateway (the WAN gateway). | Step 16: In-Path Default Gateway? 10.11.11.16 |
Step 17: Set the in-path: LAN interface speed? | Accept the default value of auto. Note: If you have configured direct path with ESXi, you can enter the speed, matching the settings on your router or switch. | Step 17: Set the in-path: LAN interface speed? [auto] auto |
Step 18: Set the in-path: LAN interface duplex? | Accept the default value of auto. Note: If you have configured direct path with ESXi, you can enter the speed, matching the settings on your router or switch. | Step 18: Set the in-path: LAN interface duplex? [auto] auto |
Step 19: Set the in-path: WAN interface speed? | Accept the default value of auto. Note: If you have configured direct path with ESXi, you can enter the speed, matching the settings on your router or switch. | Step 19: Set the in-path: WAN interface speed? [auto] auto |
Step 20: Set the in-path: WAN interface duplex? | Accept the default value of auto. Note: If you have configured direct path with ESXi, you can enter the speed, matching the settings on your router or switch. | Step 20: Set the in-path: WAN interface duplex? [auto] auto |
3. The system confirms your settings:
You have entered the following information:
1. Hostname: amnesiac
2. Use DHCP on primary interface: no
3. Primary IP address: 10.10.10.6
4. Netmask: 255.255.0.0
5. Default gateway: 10.0.0.1
6. Primary DNS server: 10.0.0.2
7. Domain name: example.com
8. Admin password: xxxyyy
9. SMTP server: natoma
10. Notification email address: example@example.com
11. Set the primary interface speed: auto
12. Set the primary interface duplex: auto
13. Would you like to activate the in-path configuration: yes
14. In-Path IP address: 10.11.11.6
15. In-Path Netmask: 255.255.0.0
16. In-Path Default gateway: 10.11.11.16
17. Set the in-path:LAN interface speed: auto
18. Set the in-path:LAN interface duplex: auto
19. Set the in-path:WAN interface speed: auto
20. Set the in-path:WAN interface duplex: auto
To change an answer, enter the step number to return to.
Otherwise hit <enter> to save changes and exit.
Choice:
The SteelHead-v configuration wizard automatically saves your configuration settings.
4. To log out of the system, enter the following command at the system prompt:
amnesiac> exit
Logging In to the SteelHead-v Management Console
This section describes how to log in to the SteelHead-v Management Console. The Management Console provides a web browser interface that facilitates managing SteelHead-v.
You can connect to SteelHead-v through any supported web browser. To connect, you must know the host, domain, and administrator password that you assigned during the initial setup.
Note: Cookies and JavaScript must be enabled in your browser.
To log in to SteelHead-v
1. Enter the URL for SteelHead-v in the location box of your browser:
<protocol>://<host>.<domain>
<protocol> is http or https. The secure https uses the SSL protocol to ensure a secure environment. If you use https to connect, you are prompted to inspect and verify the SSL key.
<host> is the IP address or hostname you assigned to SteelHead-v during the initial configuration. If your DNS server maps the IP address to a name, you can specify the DNS name.
<domain> is the full domain name for the SteelHead-v.
Note: Alternatively, you can specify the IP address instead of the host and domain.
The Management Console Login page appears.
Figure: Login Page
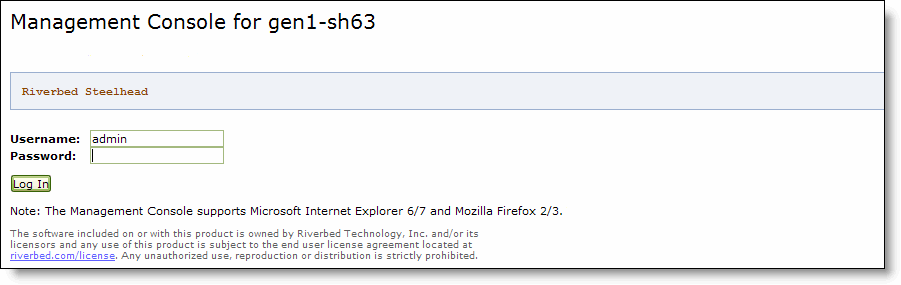
2. In the Username text box, enter the user login: admin or monitor. The default login is admin.
Users with administrator (admin) privileges can configure and administer the SteelHead. Users with (monitor) privileges can view connected SteelHeads and reports. A monitor user cannot make configuration changes, modify private keys, view logs, or manage cryptographic modules in the system.
3. In the Password text box, enter the password you assigned in the configuration wizard.
4. Click Log In to display the Dashboard page.
The Dashboard page summarizes the current status of SteelHead-v.
Purchasing the Token and Receiving the Licenses
Before you can add licenses to SteelHead-v, you must purchase a token from Riverbed. The token is associated with a model number that is assigned to SteelHead-v during licensing.
To view your purchased tokens, log in to your account at
https://support.riverbed.com.After you receive a token, you are ready to install the licenses.
Starting in RiOS 8.0.2, you can delete an instance of SteelHead-v and deploy a new instance with the same token. When you reuse a token, the system indicates the reuse and recommends removing the old instances. Each new instance using the same token invalidates the previous instance. Requests from an old instance to get licenses result in an error message. The serial number remains the same for the new instance and licenses.
You can reuse a token up to five times. After reusing a token five times, contact Riverbed Support for a new token.
Managing Licenses and Model Upgrades
This section describes how to install, update, and remove a license. It also describes how to use flexible licensing to manage model configurations and upgrades. It includes the following topics:
You perform all license management and SteelHead-v model upgrades in the Administration > Maintenance: Licenses page.
Flexible Licensing Overview
RiOS provides a flexible way to manage SteelHead-v licenses, model configurations, and upgrades. Rather than performing an incremental model upgrade or replacing a virtual appliance with a new OVA image, RiOS provides specification licenses that configure specific performance characteristics of SteelHead-v. A specification license points to a specific, validated model and includes the required licenses and the virtual hardware specification.
Licensing and Model Upgrade
Version 8.5 and later include improvements in the licensing and model upgrade areas.
SteelHead-v can run with a specification license for a higher model. For example, if there is only VCX755H hardware, but there is a specification license to run a VCX1555H, then the appliance can operate as the VCX755H model until more hardware is available.
If you are licensed for a higher model than you have hardware for, you can shut down SteelHead-v, add the hardware, and power it back on. When SteelHead-v comes up again it automatically upgrades to the highest runnable model.
In addition, when you add a specification license for the first time (or whenever RiOS is not running), SteelHead-v automatically upgrades to the highest runnable model based on the available hardware and license. No reboot is required.
By activating a specification license on SteelHead-v, you can transform its capabilities to meet performance characteristics for any model within a platform family.
SteelHead-v xx50 Model | License |
V150M | MSPECV150M |
V250L | MSPECV250L |
V250M | MSPECV250M |
V250H | MSPECV250H |
V550M | MSPECV550M |
V550H | MSPECV550H |
V1050L | MSPECV1050L |
V1050M | MSPECV1050M |
V1050H | MSPECV1050H |
V2050L | MSPECV2050L |
V2050M | MSPECV2050M |
V2050H | MSPECV2050H |
SteelHead-v xx55 Model | License |
VCX555M | MSPECVCX555M |
VCX555H | MSPECVCX555H |
VCX755L | MSPECVCX755L |
VCX755M | MSPECVCX755M |
VCX755H | MSPECVCX755H |
VCX1555L | MSPECVCX1555L |
VCX1555M | MSPECVCX1555M |
VCX1555H | MSPECVCX1555H |
VCX5055M | MSPECVCX5055M |
VCX5055H | MSPECVCX5055H |
VCX7055L | MSPECVCX7055L |
VCX7055M | MSPECVCX7055M |
Model downgrades are not supported, even for model evaluations. If you purchase a V250L and want to evaluate a V550M, you can install an evaluation license. When the trial period for the V550M expires, you cannot downgrade SteelHead-v to the V250L. For this reason, you must create a new, separate VM for the evaluation. If you decide to upgrade to the new model, you purchase the full license for the V550M (in this scenario) and upgrade the SteelHead. Upgrading to a new model requires a new token and hardware specification for the new model, and you must restart SteelHead-v with a clean data store.
You cannot upgrade between the SteelHead-v xx50 models and the VCX xx55 models.
Activating the Token and Installing the Licenses
This section describes how to activate a token, receive the license, and install the license on SteelHead-v. The procedure in this section describes both autolicensing and manual licensing.
To activate the token and install a license
1. Restart with a clean RiOS data store.
2. Log in to SteelHead-v and display the Management Console.
3. Choose Administration > Maintenance: Licenses to display the Licenses page.
4. Under License Request Token, enter the token number and click Generate License Request Key.
The console does not support pasting text directly into the field.
Starting in RiOS 8.0.2, SteelHead-v performs autolicensing by default. With autolicensing, once you enter the token and click Generate License Request Key, SteelHead-v contacts the Riverbed licensing server and automatically downloads and installs the licensing keys.
For more information about autolicensing, including commands to enable or disable autolicensing and to configure a licensing server, see the Riverbed Command-Line Interface Reference Manual.
If you disable autolicensing or if SteelHead-v cannot connect to the licensing server, you can manually configure your licenses. With manual licensing, you enter the token and click Generate License Request Key and RiOS displays a license request key. Continue with the next step.
5. After you have obtained the license request key, go to the Riverbed Licensing Portal at
https://licensing.riverbed.com (unregistered users) or to the Licenses tab on the Riverbed Support site at http://support.riverbed.com/ to generate your license keys. The license keys include the VBASE license as well as any other licenses needed for the SteelHead-v model.
The Licensing Portal is a public site; the Riverbed Support site requires registration.
After your licenses are generated, they appear online and are also emailed to you for reference.
6. Return to the Administration > Maintenance: Licenses page and click Add a New License.
7. Copy and paste the license key into the text box. Separate multiple license keys with a space, Tab, or Enter.
8. Click Add.
9. Click Save to save your settings permanently.
10. Choose Administration > Maintenance: Services and click Restart to restart the optimization service.
Model Upgrade Overview
You can use a hardware specification to upgrade a model. Some model upgrades require additional virtual hardware. When the appliance has the required virtual hardware, activating the hardware specification upgrades the appliance to the new model number. When the existing hardware is not adequate, the message hardware required appears after the hardware specification description.
For details about SteelHead-v model requirements, see
SteelHead-v Platform Models.
Note: Upgrading SteelHead-v from a V1050L or V1050M model to a V1050H model clears all data in the RiOS data store and requires a reboot.
Model Upgrade and Flexible RiOS Data Store
With SteelHead-v 8.5 and later, you can configure the size of the RiOS data store disk for SteelHead-v on VCX models. This configuration is still fixed for other SteelHead models.
If you upgrade to a version later than 8.0.3, your RiOS data store configuration remains intact. However, due to changes in the RiOS data store disk layout, if you modify the disk size either manually or during a model upgrade, and later downgrade to the earlier image, data store corruption can result.
If you see errors related to the data store, you must clean the RiOS data store. If your disk is smaller than the SteelHead model is expecting based on the values required in the earlier version, increase the disk size to the expected size, and then enter the command restart clean.
To avoid this situation, upgrade the SteelHead model prior to upgrading to SteelHead-v 9.0 or later.
Note: When you upgrade SteelHead-v to a model that can use more of the available RiOS data store disk, the data store is automatically cleared.
Next Steps
After installing a license, the next steps to complete a model upgrade depend on whether the upgrade requires additional virtual hardware:
Upgrading a Model That Requires No Additional Virtual Hardware
This section describes how to activate a hardware specification that does not require additional virtual hardware on SteelHead-v.
Upgrades to models within a platform family (V250, V550, V1050, V2050) require only a new license, because the existing virtual hardware is sufficient. For example, an upgrade from a model V1050L to a model V1050M is a license-only upgrade. Downgrades are not permitted.
To activate a hardware specification
1. Stop the optimization service.
2. Choose Administration > Maintenance: Licenses to display the Licenses page.
The hardware specifications appear at the bottom of the page. The hardware specification description includes the potential bandwidth and connection counts. The current specification appears in bold.
You might see specifications listed but grayed out. After the license or required hardware for the model is installed, these specification become available.
3. Select the hardware specification that you want to activate.
4. Click Apply.
5. Click Restart to restart the optimization service.
Upgrading a Model That Requires Additional Virtual Hardware
This section describes how to activate a hardware specification that requires additional virtual hardware on SteelHead-v.
Upgrades to models from one platform family to another require additional virtual hardware. For example, to upgrade from a V250L to a V550M requires another CPU, more RAM, and additional RiOS data store disk space.
Hypervisor Reservations and Overhead
When you reserve CPU and other resources, reserve the full amount required for the SteelHead-v model. In addition, verify that additional unclaimed resources are available. Due to hypervisor overhead, VMs can exceed their configured reservation.
The overhead calculations for the ESX/ESXi and Hyper-V hypervisors differ:
• For ESX/ESXi, reserve the memory and CPU cycles needed for the SteelHead-v model and verify that the host has resources to accommodate the 5 percent VMware overhead.
• For Hyper-V, reserve the memory and CPU percentage needed for the SteelHead-v model and verify that the host has 1.5 GB and 15 percent CPU remaining, for overhead purposes.
Note: After you deploy SteelHead-v on Hyper-V, set the reserve weight for CPU to 100 and the memory weight to High.
To upgrade a model and add virtual hardware, perform the following steps after installing the license.
To upgrade a model
1. In the Management Console, choose Administration > Maintenance: Licenses.
2. Click Stop to stop the optimization service, and log out of SteelHead-v.
3. Right-click the name of the VM that you want to upgrade, choose Power, and choose Power Off.
4. In the vSphere Client, right-click the name of the VM that you want to upgrade and select Edit Settings.
5. Check the memory, CPU, and hard disk settings. Change any setting necessary to accommodate the model upgrade.
Figure: VM Properties Page - Hardware Tab

6. Right-click SteelHead-v, choose Power, and select Power On.
7. Log in to SteelHead-v and display the Management Console.
8. Choose Administration > Maintenance: Licenses to display the Licenses page.
The bottom of the screen lists the available hardware specifications. The current specification appears in bold. The hardware specification description includes the potential bandwidth and connection counts. Hardware specifications that will be available after the license or required virtual hardware have been installed are included in the list but are dimmed.
9. Select the hardware specification that you want to activate.
If a hardware specification requires a reboot after activation, you see the message activation reboots appliance.
10. Click Apply.
SteelHead-v reboots and the optimization service restarts.
When the upgrade is complete, the new model number appears on the SteelHead-v banner in the upper-right corner of the screen.
To add memory
1. On the Hardware tab, click Memory.
Reserve the RAM needed by the SteelHead-v model.
2. Under Memory Configuration, increase the memory by clicking a colored triangle (on the slider or in the legend), using the slider control, or selecting a number from the drop-down list.
Only multiples of 4 MB are valid for memory settings. If you manually enter a value that is not a multiple of 4 MB, a warning message appears.
3. Click OK.
To increase the size of a hard disk
1. On the Hardware tab, select Hard Disk 2.
2. In the Disk Provisioning section, specify the disk size, in gigabytes.
3. Click OK.
To add a hard disk
1. On the Hardware tab, click Add.
2. Select Hard Disk.
3. Specify the disk size, in gigabytes.
4. Click OK.
To add CPU capacity
1. On the Hardware tab, select CPUs.
2. Increase the number of virtual CPUs to two or four, depending on the model upgrade.
You can configure how the virtual CPUs are assigned in terms of sockets and cores. For example, you can configure a VM with four virtual CPUs in the following ways:
– Four sockets with one core per socket
– Two sockets with two cores per socket
– One socket with four cores per socket
3. Click OK.
4. Select the Resources tab.
5. Use the slider control to reserve the number of clock cycles (in terms of CPU MHz).
For example, for a model V550M requiring two virtual CPUs running on a quad-core Xeon-based system running at 2.6 GHz on a ESX/ESXi host, reserve two virtual CPUs and 2 * 2.6 GHz CPU cycles.
6. Click OK.
Downgrade Limitation
After using flexible licensing to upgrade, you cannot return SteelHead-v to a lower model.
Removing a License
You can remove a SteelHead-v license.
To remove a license
1. Choose Administration > Maintenance: Licenses to display the Licenses page.
2. Select the license you want to delete.
3. Click Remove Selected.
4. Click Save to save your settings permanently.
Upgrading RiOS Software
Your new RiOS software is backward compatible with previous RiOS versions. However, to obtain the full benefits of the new features in this version, you must upgrade the client-side and server-side SteelHeads on any given WAN link. After you have upgraded all appliances, all the benefits of the new RiOS features and enhancements are available.
If you mix RiOS software versions in your network, you might not be able to take full advantage of new features that are not part of older software versions.
This section describes how to upgrade your RiOS software; you must already be familiar with the SteelHead, the CLI, and the Management Console.
To upgrade RiOS software
1. Download the software image from the Riverbed Support site to a location such as your desktop.
2. Log in to the Management Console using the Administrator account (admin).
3. Choose the Administration > Maintenance: Software Upgrade and select one of the following options:
– From URL - Enter the URL that points to the software image in the text box.
– From Local File - Browse your file system and select the software image.
– Schedule Upgrade for Later - Select this option to schedule an upgrade for a later time. Enter the date and time in the Date and Time text boxes using the formats yyyy/mm/dd and hh:mm:ss.
– Click Install.
4. Reboot the appliance.
The software image is large, and uploading the image takes a few minutes.
After the upload completes, the system reminds you to reboot the system to switch to the new version of the software. After reboot, the software version displays on the Dashboard page of the Management Console.
Downgrading the Software
If you are downgrading to a previous version of the SteelHead software, you must downgrade to a version of the software that has previously run on SteelHead-v.
Rebooting and Shutting Down SteelHead-v
You can reboot or shut down the system in the Administration > Maintenance: Reboot/Shutdown page.
Rebooting the system disrupts existing network connections that are currently proxied through it. Rebooting can take a few minutes.
When you shut down the system, connections are broken and optimization ceases. Shutdown can take several minutes.
To reboot or shut down the system
1. Choose Administration > Maintenance: Reboot/Shutdown to display the Reboot/Shutdown page.
Figure: Reboot/Shutdown Page

2. Click Reboot.
After you click Reboot, you are logged out of the system and it reboots.
3. Click Shutdown to shut down the system.
After you click Shutdown, the system turns off. To restart the system, you must manually turn on the SteelHead.
Note: To remove data from the RiOS data store, select Clear the Data Store on Reboot.
Verifying Your Connections
This section describes how to verify that you have properly connected SteelHead-v.
To verify your connections
1. From a remote host, connect to the CLI. At the system prompt, enter one of the following commands:
ssh admin@<host>.<domain>
ssh admin@<ip-address>
2. When you are prompted for a password, specify the administrator password you set when you ran the configuration wizard.
3. At the system prompt, enter ping commands to verify the connections. For example:
ping -I <primary-ip-address> <primary-default-gateway>
—or, to verify in-path connectivity—
ping -I <inpath-interface> <ip-address>
Verifying Your Configuration
This section describes how to verify that you have properly configured SteelHead-v.
To verify optimization in an in-path configuration
1. Navigate to the Reports > Optimization: Bandwidth Optimization page in the Management Console to verify optimization.
2. Map a remote drive on a client machine.
3. Drag and drop a 1-MB file from the client to the remote server.
Ensure that the server is located across the WAN.
4. Drag and drop the 1-MB file again.
Performance improves significantly.
Note: For details about managing and configuring SteelHead-v, see the SteelHead Management Console User’s Guide, the SteelHead Deployment Guide, and the Riverbed Command-Line Interface Reference Manual. In the Riverbed product documentation, the term “SteelHead” refers to the physical SteelHead as well as SteelHead-v unless otherwise stated.
Verifying Hardware Capabilities of Virtual Appliances
After you deploy a SteelHead-v appliance, you might want to verify the appliance’s optimization and disk usage performance before using the appliance in a production environment. You can run tests that benchmark your appliance’s performance against that of other Riverbed products from the Reports > Diagnostics: Benchmarks screen. Test results indicate the highest virtual appliance that can be run on the hardware supporting the tested appliance.
Note: Running these tests will delete all data store contents.
To verify hardware capabilities
1. Log in to the management console on the appliance.
2. Navigate to Reports > Diagnostics: Benchmarks.
3. Ensure that optimization services are stopped.
4. Select the tests that you want to run.
5. Click Run Selected Tests.