Server-based data protection configuration overview
In the Configure > Data Protection: Policies page, you can configure data protection settings for connected Edges using the Create New Hyper-V Policy or Create New Windows Policy wizard. You can perform data protection operations on all Edges or specific Edges, and at a more granular level you can protect data on all servers or VMs, or a specific server. From the Policies page, you can configure, manage, and monitor your data protection operations.
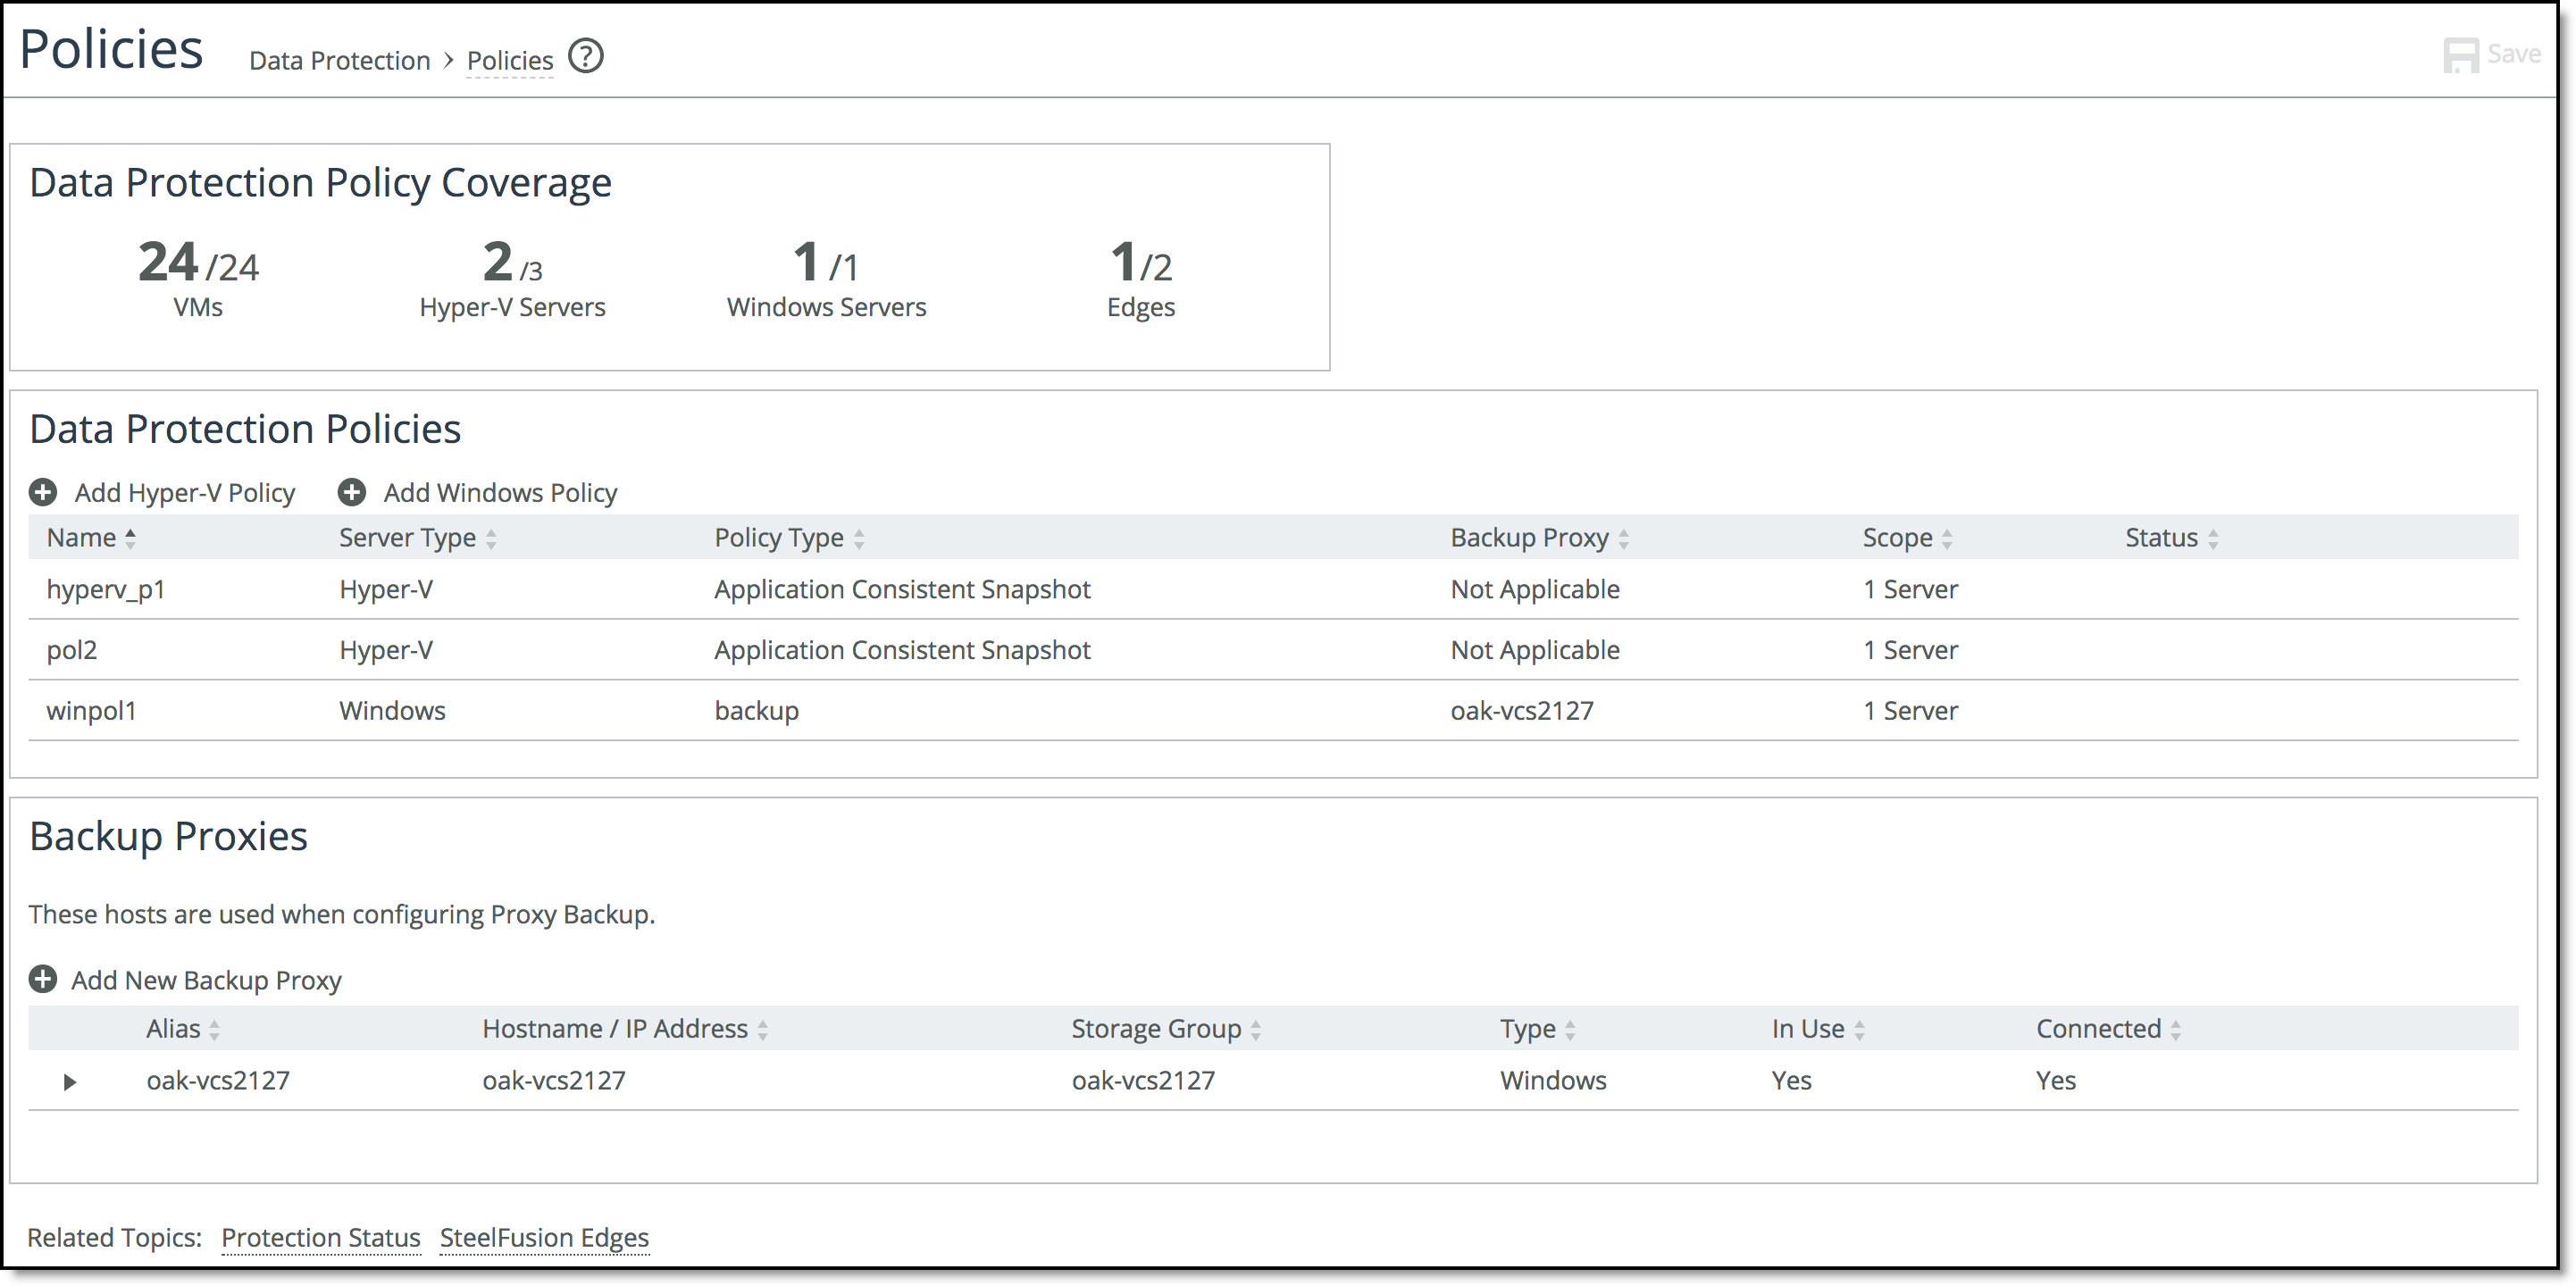
At the top of the Policies page, the Data Protection Policy Coverage panel displays the VMs, Hyper-V servers, Windows servers, and Edges that currently have a configured data protection policy. In this panel, an Edge will only be considered protected when all of its servers are covered by data protection policies.
Figure: Policies page
The following steps describe the general process for configuring snapshots for Hyper-V or Windows servers:
1. Add the Hyper-V or Windows server on the Edge.
You can add a Hyper-V or Windows server to the Edge in the Configure > Manage: SteelFusion Edges page. Expand the desired Edge to display controls that include the Servers tab. For details, see
To modify an existing Edge configuration.
2. Specify the storage array.
The controls in the Configuration tab enable you to specify the storage array where the current LUN resides and to apply a static name that is prepended on the names of snapshots. For details, see
Configuring the storage array.
3. Add a backup proxy server to mount a Windows server or VM snapshot.
Adding a backup proxy enables backup integration directly from the data center. The Core clones the Windows snapshot specified for data protection and mounts the cloned server on the backup proxy. The backup software then communicates with the proxy server to perform the backup. You can add the proxy server in the Configure > Data Protection: Policies page. For details, see
Managing backup proxies to mount snapshots of Windows servers and VMs.
4. Create a data protection policy.
The wizard in the Configure > Data Protection: Policies page enables you to create a Hyper-V or Windows server data protection policy including the policy name, data protection schedule, and backup proxy (to mount Windows snapshots). For details, see
Creating a data protection policy.
5. Verify the data protection policy.
Using the Protection Status report in the Reports > Data Protection: Protection Status page, you can verify that the new data protection policy is working as expected. For details, see
Verifying a new data protection policy.
Note: Because each data protection operation takes approximately two minutes to complete, enabling the hourly option for more than 30 servers can result in an increasing number of nonreplicated snapshots on Edges.