Configuring TACACS+
NetIM supports integration with TACACS+ servers for authentication and authorization (AAA). To enable TACACS+ integration, you must log into NetIM Core VM as netadmin and then enable TACACS+ integration using the app.sh target, by entering the following command:
app.sh /TACACS_STATE enabled
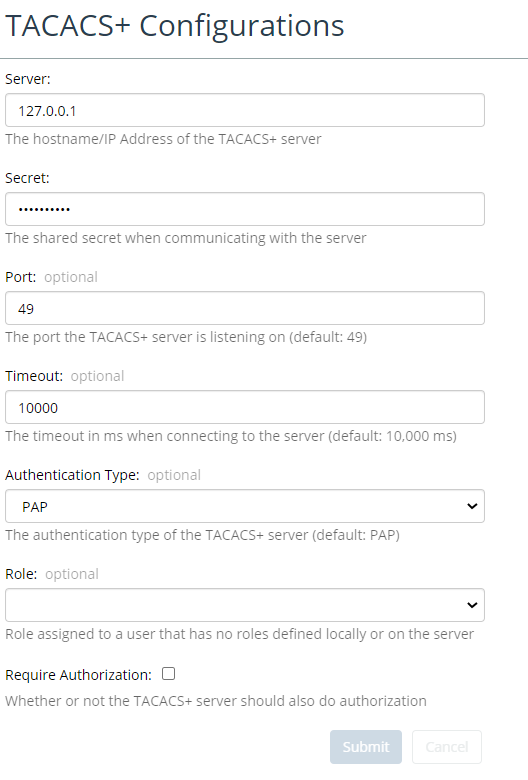
After enabling TACACS+ integration, navigate to Configure,->All Settings->Integrate->TACACS+ to access the TACACS+ Configurations page, as shown in the following screen:
Before setting up TACACS+ authentication and/or authorization, ensure that you have the following required TACACS+ configuration data from your TACACS+ administrator:
• Hostname
• Shared Secret Port
• Timeout
• Authentication Type: ASCII, PAP, CHAP, MSCHAP, ARAP
You and TACACS+ administrator must decide whether you want TACACS+ to provide just user authentication or both user authentication and user authorization. If you choose just user authentication, you can set a default NetIM role for all TACACS+ users in the NetIM TACACS+ configuration page, as follows:
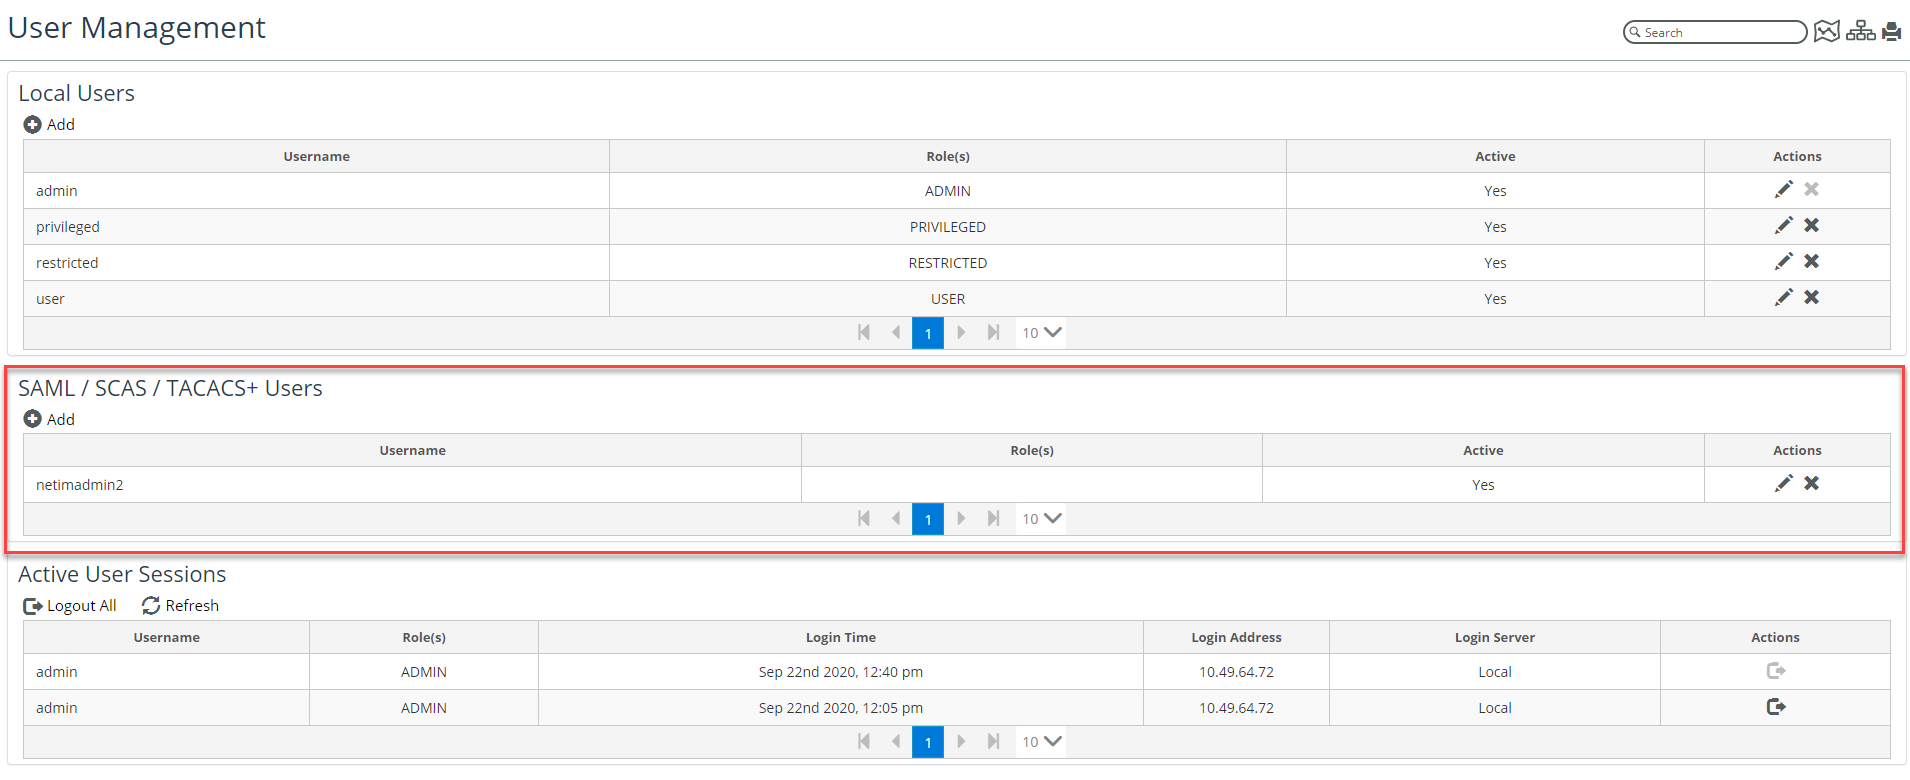
You can also assign a specific role to any user in the NetIM
User Management page (
Configure->All Settings->Administer->User Management) as shown in the following screen. For more information, see
Appendix: Tracking User Logins,Specific user roles set in the User Management page takes priority over any default roles or roles provided by TACACS+.
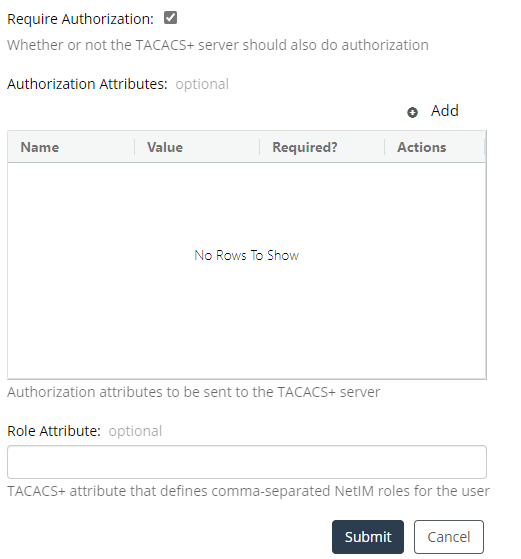
If you want TACACS+ to provide authorization as well as authentication, select the check box for “Require Authorization” and provide the authorization attributes and role attributes, as shown in the following screen:
The following settings demonstrate one way of configuring authorization on the NetIM TACACS+ authorization-screen:
• Name = Service
• Value = Shell
• Required = Yes
• Role Attribute = netim-role
On the TACACS+ server, you must define the roles as shown. (The roles should be in all CAPs as shown.)
• netim-role=ADMIN
• netim-role=PRIVILEGED
• netim-role=USER
• netim-role=RESTRICTED
In the preceding example, the name used for role attribute is netim-role. However, the role attribute can be named anything you want. It does not need to be called netim-role. The only requirement is that the role attribute entered in NetIM must match the name on the TACACS+ server.
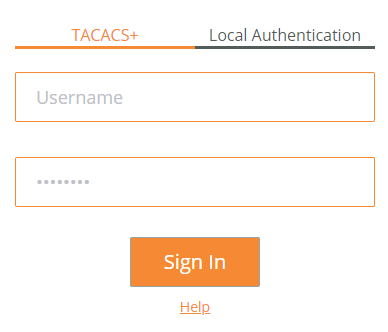
After enabling and configuring TACACS+ integration, the NetIM login screen presents an option to use TACACS, as follows:
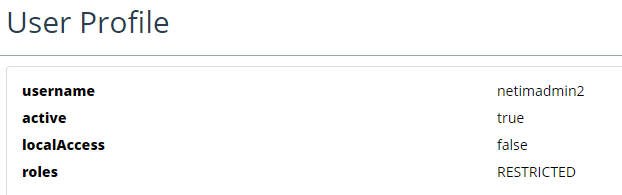
Any errors encountered will be displayed in the login screen. If you successfully log in using TACACS+, you can click the username in the upper right side. and view your user profile, as follows:
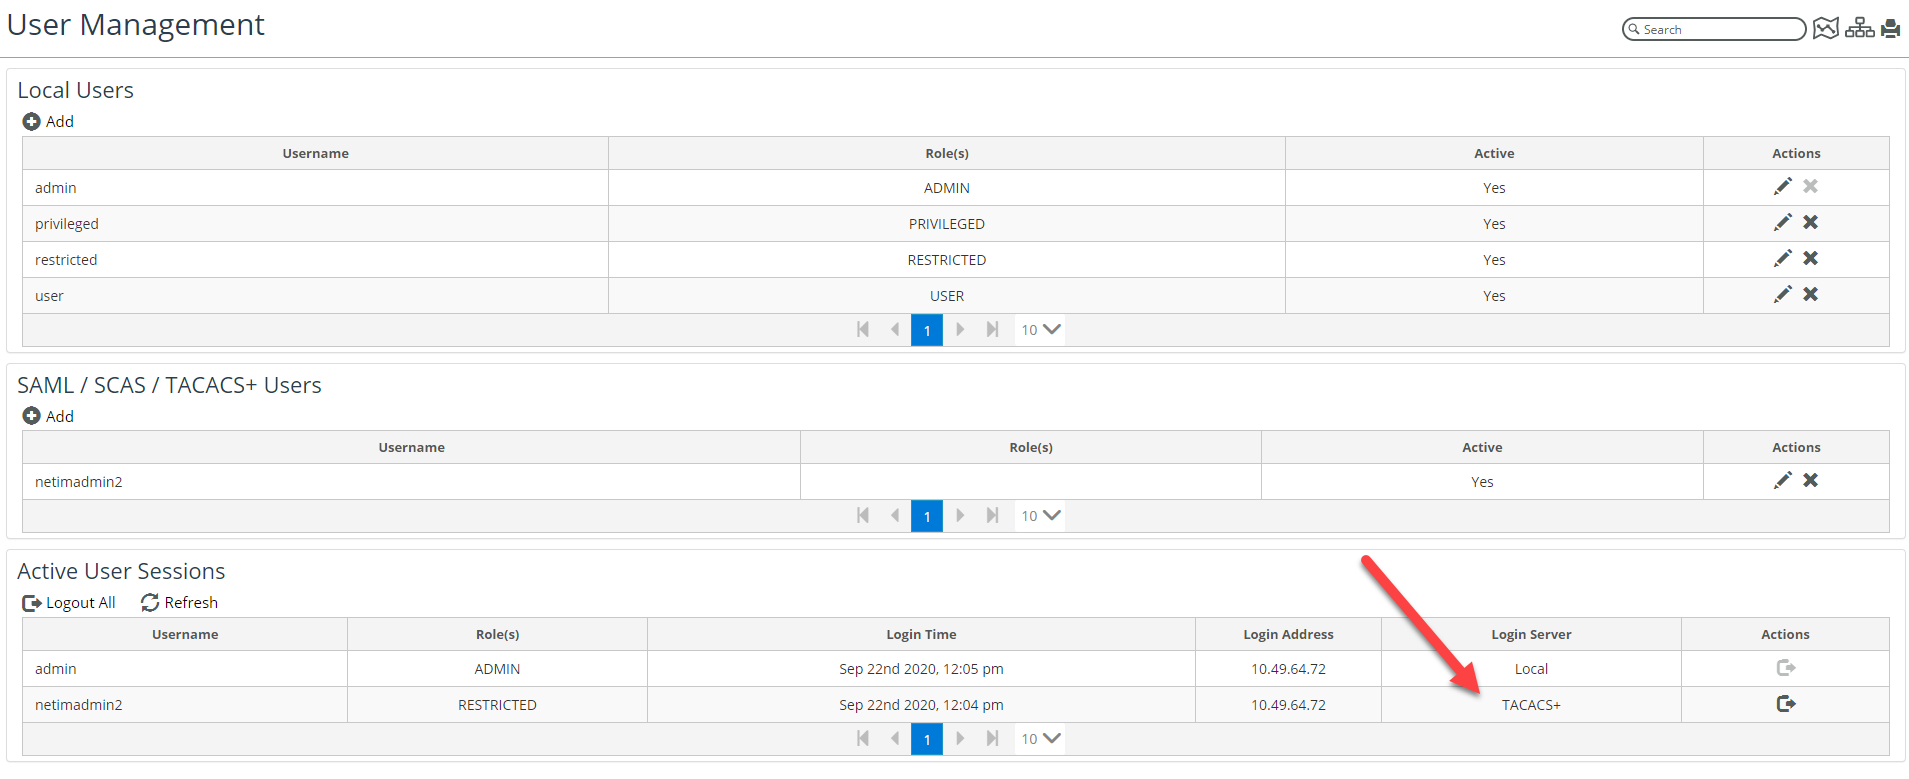
If you have admin rights, then you can go to the NetIM User Management page (Configure->All Settings->Administer->User Management) and view the Active User Sessions, as follows:
There are numerous vendors of TACACS+ servers with many different deployment options, so your TACACS+ configuration may be unique to your enterprise and require different Authorization Attributes and Role Attribute settings. You should work with your TACACS+ administrator to design an integration that works for both ends of the integration.
TACACS+ integration may require some debugging on both ends, including Wireshark packet captures. To turn on debugging in NetIM, go to the Core Server Management page and turn the Debug State of the NetIM Web Service to On.
To view debug output, look in the Catalina.out log file in: <install_dir>/webServer/jakarta-tomcat/logs on NetIM core.
Alternatively, you can turn on debug in the <install-dir>/webServer/jakarta-tomcat/webapps/vnes/WEB-INF/classes/logback.xml file and restart the web service.
1. Login to NetIM core as netimadmin.
2. Change your working directory to <install-dir>/webServer/jakarta-tomcat/webapps/vnes/WEB-INF/classes
3. Open the logback.xml file for editing.
4. To turn on debugging, change:
<!-- SLF4J logging to vnes_webapp. -->
<root level="info">
to:
<!-- SLF4J logging to vnes_webapp. -->
<root level="debug">
5. To restart the Web Service, enter the following command from the netimsh shell:
start WS