Configuring Monitored Ports
You set the TCP ports to monitor in the Administration > System Settings: Monitored Ports page. The ports you specify appear in the Traffic Summary report. Make sure the description you specify helps you identify the type of traffic on the port.
The SteelHead automatically discovers all the ports in the system that have traffic. Discovered ports, with a label (if one exists), are added to the Traffic Summary report. If a label doesn’t exist then an unknown label is added to the discovered port. To change the unknown label to a name representing the port, you must add the port with a new label. All statistics for this new port label are preserved from the time the port was discovered.
By default, traffic is monitored on ports 21 (FTP), 80 (HTTP), 135 (EPM), 139 (CIFS:NetBIOS), 443 (SSL), 445 (CIFS:TCP), 1352 (Lotus Notes), 1433 (SQL:TDS), 1748 (SRDF), 3225 (FCIP), 3226 (FCIP), 3227 (FCIP), 3228 (FCIP), 7830 (MAPI), 7919 (IP Blade), 8777 (RCU), 8778 (SMB Signed), 8779 (SMB2), 8780 (SMB2 Signed), 8781 (SMB3), 8782 (SMB3 Signed), 8783 (SMB3 Encrypted), and 10566 (SnapMirror).
To set monitored ports
1. Choose Administration > System Settings: Monitored Ports to display the Monitored Ports page.
Figure: Monitored Ports Page
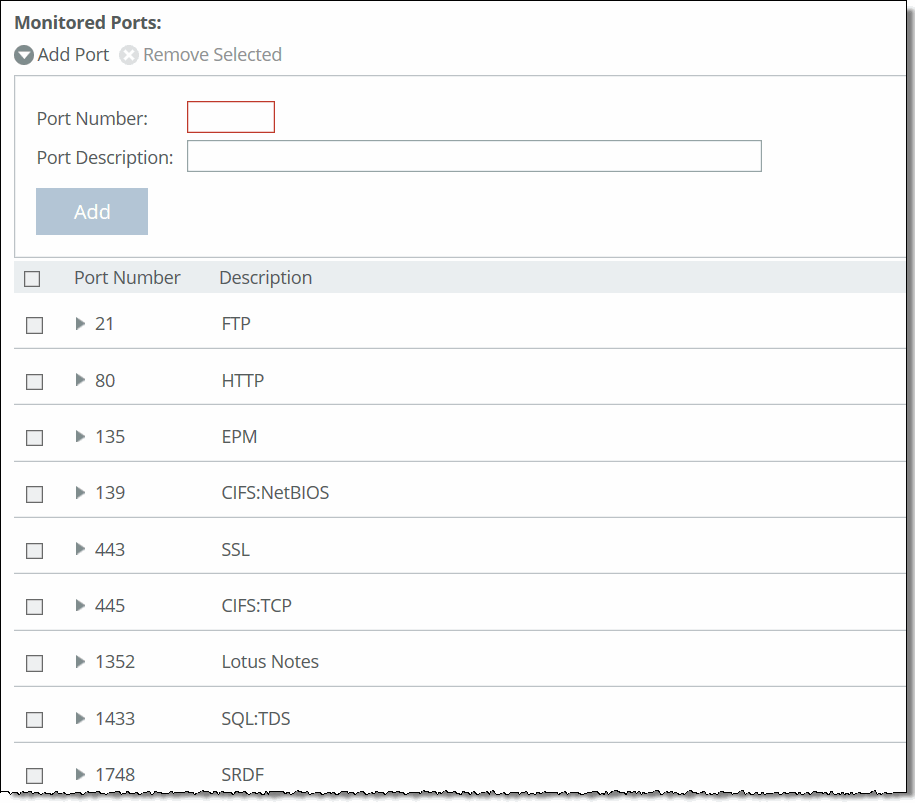
2. Complete the configuration as described in this table.
Control | Description |
Add Port | Displays the controls to add a new port. |
Port Number | Specify the port to be monitored. |
Port Description | Specify a description of the type of traffic on the port. |
Add | Displays the controls for adding a port. |
Remove Selected | Select the check box next to the name and click Remove Selected. |
3. To modify a monitored port, click the right arrow next to the port and complete the configuration as described in this table.
Control | Description |
Port Description | Specify a description of the type of traffic on the port. |
Apply | Applies your settings to the running configuration. |
4. Click Save to Disk to save your settings permanently.