Deploying product appliances with AWS Storage Gateway
This section provides step-by-step instructions on configuring the entire backup solution.
Deployment prerequisites
• An Amazon Web Services Storage Gateway licensed and configured in either gateway cache or gateway stored mode.
• Administrator access to the Amazon Web Services Storage Gateway and the product to make changes such as enabling iSCSI, adding initiator groups, and so on.
• Core and Edge installed.
Deploying the AWS Storage Gateway
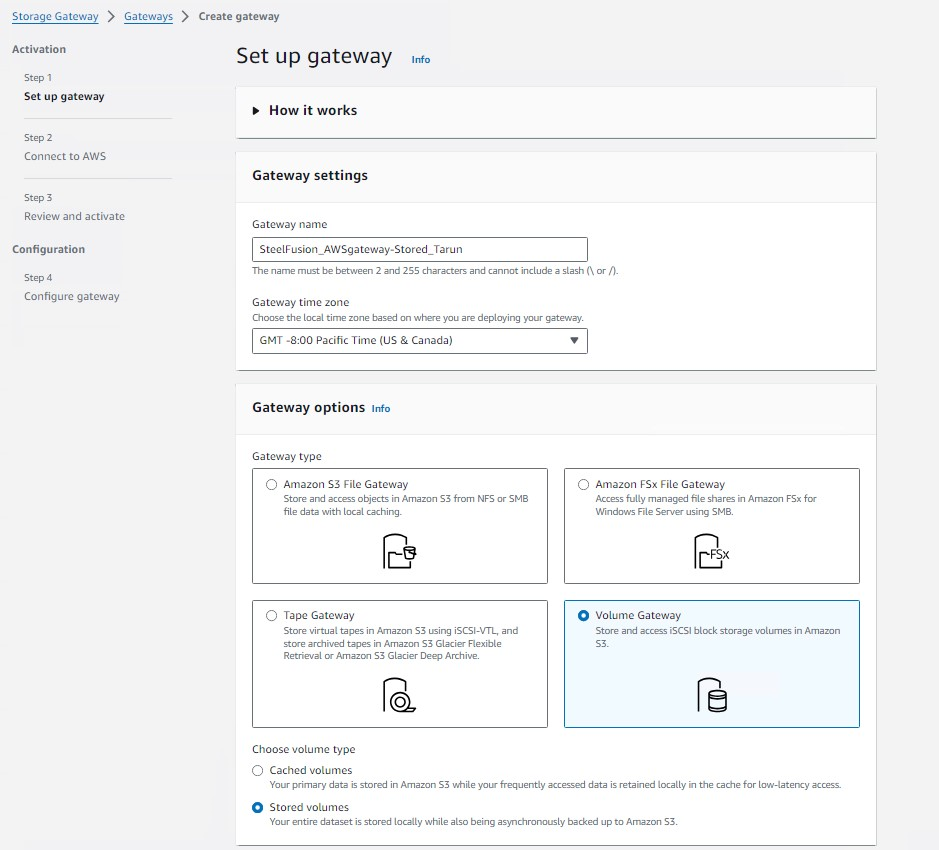
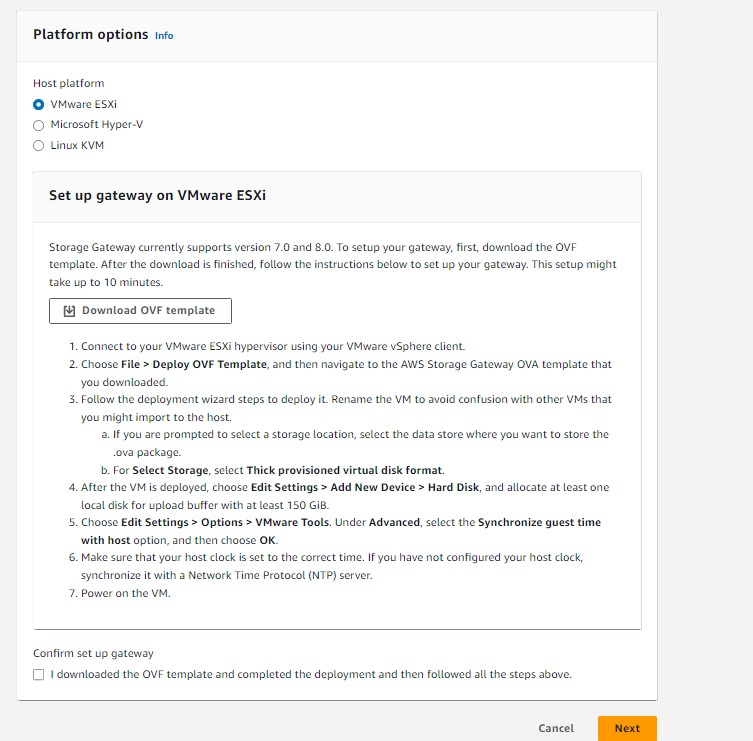
1. From the AWS Storage Gateway page, download and install the AWS Storage Gateway virtual machine (VM) in either a gateway-cached or gateway-stored configuration. Refer to the directions on the pages in the following figures for details about downloading the VM: Creating a Gateway -
AWS Storage Gateway (https://docs.aws.amazon.com).
Setup gateway
Platform options
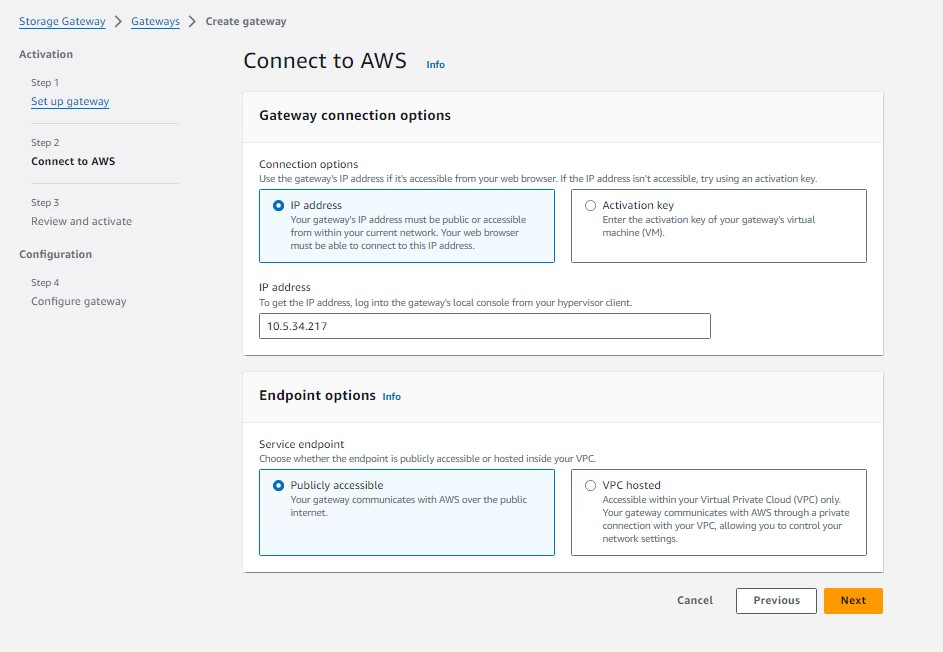
2. Activate the AWS Storage Gateway, as shown below. Refer to the directions in the following page for details: Configure IP for the gateway and Endpoint options.
Setup gateway
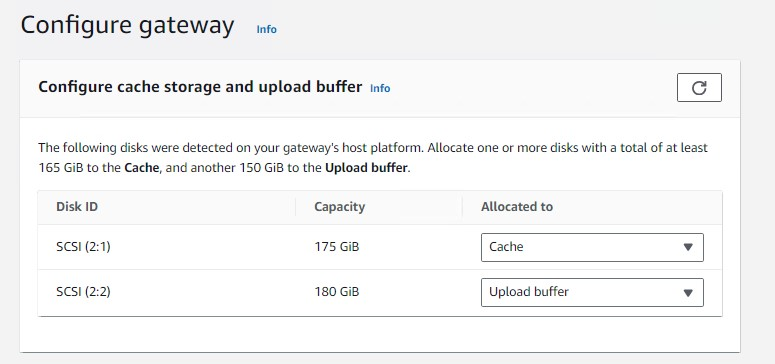
3. Once the VM is installed, you will need to create and configure local storage volumes for the AWS Storage Gateway to use as either cache and buffer volumes (Gateway-Cached configuration), or as buffer and storage volumes (Gateway-Stored configuration), as shown below. Refer to the directions on the following page for details: Managing local disks for your Storage Gateway - AWS Storage
Gateway (https://docs.aws.amazon.com).
Configure gateway
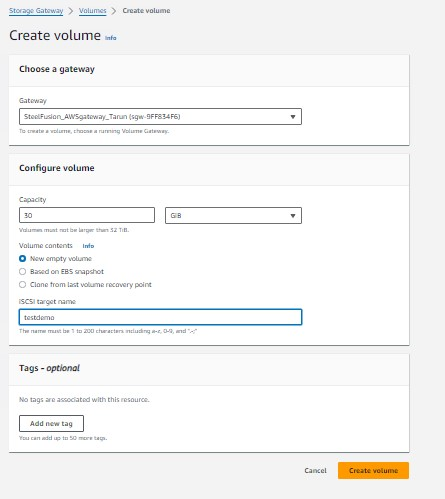
4. Configure storage in Amazon S3 for the AWS Storage Gateway, as shown below. If using a Gateway-Cached configuration, specify the volume size you want to create. If using a Gateway-Stored configuration, specify the local volume in the VM you created previously that will be assigned for use. Refer to the directions on the following page for details: Creating a volume - AWS Storage Gateway (amazon.com).
Create volume
Configuring Core
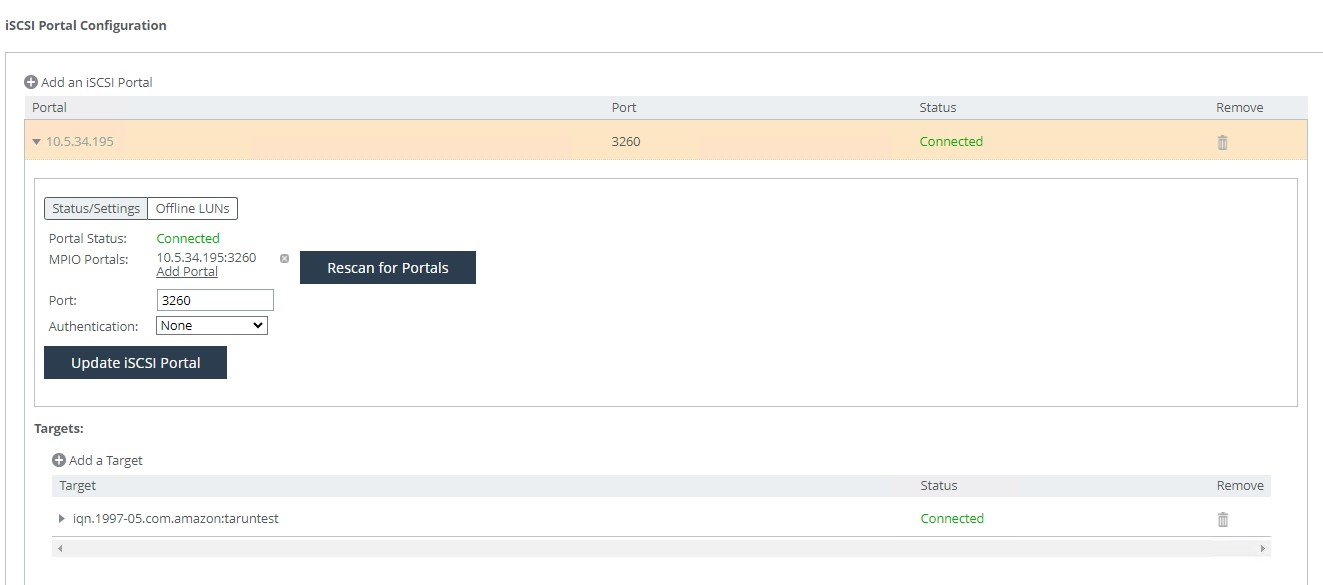
1. Click Add an iSCSI Portal on Core, and enter the details of the on-premises AWS Storage Gateway Device. Once the Portal is successfully added, Core will auto discover and add all the MPIO Portals (if available) and will add Targets.
iSCSI Portal Configuration
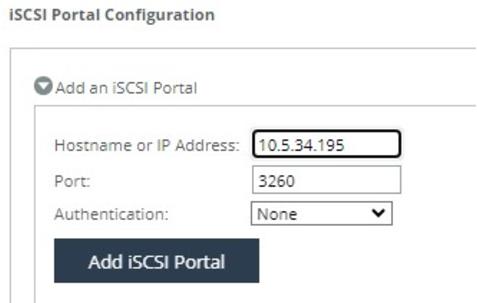
Add an iSCSI Portal
2. Select the Configure tab, and launch the LUN Mapping Wizard.
3. Click Next on the next two screens.
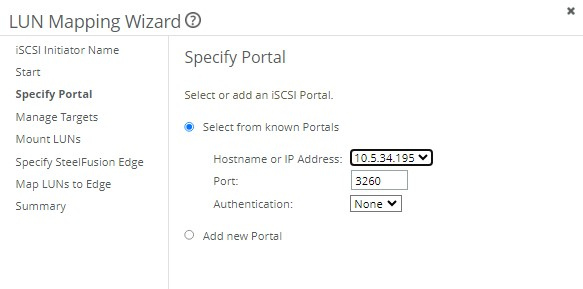
4. On the Specify Portal page, select Select from known Portals, and click Next.
Specify Portal
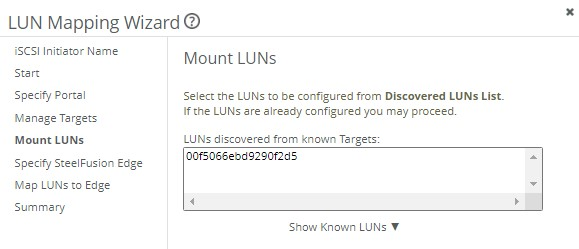
5. Select the volume listed under the LUNs discovered section.
Mount LUNs
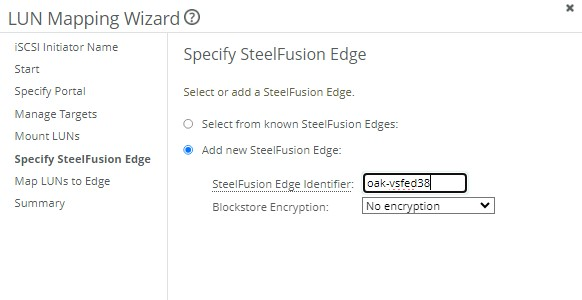
6. From the next page, select Add new Edge and give it a unique edge identifier and click Next.
Specify Edge
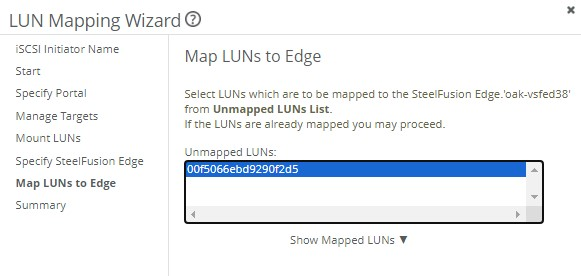
7. Select the LUN from the unmapped LUNs section, and click Next.
Map LUNs to Edge
8. Click Exit at the end of the wizard.
Establishing the connection between Edge and Core
1. On the Edge appliance, choose Storage > Storage Edge Configuration.
Storage Edge Configuration
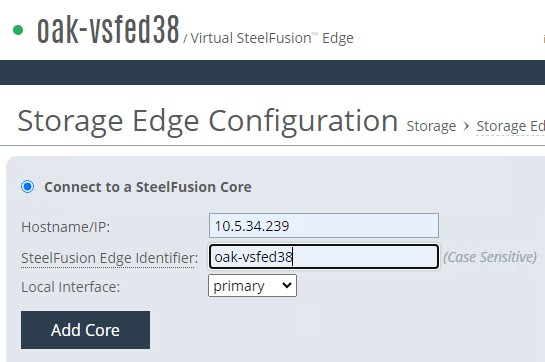
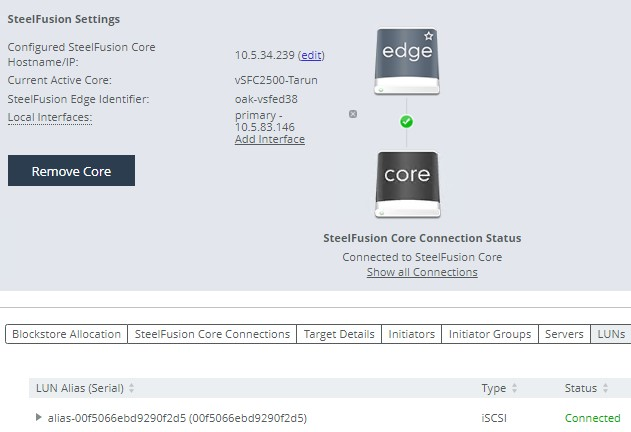
2. Enter the IP address of the Core.
3. Enter the unique Edge identifier, which you created earlier.
4. Click Add Core.
After the connection is established, you should see the LUN listed under the LUNs section.
Core settings
At this point the LUN is mapped to Edge, and now you will have to expose it to the ESXi Host.
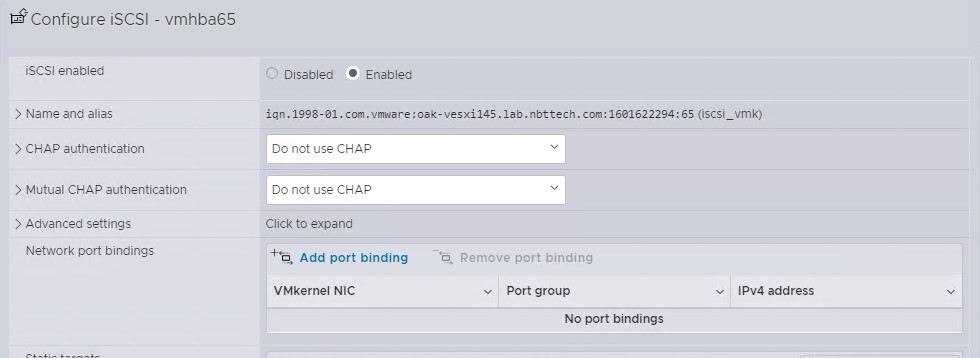
5. In order to get the IQN of the ESXi host, navigate to the ESXi host and choose Storage > Adapters > Software SCSI, and copy the IQN.
Configure iSCSI
6. On Core, navigate to the Edges page.
7. Under Initiators, click Add Initiator.
Add Initiator
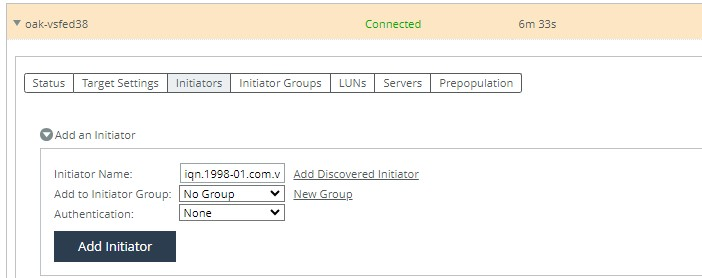
Once the initiator is added, you can log in to the ESXi OS and create a datastore on the Storage you added and then create a virtual machine on it.