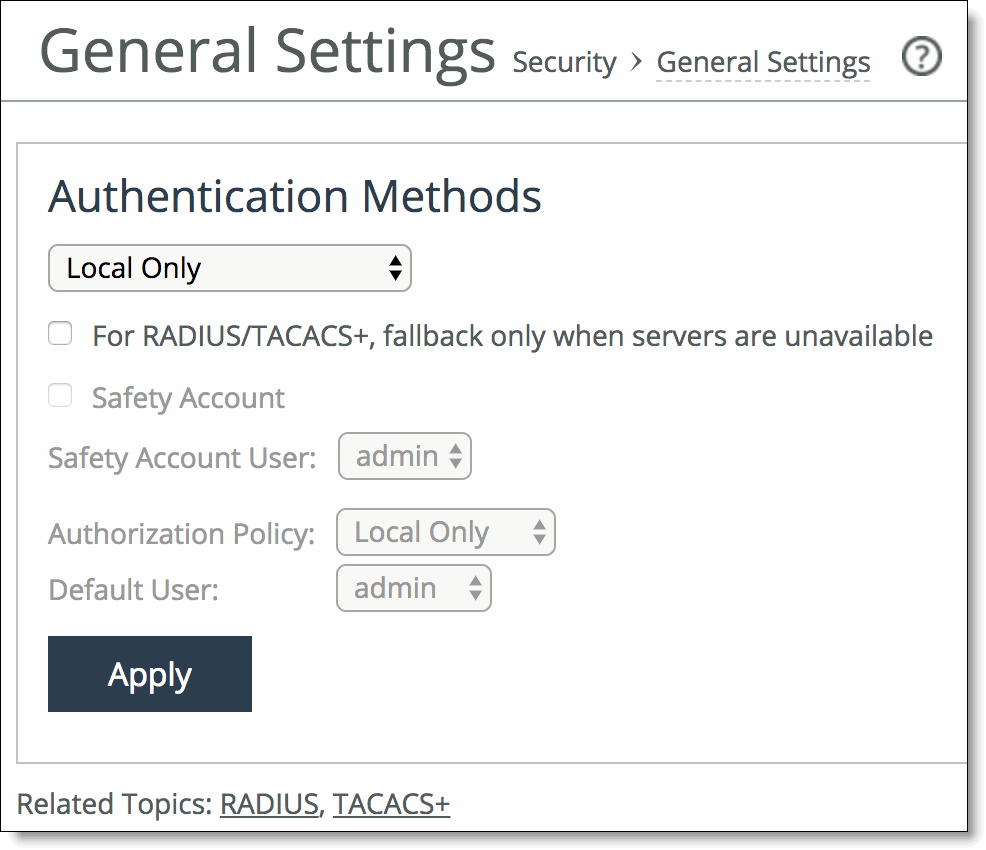
Figure: General Settings page


Control | Description |
Authentication Methods | Specifies the authentication method. Select an authentication method from the drop-down list. The methods are listed in the order in which they occur. If authorization fails on the first method, the next method is attempted, and so on, until all of the methods have been attempted. |
For RADIUS/TACACS+, fallback only when servers are unavailable. | Specifies that the Core falls back to a RADIUS or TACACS+ server only when all other servers don’t respond. This is the default setting. When this feature is disabled, the Core does not fall back to the RADIUS or TACACS+ servers. If it exhausts the other servers and does not get a response, it returns a server failure. |
Safety Account | Creates a safety account so that admin or sys admin users can log in to the SteelFusion Core appliance even if remote authentication servers are unreachable. A safety account increases security and conforms to U.S. National Institute of Standards and Technology (NIST) requirements. Only the selected safety account will be allowed to log in if the AAA server isn’t reachable. (Only one user can be assigned to the safety account.) You can create a system administrator user in the Administrator > Security: User Permissions page. For details, see Managing user permissions. |
Safety Account User | Select the user from the drop-down list. |
Authorization Policy | Appears only for some Authentication Methods. Optionally, select one of these policies from the drop-down list: • Remote First - Check the remote server first for an authentication policy, and only check locally if the remote server does not have one set. This is the default behavior. • Remote Only - Only checks the remote server. • Local Only - Only checks the local server. All remote users are mapped to the user specified. Any vendor attributes received by an authentication server are ignored. |
Default User | Specifies the default role assigned by the AAA server administrator for remote authentication. Note: If a TACACS+ server is configured for authentication and the authorization policy is set to Local Only, the TACACS+ authenticated user assumes the existing Default User privileges. To ensure that the TACACS+ user assumes the assigned permissions and privileges, perform the following steps: 1. Choose Settings > Security: User Permissions to display the User Permissions page. 2. Click the user account name and select the Enable Account check box to enable the account. 3. Click Apply and click Save. 4. Choose Settings > Security: General Settings to display the General Settings page. 5. Select TACACS+; Local from the Authentication Methods drop-down list. 6. Select Local Only from the Authorization Policy drop-down list. 7. Select the TACACS+ user from the Default User drop-down list. 8. Click Apply and click Save. For details about user accounts and permissions, see Managing user permissions. |