Removing and Installing the Chassis Cover
You need to remove the top cover to add or replace components inside the appliance. This section describes how to work with the chassis cover on xx70 appliances.
The appliance must be operated with the appliance cover in place to ensure proper cooling.
Removing the Chassis Cover on 1U and 2U Appliances
This section describes how to remove the chassis covers for the 1U and 2U xx70 appliances.
To remove the chassis cover on 1U and 2U appliances
1. Power down the appliance and unplug all peripheral devices and the power cable.
2. Remove the four screws (letter A).
Figure: Removing the 1U Appliance Cover

Figure: Removing the 2U Appliance Cover
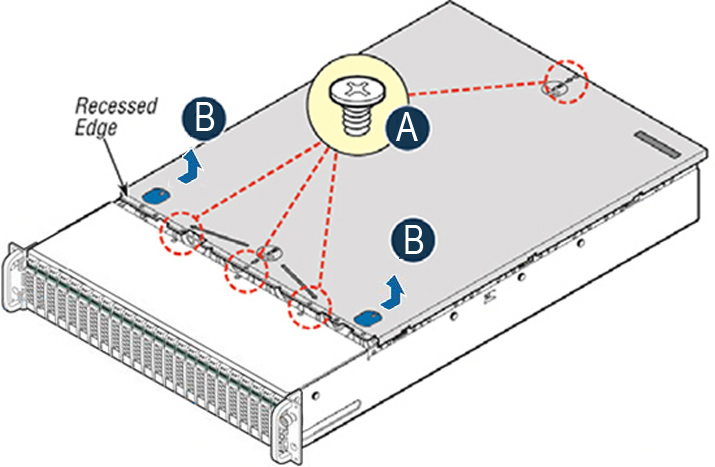
3. Slide the cover back and lift upward (letter B).
Installing the Chassis Cover on 1U and 2U Appliances
This section describes how to install the chassis covers for the 1U and 2U xx70 appliances.
To install the chassis cover on 1U and 2U appliances
1. Place the top cover on the appliance and slide it toward the front of chassis until the recessed front edge fits smoothly under the chassis edge and the locking pins (letter A) are fully engaged.
Figure: Installing the Appliance Cover
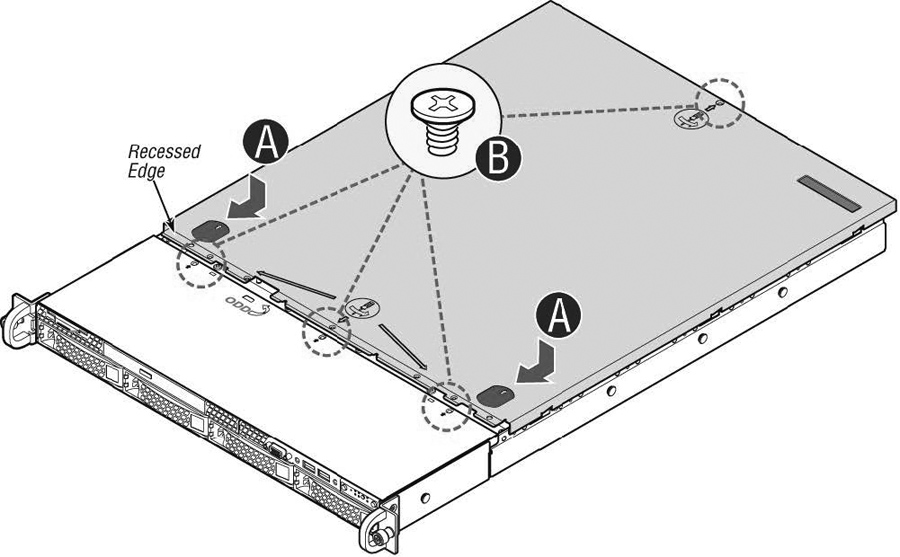
2. Install the three screws at the front and then install the screw at the back (letter B).