Replacing Disk Drives
The following sections describe how to replace disk drives in the xx50 appliances.
Note: When you replace the disk drive, you must wear a grounded ESD antistatic strap to protect the hardware against electrostatic discharge. Make sure that the strap makes skin contact prior to handling equipment.
If you have older hardware (for example, xx20 appliances), see the documentation set for RiOS v6.5.x or earlier. To service appliance 50, 100, 200, and 300 disk drives, contact Riverbed Support at
https://support.riverbed.com.
Replacing Disk Drives in SteelHead 150, 250, and 550 Appliances
SteelHead 150, 250, and 550 appliances are equipped with a replaceable disk drive. The disk drive is not hot swappable; you must first turn off the system and remove the power cord before you replace the disk drives.
You must use approved disk drives. To order disk drives, contact your sales representative.
Caution: 
SteelHead 150, 250, and 550 disk drives are not hot swappable. You must turn off the system and remove the power cable before you replace the disk drive.
Caution: When removing or replacing disk drives, be careful not to touch the adjacent power supply unit. Touching the power supply unit can cause electric shock.
Caution: Use caution when you remove or replace components; they can become hot to the touch.
To replace the disk drive
1. Power down the SteelHead.
2. Unplug the power cord from the AC circuit.
3. Remove the SteelHead from its mounting rack, if necessary.
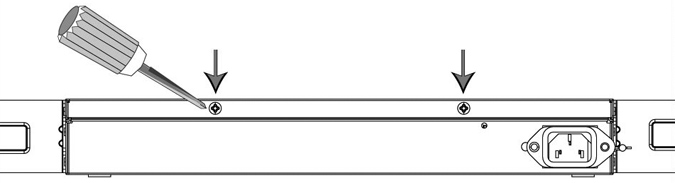
4. Remove the two locking screws on the back of the chassis.
Figure: Removing the Locking Screws
5. Position your thumbs on the top of the appliance and slide the cover back from the chassis.
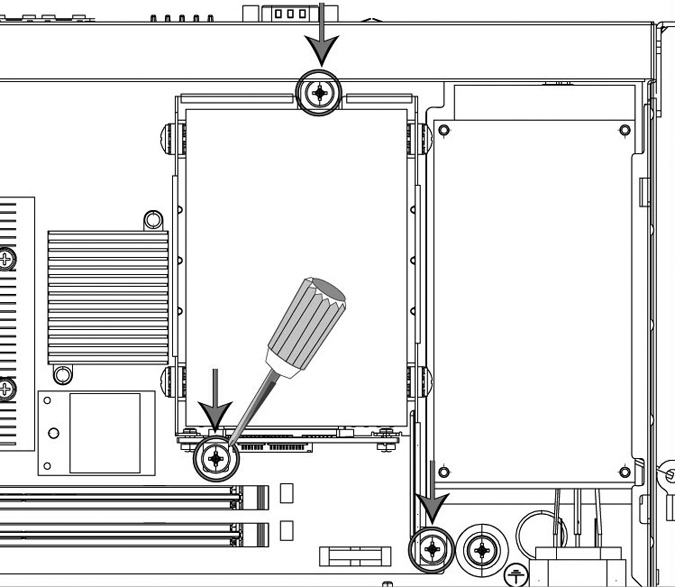
6. To remove the disk drive, unscrew the three screws and washers holding the disk drive casing to the chassis.
Caution: Use the magnetic screw driver that ships with the disk drive to remove the screws. Use caution when removing the screws and washers; do not drop them into the appliance.
Figure: Removing Disk Drive Screws
7. Remove the old disk drive with casing from the appliance.
8. Insert the new disk drive with casing in the same position and secure the casing with the three included screws.
9. Replace the appliance cover, making sure the tabs of the cover are under the front frame.
10. Plug the power cord into the AC circuit.
11. Power on the appliance.
The new disk drive runs through a self-test automatically. You do not need to set up or configure the new disk drive.
Replacing Disk Drives in the Interceptor 9350
Interceptor 9350 appliances are equipped with replaceable, hot-swappable disk drives.
Note: Upgrading appliances can impact the data store. For detailed information about the impact of upgrading your system on the data store and RSP, see
Platform Requirements.
You must use approved disk drives. To order disk drives, contact your sales representative.
Note: When you replace disk drives, you must wear a grounded ESD antistatic strap to protect the hardware against electrostatic discharge. Make sure that the strap makes skin contact prior to handling equipment.
Caution: Use caution when you remove or replace components; they can become hot to the touch.
To replace the disk drive
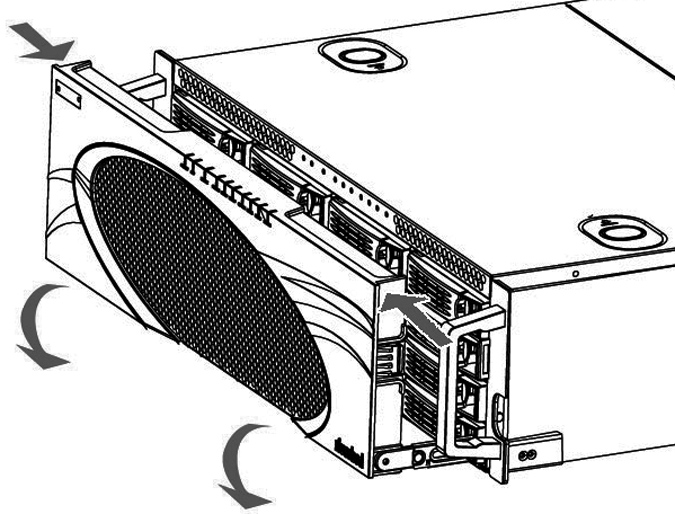
1. Open the bezel.
Press the buttons on each side of the bezel and pull toward you.
The bezel remains attached to the appliance on hinges.
Figure: Opening the Bezel on the SteelHead
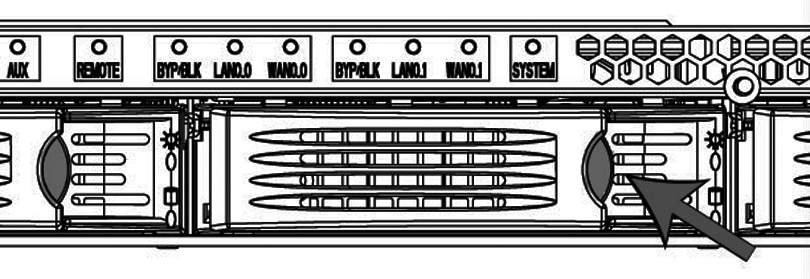
2. Identify the faulty disk drive.
The Alarm Status page in the Management Console identifies the faulty disk drive.
The drives are numbered in ascending order from left to right (that is, 0, 1, 2, 3). On Interceptor 9350 appliances, the bottom LED light indicates which drive to remove.
Figure: Disk Drive Numbers
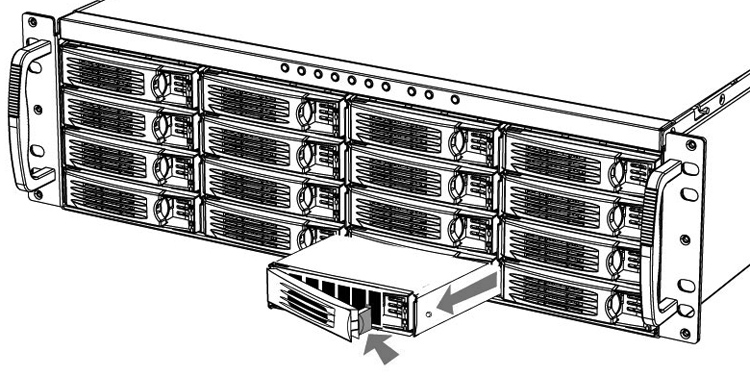
3. Press the orange release button to the left and pull the drive handle toward you to release the disk drive.
4. Slide the faulty disk drive out of the slot.
Make sure you remove the correct drive.
Figure: Removing and Replacing the Disk Drives
5. Open the new disk-drive handle by pressing the orange release button.
6. Slide in the new disk drive until it mates with the back connectors in the chassis.
7. Press in the disk-drive handle to close.
The new disk drive runs through a self-test automatically. The disk drive automatically begins proper operation with the other disk drives. You do not need to set up or configure the new disk drive.
It takes approximately 3 to 4 hours, depending on the system load, to rebuild a new disk drive. The administrator user receives email when the disk drive has finished rebuilding.